This easy to make cake is a classic favorite that is always present in Filipino gatherings. Cassava cake is appropriately sweet with notes of cheddar cheese and milk, and a whole load of the filling, tasty cassava meat.
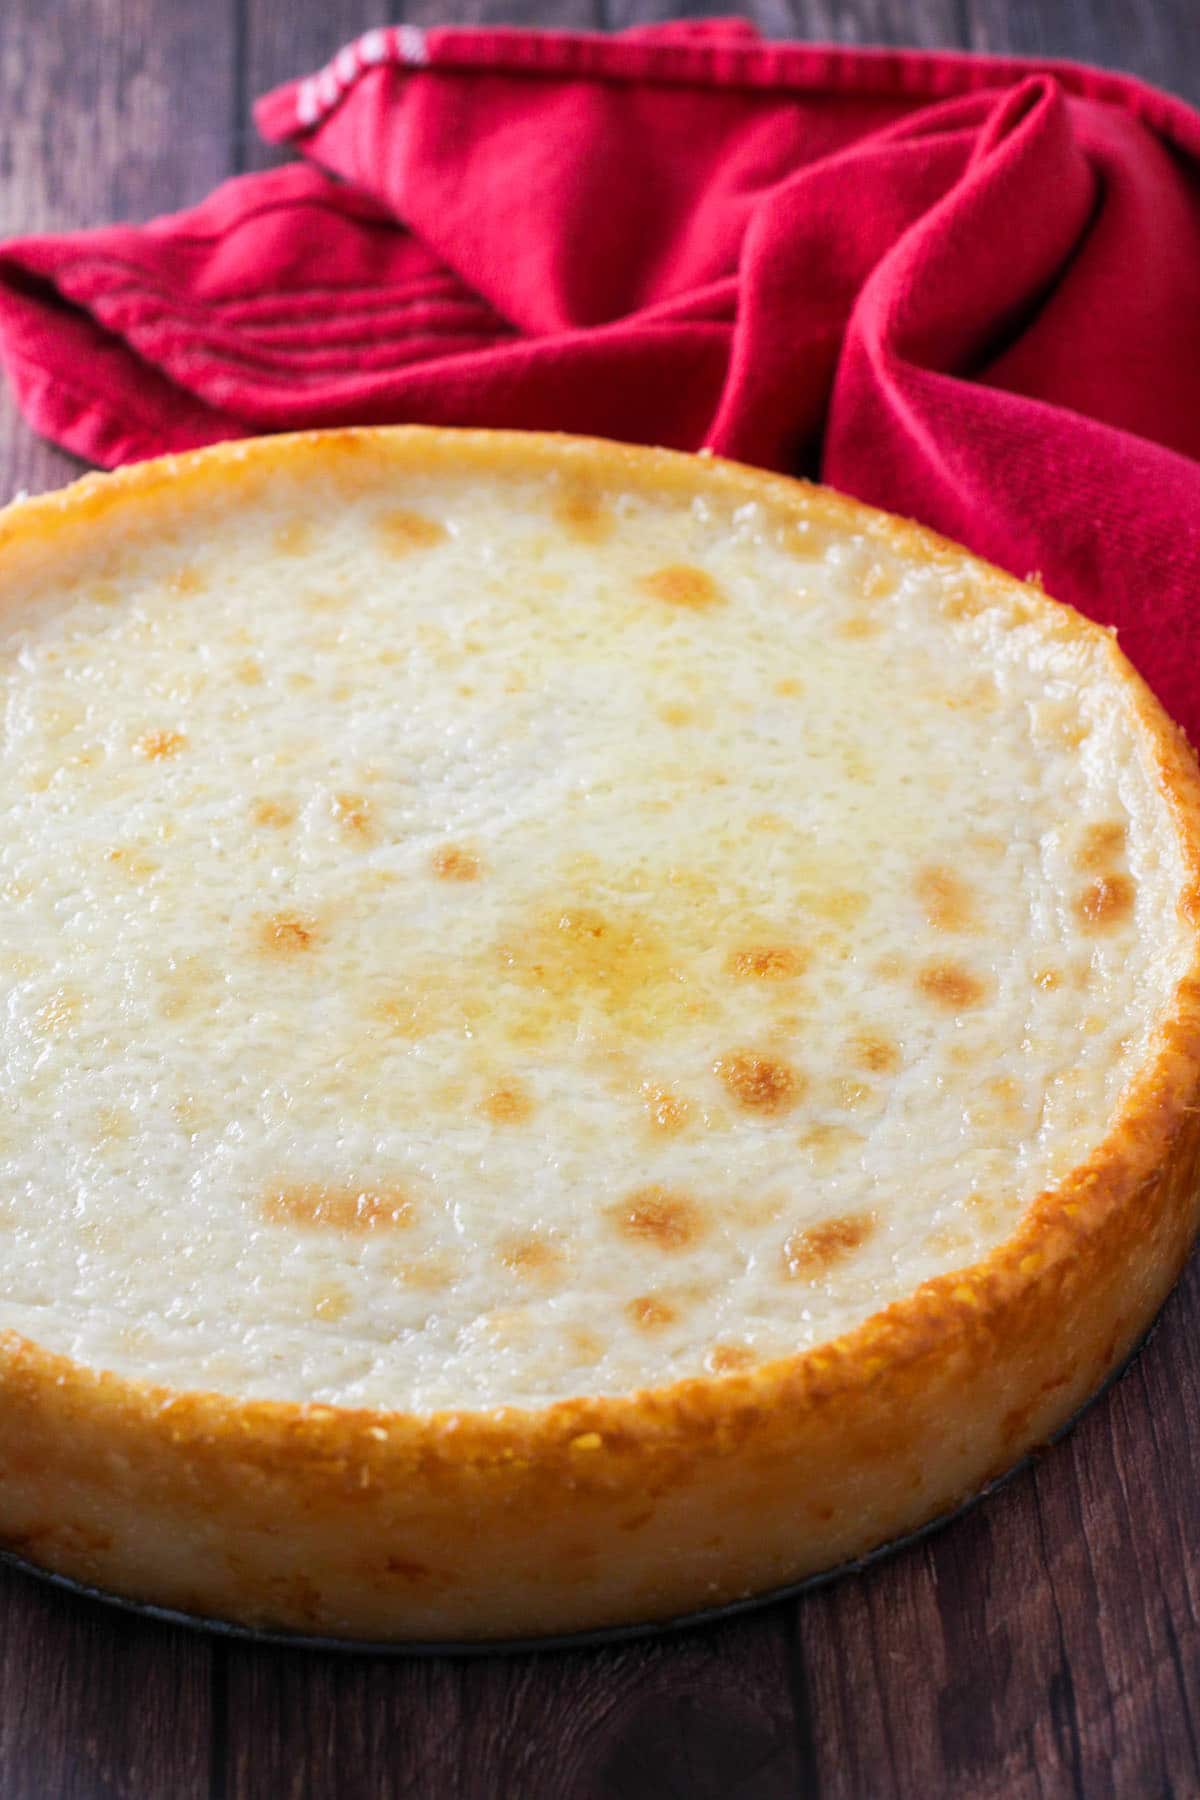
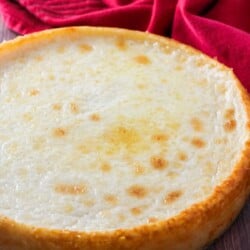
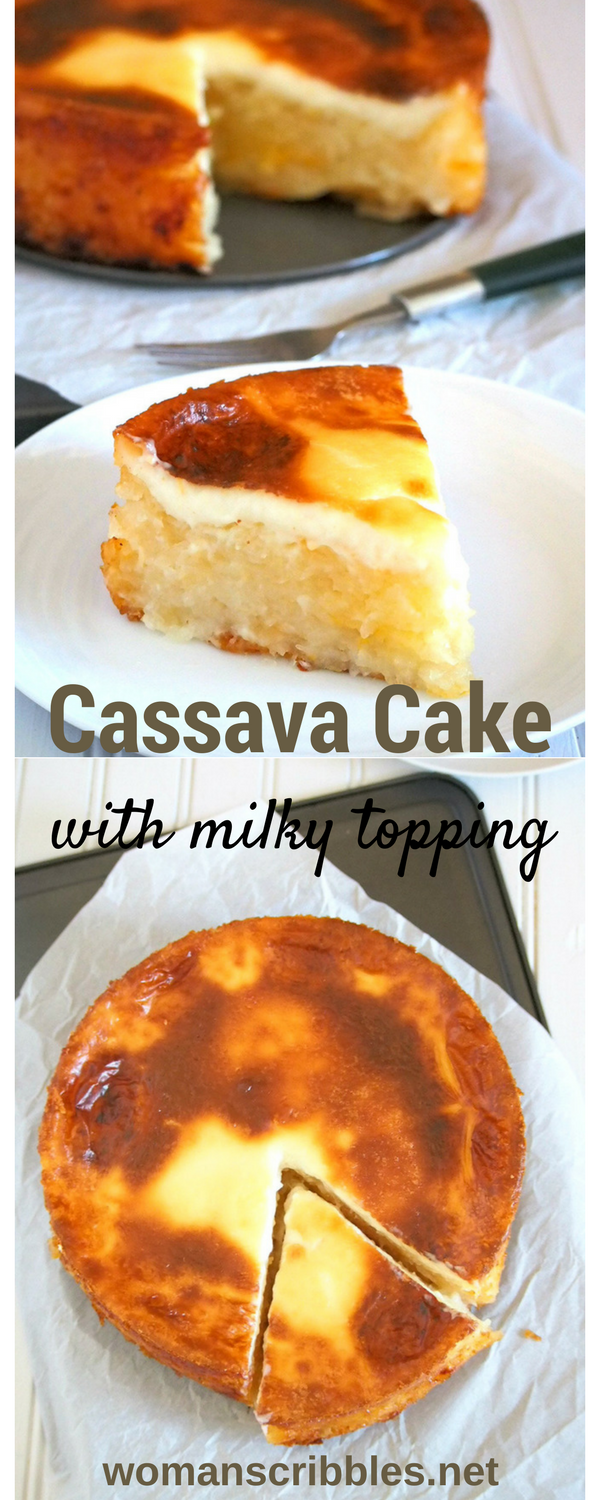
This cassava cake enticed me with its unusual circular shape and its gorgeous caramelized top. I mean, I am used to seeing cassava cake baked in rectangular or square pans, then cut into servings in bar forms.
This one, though, is a slight deviation from the traditional Filipino delicacy, being baked in a circular cake pan like it is a regular sponge or butter cake.
What is Cassava?
Think taro, yams and sweet potatoes. Cassava is similar to these tubers: it is a starchy root crop with its own distinct taste, but like the rest of the tubers, it is a perfect base to add flavors to, in order to yield a filling, substantial dish or dessert. Cassava can be boiled, baked, fried and steamed.
Frozen grated cassava
Frozen Grated Cassava
This recipe uses frozen grated cassava. It is convenient and way easier than using fresh ones. If you want to use fresh cassava, you have to do the extra work of peeling and grating them. I have outlined a guideline below.

Using Fresh Cassava
Fresh Cassava can be occasionally found in the produce section of supermarkets. They are long and brown irregularly shaped logs that vary in length and width.
- Cut both the tapered ends of the tuber.
- Depending on how long the cassava is, you might have to cut it into 3-4 inch pieces horizontally just so you can hold it with ease. Hold the cassava vertically, letting it stand on your chopping board. Peel off the skin of the cassava one side at a time using a sharp knife. This skin is thick and hard.
- Once peeled, cut the cassava vertically in quarters to expose the fibrous, wood-like center in them. Slice the fiber off and discard.
- Wash the cassava pieces and drain. Using a grater, shred the cassava and either place them on a bowl if you are using them immediately, or place them in sealed bags and refrigerate for up to overnight until you are ready to make the cake.

How to Make Cassava Cake?
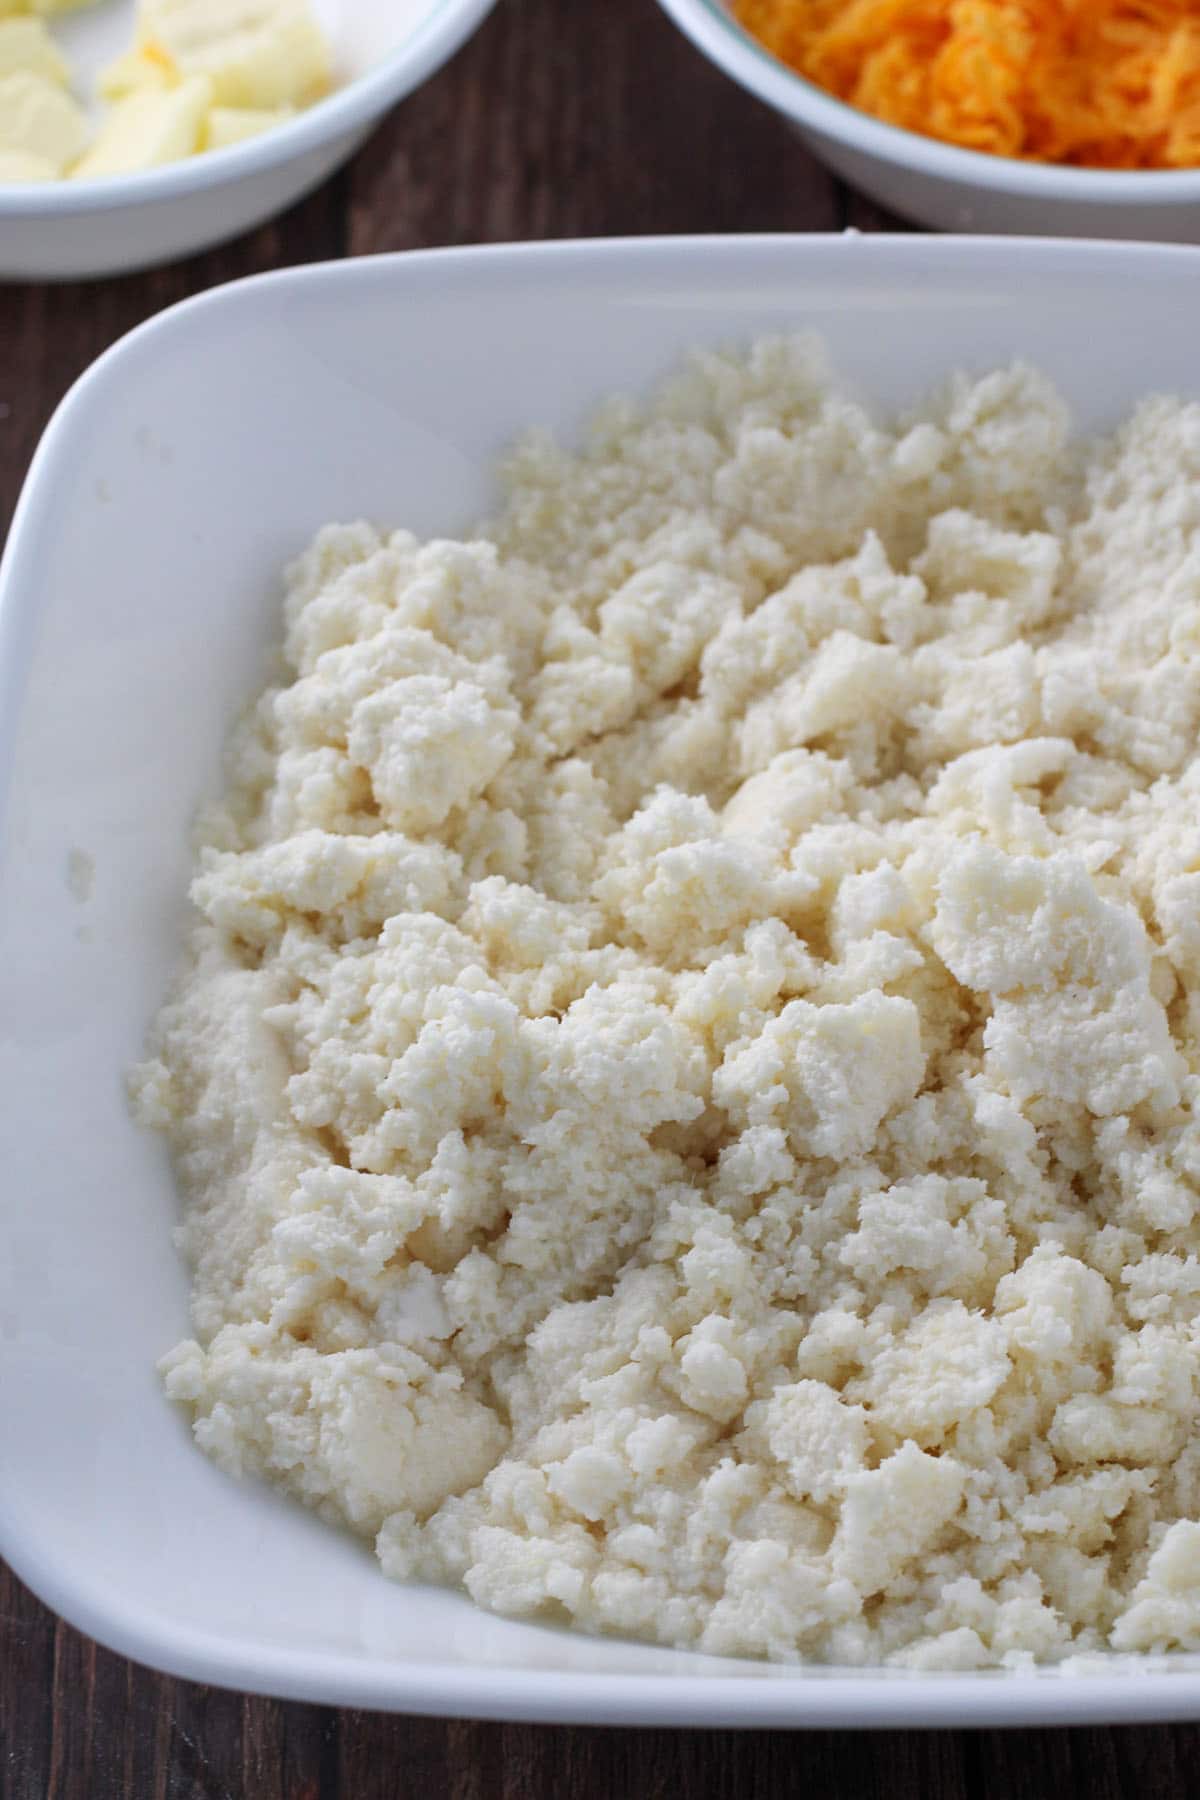
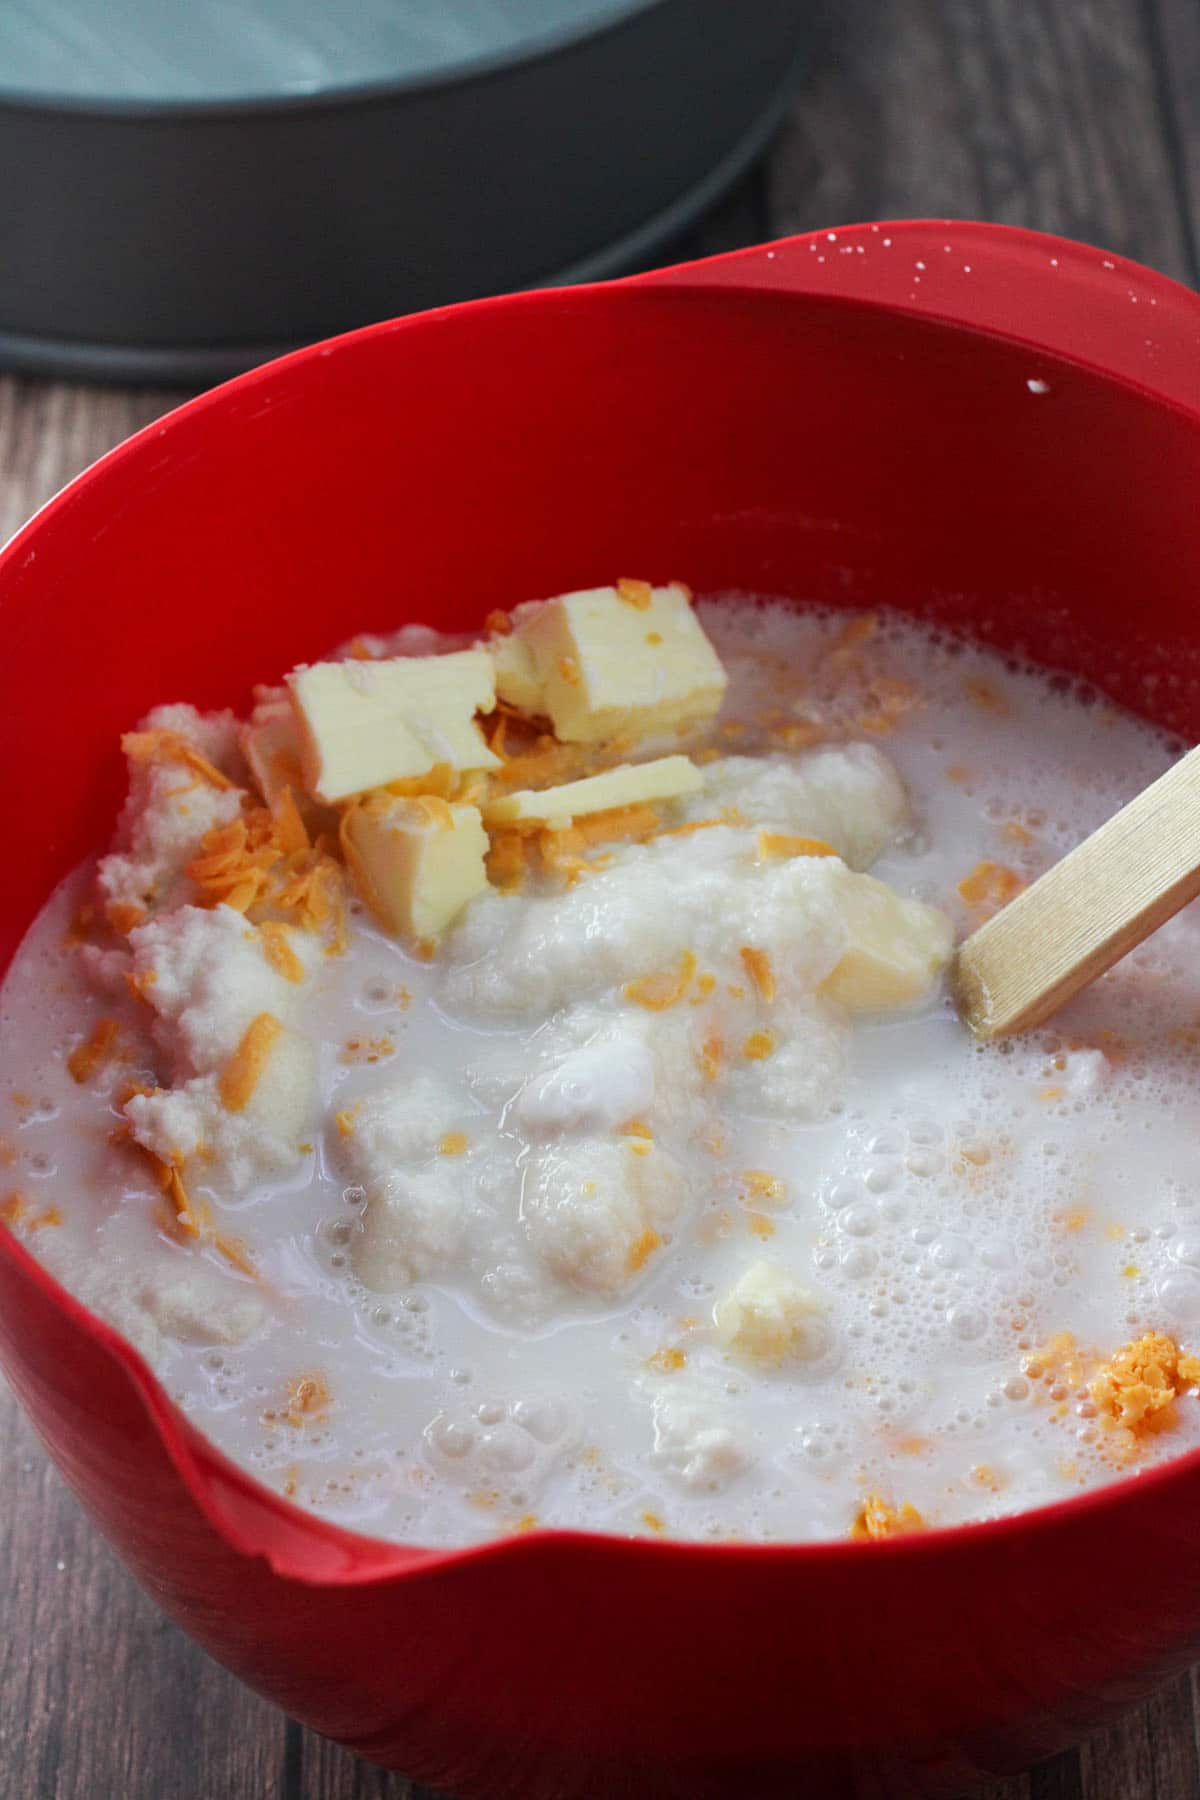
- Simply mix together in a large bowl, the grated cassava, the sugar, coconut milk, cheddar cheese and butter until they are thoroughly incorporated. Pour mixture into a 9.5-inch springform pan. Set the pan on a foil-lined baking sheet to catch any spillage. Bake at 350 F for 1 hour or until the cake is set. The surface should have no more liquid and there are some spots of brown on the surface.

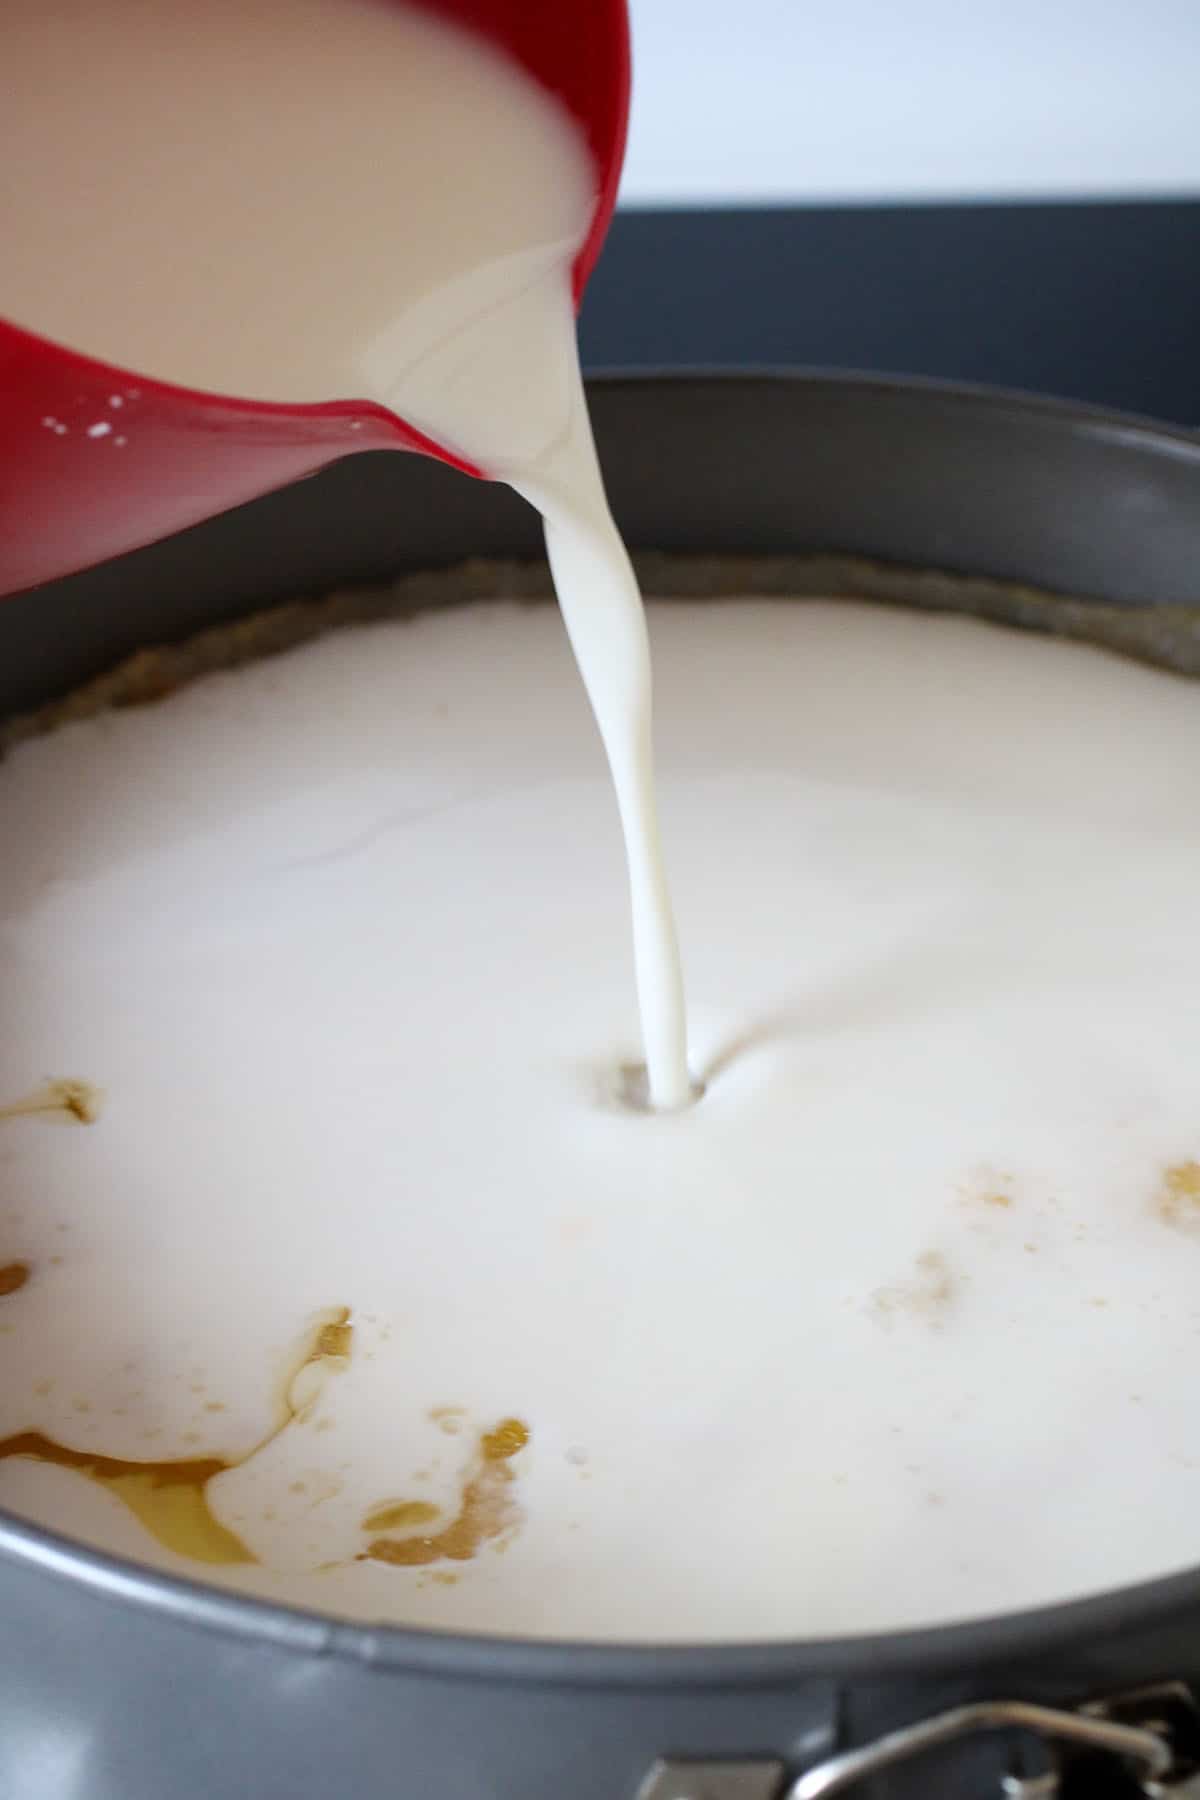
- Combine flour and water until smooth. Add coconut milk and condensed milk and stir. Let this stand while waiting for the cake base to be done.
- Once the cake base has set, briefly remove it from the oven and gradually pour the topping mixture over the base, allowing some time for the liquid to get absorbed by the cake before pouring some more.
- Bake cake for another hour and 20 minutes, or more, until the top has set with a little jiggle and the top has turned golden. Some spots will be darker than the others.
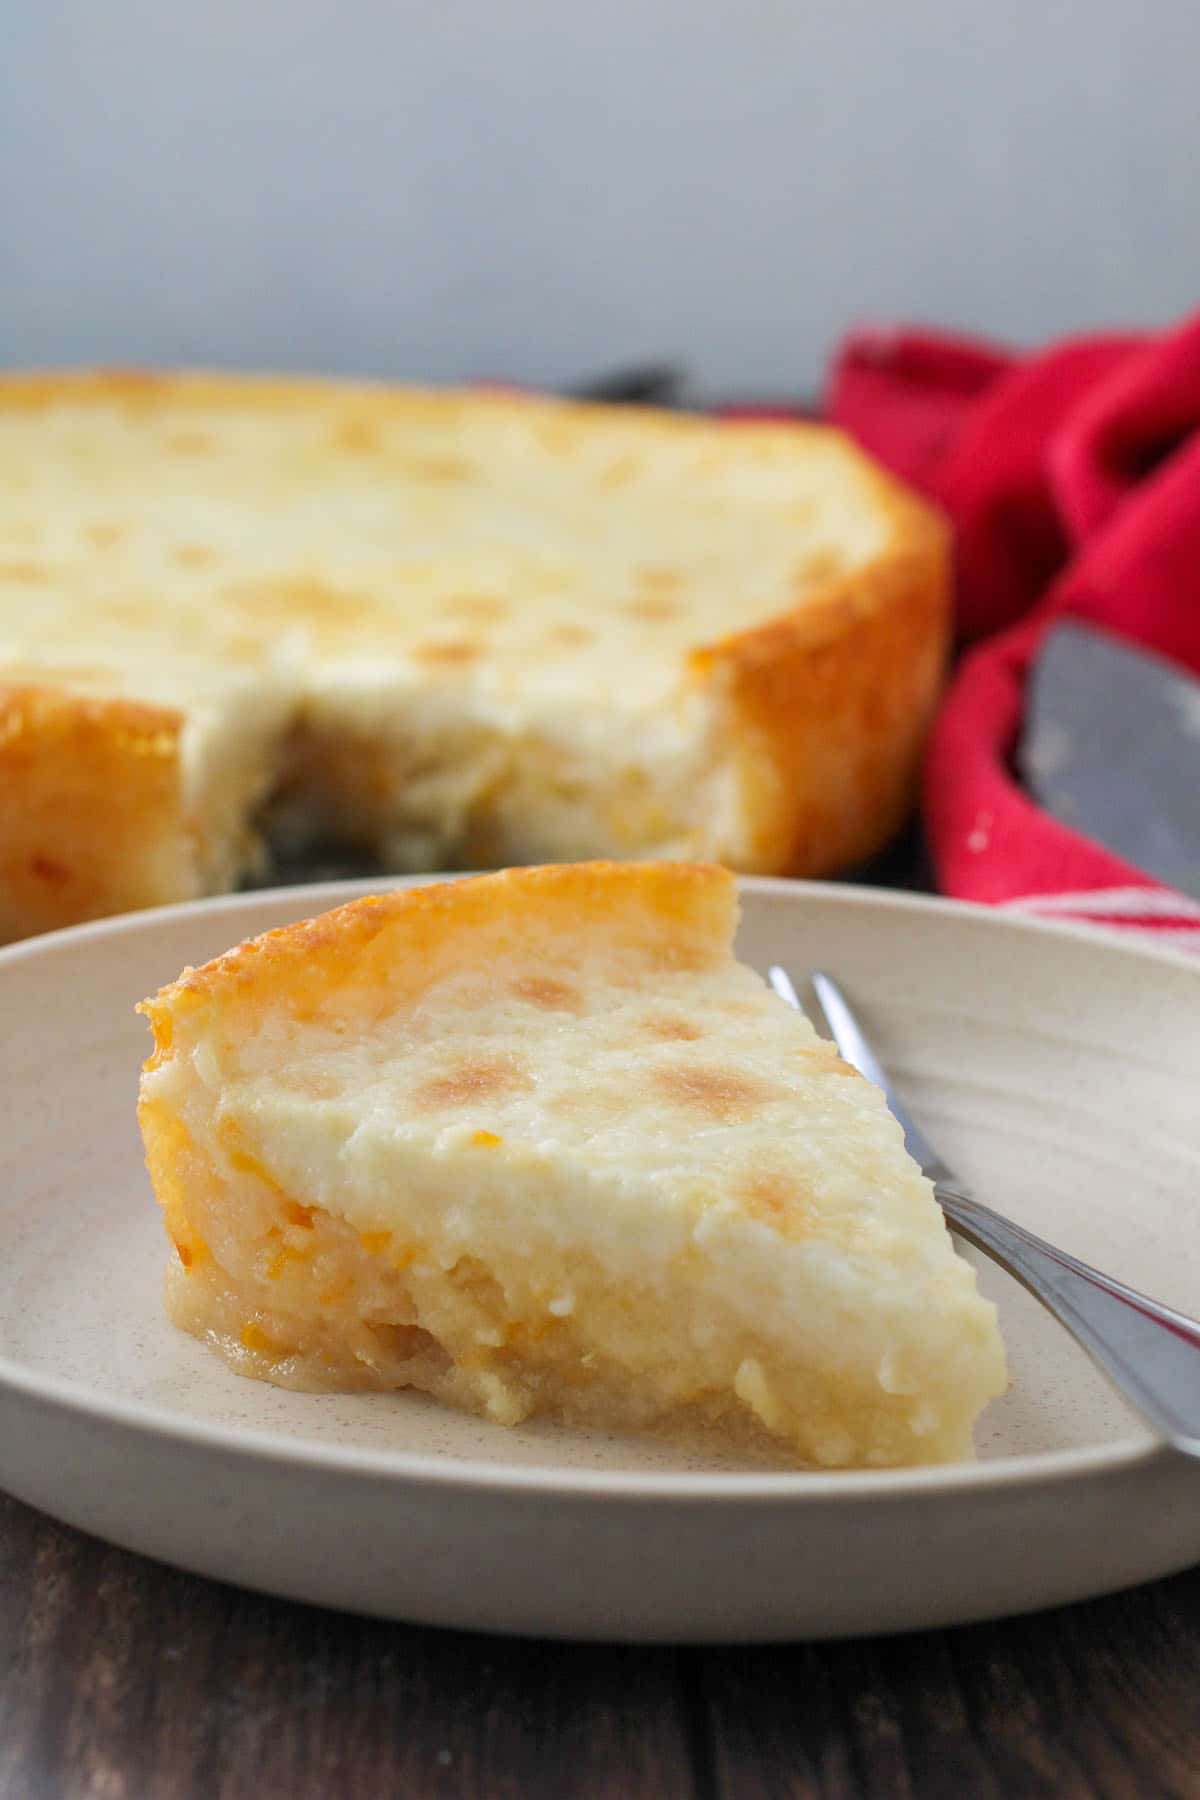
- Let cake cool completely in the pan. Loosen sides with a knife and release from the springform pan. And behold, milky, cheesy and caramelized topping over a chunky cake layer, you are going to love this one.
Looking for more Filipino desserts recipes? Also, try:
- Ube Ensaymada
- Ube Chiffon Cake with Swiss Meringue Buttercream
- Mamon
- Ensaymada
- Puto Recipe with Cheese
- Pandesal
- Ube Cake with White Chocolate Coconut Cream
- Ube Bread Rolls
- Ube Pie
- Ube Cupcakes with Ube Swiss Meringue Buttercream
(Originally published on August 2019, and is updated to use frozen grated cassava)
Cassava Cake
Ingredients
For The Cake Base
- 2 lbs frozen grated cassava thawed (If using fresh, see notes below)
- 2 and 1/2 cups coconut milk
- 1.8 oz grated cheddar cheese or lossely packed 3/4 cup
- 1 cup sugar
- 3 tbsp butter softened and cut to small pieces (or 42.5 grams)
For the Topping
- 1/2 cup water
- 1/2 cup all purpose flour
- 1 and 1/2 cups coconut milk
- 1/2 cup condensed milk
Instructions
- Preheat oven to 350 F. Grease a 9.5 inch spring form pan with butter. Mix all the ingredients for the base in a large bowl, until the sugar is dissolved and everything is incorporated.
- Pour mixture onto greased pan. Set it on top of a baking sheet that is lined with foil to catch any seepge. Bake at 350 for 1 hour or more, until the cake has set and there is no more liquid on top. Some brown spots might be present.
- While the cake is baking, prepare the topping. In a bowl, combine flour and water and stir until smooth. Add the rest of the topping ingredients and mix well.
- When the cake base is done, briefly remove it from the oven and pour the prepared topping gradually. Allow the liquid to be absorbed by the cake before pouring some more. Bake cake for another hour and 20 minutes or until the top has set and the color is golden. Some areas will be darker than the others.
- Let cake cool completely in the pan. Loosen sides with a knife and remove cake from pan.


Leave a Reply