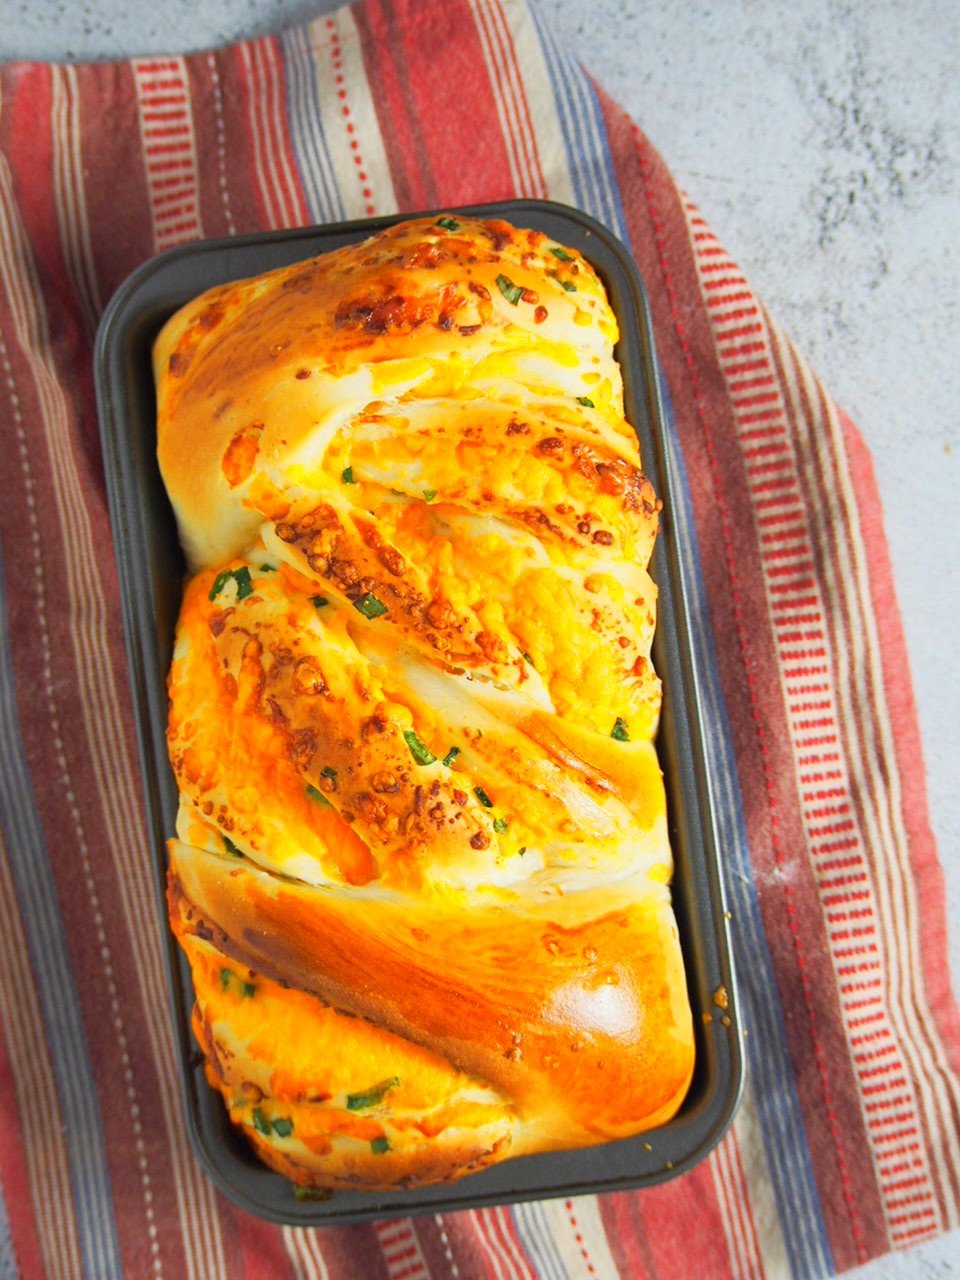
Cheddar and parmesan cheeses with bits of scallions, this savory cheese loaf bread will have you wanting slices after slices. It is ultimately cheesy! If you want a herb bread version, try Garlic Herb Bread.

(This recipe is originally posted on August 2019, and updated on October 31, 2022 to address the raw middle dough issue)
I originally intended to make a different bread than the Cheese Loaf Bread that you are looking at now. I was planning on making a keso loaf which I saw on an Asian supermarket. It looked like a regular a sandwich loaf, maybe with bits of cheese in the dough, but definitely no cheese on top.

When I started to develop the recipe I thought, why make a sandwich loaf with bits of non-visible cheese when I can actually make a braided loaf that is filled with loads of cheese?
Parmesan and cheddar cheese plus some scallions mixed in proved to be a winner-combo in a braided loaf. Once baked, the cheeses crisp up beautifully on top. The garlic powder gives the bread a tasty savory edge.

And the bread of course! The dough recipe is from Sally’s Baking Addiction and it is fantastic. It requires one rise only (great for yeast beginners) and yields a soft bread that is versatile for anything that you want to make.
It turns into this delicious cheese loaf. The flavor, the texture and the looks of it make my heart swell with joy.

How to Make Cheese Loaf Bread?
In a large mixing bowl, combine 2 and 1/4 cup all-purpose flour, sugar, salt and active dry yeast. Whisk well.
In a microwave-safe bowl, microwave butter, milk and water until the butter melts. The temperature of the mixture should be between 110-115 F. Reheat in the microwave to achieve that temperature if needed.
Add the butter mixture to the dry ingredients in the mixing bowl. Stir it using a wooden spoon until incorporated. Add the egg and stir.
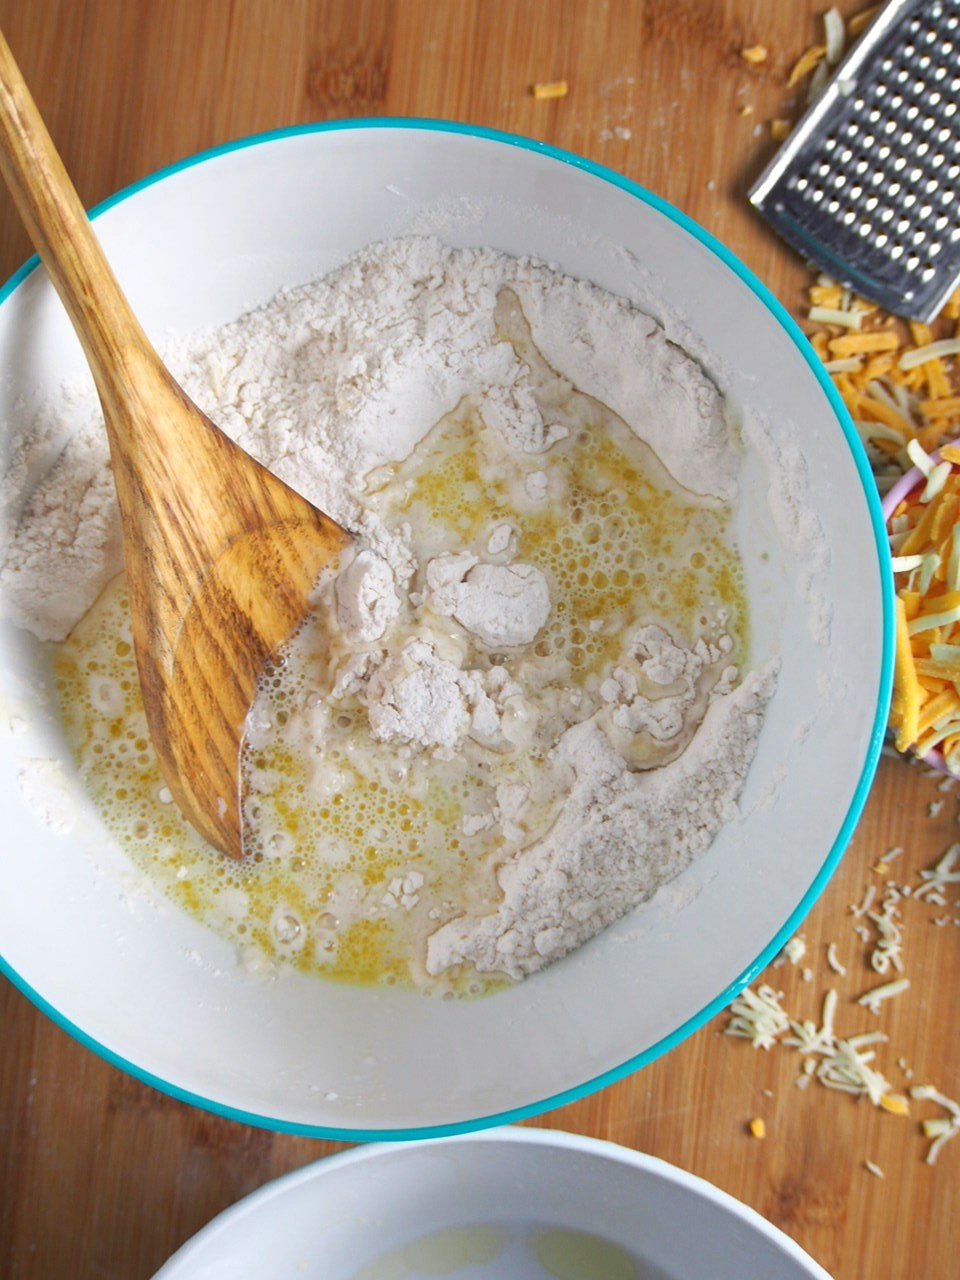
Add some of the reserved flour gradually while stirring until the mixture turns into a soft dough that gathers in the center of the bowl. After that, stop adding the flour. You may not need all of it.

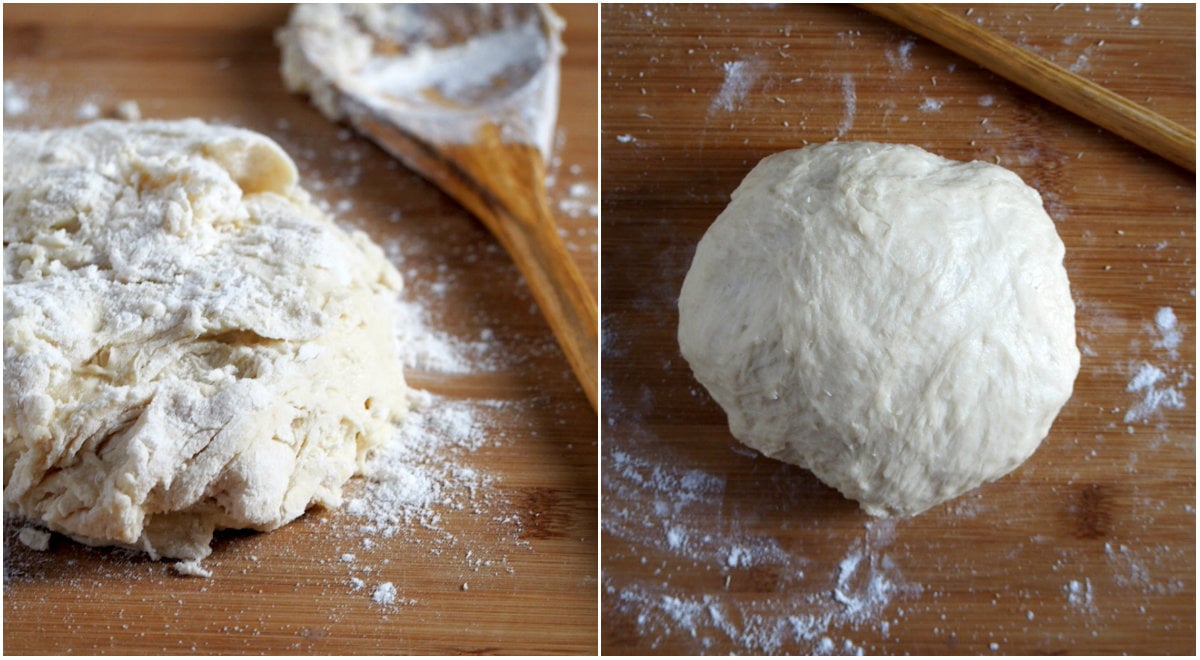
Turn the dough onto a floured board and knead it until it is smooth and elastic. If you would like to test, pull out a piece of dough and stretch it out using your fingers. You should be able to form a translucent film in the center. Let the dough rest for ten minutes in a bowl, covered.
Are you a yeast beginner? Check out my How to Knead Bread Dough with Video post.

Starting on the long edge, roll the dough into a tight log. Using a sharp knife, slice the log in half vertically, starting about an inch below the upper edge, leaving the top edge uncut. Gently rotate the divided logs so that the cut side is facing up.

Begin braiding the dough by placing one side over the other, repeating the braiding pattern until you reach the end of the log. Gently lift the braided dough and place it inside a greased 9×5 inch loaf pan.

To let the dough rise, loosely cover it with a clean kitchen towel and allow it to rise for 1 ½ to 2 hours or until it doubles in bulk.

Bake time! Position a rack one level below the middle position in the oven. Preheat oven to 350 F. Once the oven reaches 350 F, place the loaf pan on the prepared rack.
Bake the loaf for 43-46 minutes or until the top is deeply golden. Loosely cover the loaf with foil at the 25-minute mark. Serve this warm and enjoy every cheesy slice!
More Recipes to Love:
- Cheese Scones with Scallions
- Garlic Herb Bread
- Sweet Cheese Bread
- Tuna Buns
- Braided Hotdog Buns
- White Chocolate Almond Buns
- Hawaiian Rolls
- Double Chocolate Mini Buns
- Chocolate Chip Bread
- Blueberry Cinnamon Rolls with Lemon Cream Cheese Glaze

Cheese Loaf Bread
Ingredients
- 2 and 1/4 cup all-purpose flour plus 1/4 cup reserved
- 3 tbsp sugar
- 1 tsp salt
- 2 and 1/4 tsp active dry yeast
- 3 tbsp butter or 43 grams
- 1/2 cup water
- 1/4 cup milk
- 1 large egg
For the Filling
- 4 stalks scallions/ green onion chopped
- 1 cup cheddar cheese grated/shredded
- 1/2 cup parmesan cheese grated
- 1 tsp garlic powder
Instructions
- In a large mixing bowl, combine 2 and 1/4 cup all-purpose flour, sugar, salt and active dry yeast. Whisk well.
- In a microwave-safe bowl, microwave butter, milk and water until the butter melts. The temperature of the mixture should be between 110-115 F. Re-heat in the microwave when necessary.
- Add the butter mixture to the dry ingredients in the mixing bowl. Stir the mixture using a wooden spoon until incorporated. Add the egg and stir. Add some of the reserved flour gradually while stirring until the mixture turns into a soft dough that gathers in the center of the bowl. You may not need all the flour.
- Turn the dough onto a floured board and knead for 6-12 minutes, until it is smooth and elastic. Let the dough rest for ten minutes in a bowl, covered.
- Roll the dough using a rolling pin into a 14x10 inch rectangle. Sprinkle garlic powder all over the dough. Sprinkle the cheeses and the scallions. Starting on the long edge, roll the dough into a tight log. Using a sharp knife, slice the log in half vertically, starting about an inch below the upper edge, leaving the top edge uncut. Gently rotate the divided logs so that the cut side is facing up.
- Begin braiding the dough by placing one side over the other, repeating the braiding pattern until you reach the end of the log. Gently lift the braided dough and place it inside a greased 9x5 inch loaf pan.
- Let the shaped dough rise for 1 ½ hours, covered with a clean towel. The braided dough should be soft and puffy.
- Position a rack one level lower than the middle position in the oven. Preheat oven to 350 F. Once the oven reaches 350 F, place the loaf pan in the prepared rack. Bake the loaf for 43-46 minutes, lossely covering the loaf with foil at the 25 minute mark. The top is nicely golden and a thermometer inserted at the center of teh loaf should read 200 F. Let the loaf cool on a wire rack completely.
Video
Notes
- Store leftovers in a tightly covered container at room temperature for up to 3 days.
- To serve, re-heat for a few seconds n the microwave.
- Dough recipe from Sally's Baking Addiction.


Leave a Reply