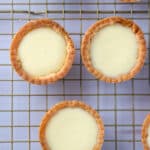
Hokkaido Baked Cheese Tarts
Creamy and sweet cheese filling nestled on a buttery sugar crust, these Hokkaido Baked Cheese Tarts are amazing pastry desserts and it is a a family favorite!
Servings 14
Calories 352kcal
Equipment
- regular muffin pan
Ingredients
For the Pastry
- 1 cup butter softened
- ¾ cup powdered sugar
- 1 egg yolk from a large egg
- 1 ¾ cups all-purpose flour
- 1 tsp cold water
For the Cheese Filling
- 250 grams cream cheese
- 57 grams butter
- ½ cup whipping cream
- ½ cup whole milk
- ¼ cup sugar
- 2 tbsp grated parmesan cheese
- 1 large egg
- 1 tbsp cornstarch
- 2 tsp lemon juice
Instructions
Make the Crust
- In the bowl of a stand mixer, cream together butter and sugar until fluffy. Start at a low speed then, speeding up once the sugar is moistened. Beat in the yolk until incorporated. Add the flour and salt and beat until moistened. Add water and briefly mix just until a dough is formed.
- Turn the dough into a slightly floured surface. Knead briefly then shape into a 2 inch thick disk. Wrap this in plastic and let it rest in the fridge overnight.
Roll and Shape the Pastry Cups
- Let the chilled dough sit at room temperature for 8-10 minutes. On a lightly floured surface, Roll the dough out to ¼ inch thickness. Using a 3 inch scalloped cookie cutter (a plain, round one will work, too), cut circles from the dough.
- Use a pastry scraper or angled spatula to lift the edges of the dough circles. Place each cut dough into the slots in the muffin pan. Make sure that the dough is nice and flushed against the sides of the muffin cavity. Gather and roll out the remaining pastry, and cut more circles. The pastry can make about 14-16 circles. I usually just stop at 12, then chill the remaining pastry. You can make more the next day. There will be enough cheese filling to make 2-4 more tarts.
- Chill the muffin pan in the fridge for an hour. Meanwhile, cut 12 little pieces of parchment paper that can cover the bottom and sides of each tart shell. Crumple each one.
Pre Bake the Tart Shells
- Take the pan with the tart shell out from the fridge. Using the tines of a fork, poke several holes on the bottom of each shell.
- Preheat oven to 325 ℉. Lay the cut up parchment paper over each tart shell, easing it gently in every slot. Carefully spoon uncooked beans to each hole, filling up the sides.
- Pre bake the shells at 325℉ for 20 minutes. Take out the pan from the oven and carefully remove the parchment with the beans. If the dough tears or the dough sticks while removing the parchment paper, bake for an additional 5-7 minutes with the pie weights on, until the pastry is dry. Then remove the parchment and weights and bake the shells for 5-10 minutes more, or until the edges are lightly golden. Let the shells cool.
Make the Cheese Filling
- Prepare a double boiler set up ( see photo in the post): Fill a pot with about 2 inch of water. Bring it to gentle simmer. Fit a heat-resistant bowl snugly over the pot (the water should not touch the bottom of the bowl. If it does, reduce the water).
- Add the cream cheese, butter, milk, whipping cream and sugar to the bowl. Stir occasionally until everything melt together. Once the cream cheese has melted, stir in the parmesan cheese until the mixture is smooth.
- In a small bowl, beat together egg, lemon juice and cornstarch until smooth. Add about 1 tablespoon of the cheese mixture to the egg-lemon mix and stir. Add this small mixture to the bowl. Stir for a few minutes more, until the mixture is thick like a curd. Turn off heat. Allow the cheese filling to cool slightly.
Bake the Cheese Tarts
- Preheat oven to 425 F. Using a soup ladle, spoon cheese mixture into each tart shell until almost full. Bake at 425 ℉ for 12-15 minutes, or until the edges of the cheese has set, and there is only a slight jiggle in the middle. Do not overbake. If the cheese is starting to balloon or puff, you are overbaking it.
- Allow the tarts to cool in the pan for about ten minutes. The filling will be very hot, so do not eat right away. Enjoy warm. To remove the tarts from the pan, use a small angled spatula or thin bread knife to gently pry on one side. The tart will start to lift. Then, dig in! The filling will be nice and flowy and pastry is tender-crisp!
- To store, keep them in a tightly covered container in the fridge for up to 5 days. To serve, reheat them in the microwave for 5-8 seconds.
Notes
The recipe can make 14-16 cheese tarts. I make 12 tarts at one time, then I refrigerate the extra dough and filling and make the extra tarts the next day. This is because the dough may be too soft for re-rolling and cutting the 4 extra tarts shells.
If you are making cheese tarts using your refrigerated cheese filling, you will have to transfer the filling to a piping bag and pipe the filling to the pre-baked tart shells.
Nutrition
Serving: 1tart | Calories: 352kcal | Carbohydrates: 24g | Protein: 4g | Fat: 27g | Saturated Fat: 17g | Polyunsaturated Fat: 1g | Monounsaturated Fat: 7g | Trans Fat: 1g | Cholesterol: 100mg | Sodium: 211mg | Potassium: 75mg | Fiber: 0.4g | Sugar: 11g | Vitamin A: 930IU | Vitamin C: 0.3mg | Calcium: 51mg | Iron: 1mg