
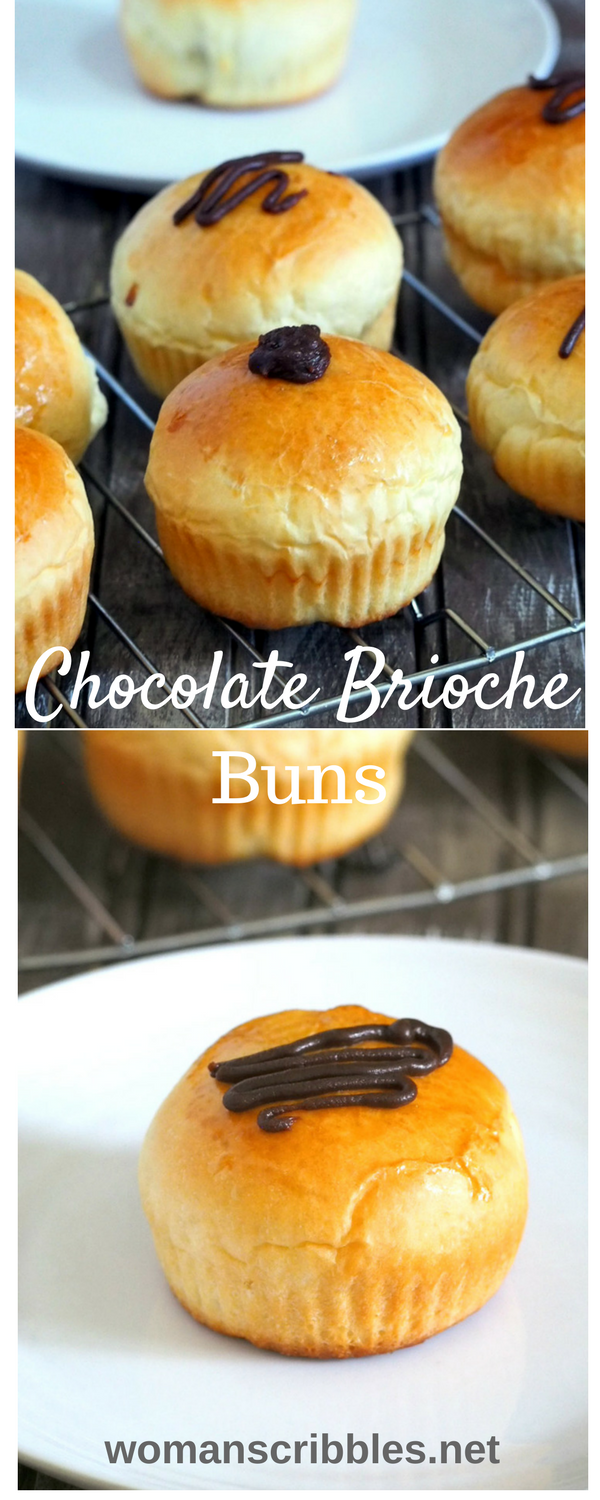
Chocolate Brioche
These chocolate brioche are soft, golden buns filled with decadent chocolate cream. These will fill you up and satisfy your chocolate cravings anytime.
Okay, I am going to assume that you are here because you crave for a rich, buttery brioche, and you long to bite into the creamy chocolate center of these chocolate brioche buns.
Well, you are in a good place, I assure you.
While making brioche seems intimidating, nothing compares to the sense of accomplishment you get from making real pastry from scratch.
Nothing beats a tray of warm, fresh bread out of the oven and chocolatey aroma around the house as they bake.
This recipe is for you. So please carry on and don’t let the assumption that making brioche is complicated scare you.
I can tell from experience that once you make this brioche dough, you have released yourself from your inhibitions. Once you realize that it is not that hard as it may seem, you are going to make this over and over again.
You can make yummy things with this brioche dough. I made them into the famous Filipino sweet pastry called ensaymada, and an ube braided version as well.
Also, let us not forget this elegant cream cheese brioche filled with creamy and citrus filling.
Or have a little dough fun and make a grand brioche braid and be stunned by a beautiful pastry out of the oven. So really, the possibilities are endless.
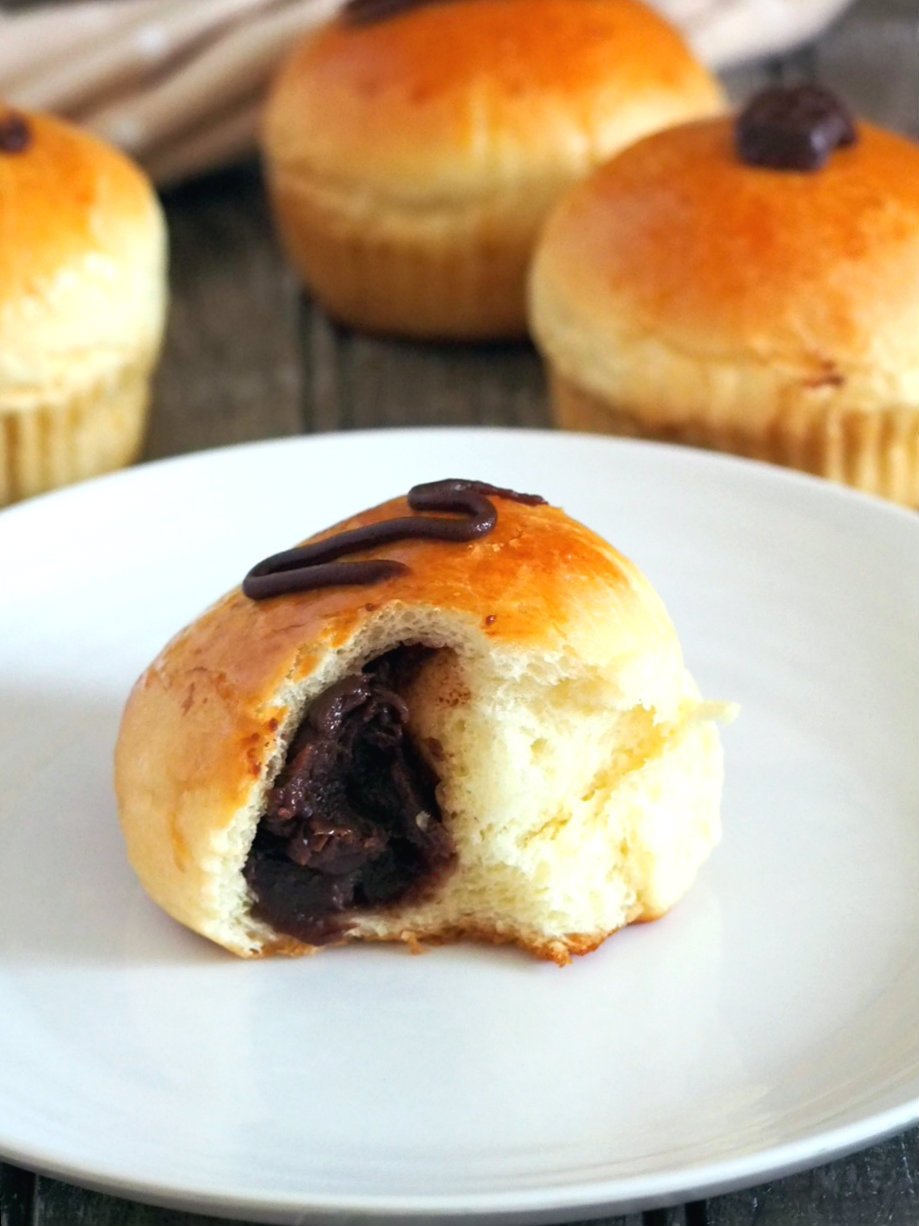
The chocolate cream inside this brioche is an addictive, decadent concoction that will send ( little) people your direction ( a.k.a. the kitchen) and say, ” I smell chocolate, can I taste?”.
I don’t blame my daughter. I can’t blame anyone. I will eat this thing with a spoon and end things up right there but I knew I had to stay focused on the goal. Chocolate brioche.
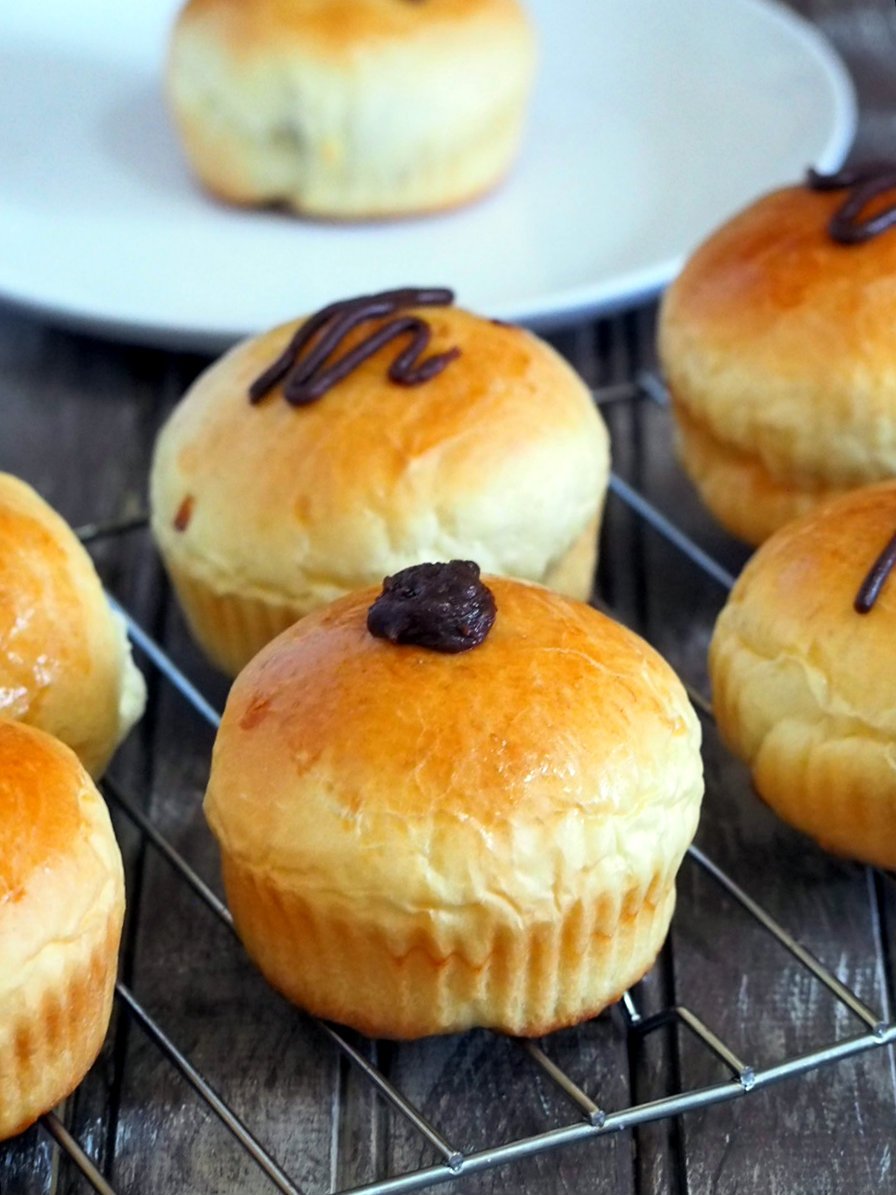
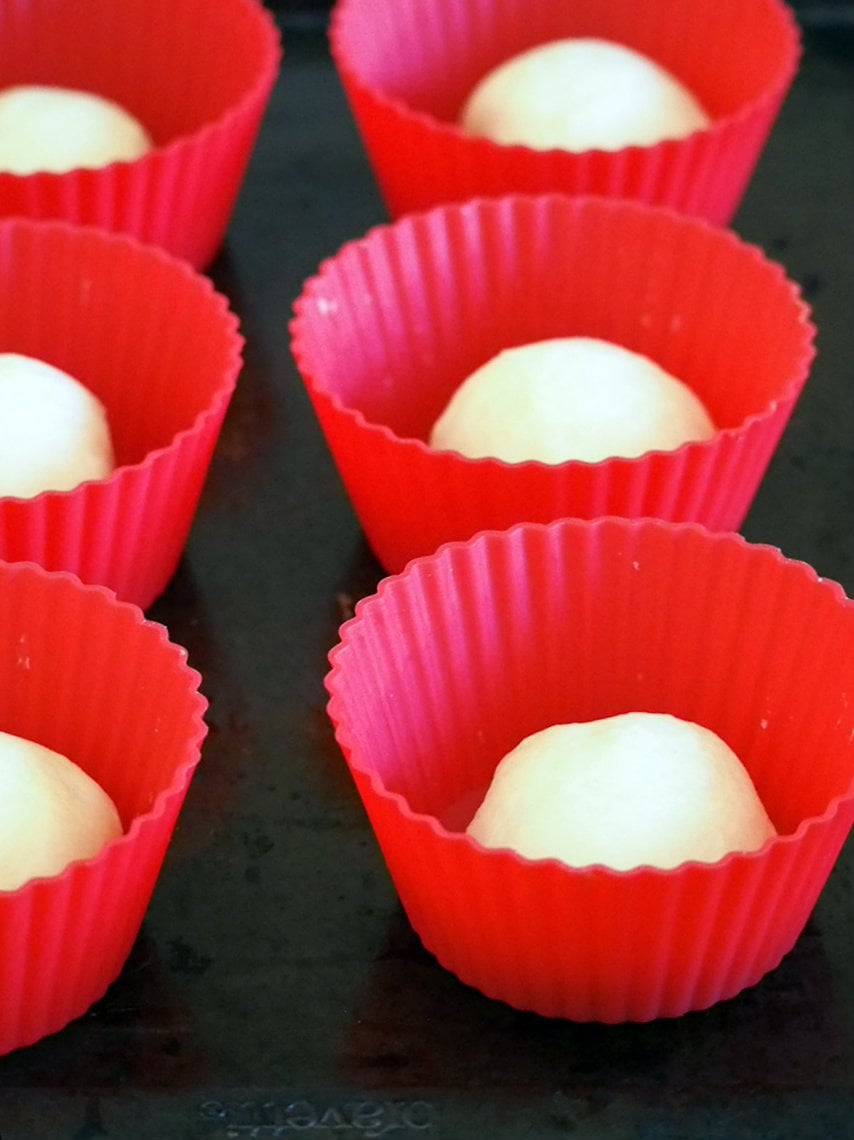
As for baking molds, I used these silicone baking cups which I find so convenient to have. I use them a lot in my baking such as in these plain mamon and chocolate mamon, and in making buns versions of the ensaymada.
If you don’t have these or something comparable to their size, you can place the buns on greased round baking pans, or baking sheets.
No big deal really, if you don’t have them. Except you won’t get those vertical lines on the base of the buns, but those just add a pretty touch and nothing more. These chocolate brioche will still taste amazing regardless.
To make chocolate brioche, you will only need half the brioche dough and the yield is 11 buns. Of course, you can go ahead and use all of the dough to yield a big batch of 22 pieces.
I prefer to freeze the other half of dough most of the time. It is so handy to have brioche dough ready for future cravings! These pastries will stay fresh in a covered container at room temperature for up to 3 days.
You can freeze the other half of dough for three weeks up to a month. Just wrap it well with plastic and then in foil.
Pointers For Making Chocolate Brioche
- For a step by step guide to making the brioche dough, check out this post.
- When filing the brioche dough with the chocolate cream, keep the filling in the center of the flattened dough. Any smears on the sides will make the dough difficult to seal closed.
- Don’t use flour while shaping the dough and filling, as the flour may prevent the dough from adhering together when sealing them to close.
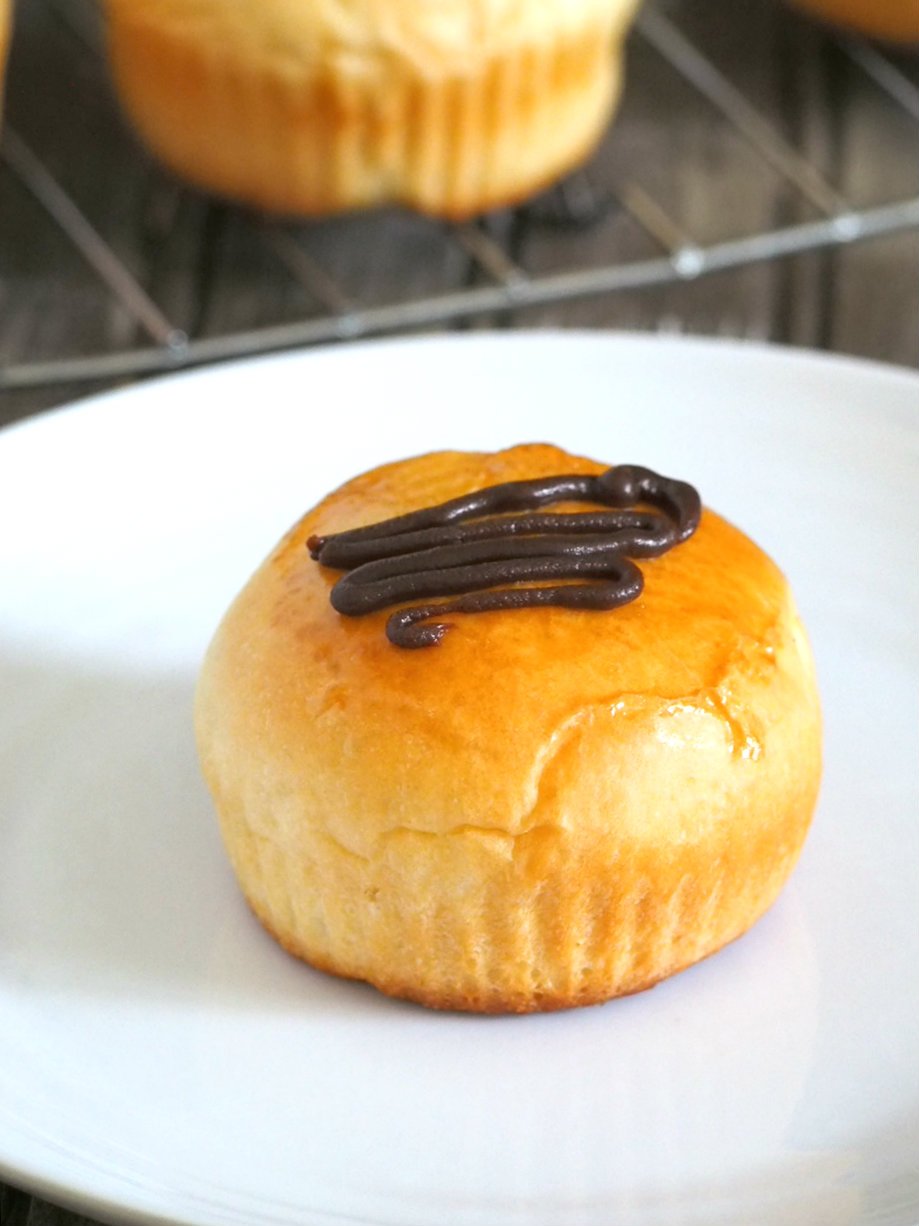
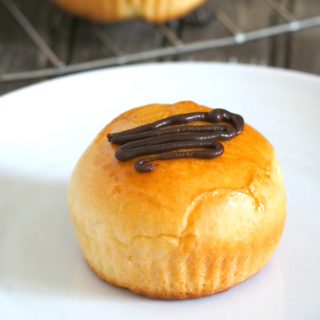
- Use the leftover chocolate cream to pipe decorations on top of the buns after baking. If it gets too thick to pipe, simply put decorative dots on top of each of the chocolate brioche.
Chocolate Brioche
Ingredients
FOR THE BRIOCHE
First Part: The Sponge
- 1/3 cup warm milk 110 F
- 2 and 1/4 tsp active dry yeast 1 packet
- 1 large egg
- 2 cups all purpose flour
Second Part: The Dough
- 1/3 cups sugar
- 4 large eggs lightly beaten
- 1 and 1/2 c all purpose flour
- 1 tsp salt
- 1 and 1/2 sticks unsalted butter at room temperature
FOR THE CHOCOLATE CREAM FILLING
- 1/4 cup butter unsalted
- 1/2 heaping cup chopped semi- sweet chocolate 90 grams
- 1 cup condensed milk
For the Egg Wash
- 1 large egg
- 1 tbsp milk
Instructions
MAKE THE BRIOCHE
Make the Sponge
- In the bowl of heavy duty mixer, Add the yeast, milk, egg and 1 cup all purpose flour. Mix with a rubber spatula just until combined. Sprinkle the remaining 1 cup of flour over the top as if to cover mixture. Let this stand for about 40-45 minutes. There will be cracks on the flour surface at this point.
Make the Dough
- Add the sugar, salt, eggs and 1 cup of flour to the bowl with the yeast mixture. Using a dough hook, run the heavy duty mixer on low speed for about a minute , until the mixture is just about incorporated. Add the remaining half cup of flour and run the mixer on medium speed. Continue to beat, scraping the bowl as needed, for about 15-20 minutes. You will know when the dough is ready if it is coming together in the center of the bowl, and also attaching itself into the dough hook. You should see the dough slapping the sides of the bowl, like it is almost violently throwing itself to the sides white it still clinging and rotating with the dough hook. You should also hear the slapping sounds. ( If you don't see the slapping action after ten minutes into the mixing , sprinkle about 2 tbsp of flour to the bowl. Continue to beat until you reach the slapping stage , giving the dough a total of about 15-20 minutes in the mixer ).
- Now add the butter bit by bit. Make sure that the butter is in in room temperature, but not warm or oily. It should be pretty soft and malleable. When you add the butter, the dough will fall apart again for a moment. Continue to beat until you hear the slapping sounds again. This should take about 5 minutes or so. The dough is now , once again, clinging together in the center and in the dough hook with the slapping sound. Dough is sticky but shiny at this point.
First Rise
- Place the ball of dough into a greased bowl and cover with a plastic wrap. Let stand in room temperature until the size is doubled, 2 hours.
Second Rise
- After the dough has doubled in size, simply lift it in sections until you have gone around the entire circle of dough, lifting and then letting it fall back to the bowl ( like deflating it but very gently. Do not punch the dough down.) Cover the bowl again with a plastic wrap and chill in the refrigerator for 6 hours or overnight. The dough will double in size again
Assemble and Bake
- After the long chill, divide the dough into 2 equal portions. You are only going to use half of the dough at this point. Cover the other half with plastic wrap, then in foil. Freeze for up to three weeks.
- Divide the other half of dough into 11 equal portions. Shape each portion into a smooth ball that is about 2.5 inches in diameter. To fill, flatten a ball using your palms until it is about 1/4 inch thick. Spoon about half a tablespoon of chocolate cream in the center. Fold the edges of the dough over the filling, stretching the dough to cover the filling completely. Seal it closed by pinching the edges together, then twist that part to fully seal the ball. Place assembled pastry inside a baking mold. Repeat the process with the rest of the dough. There will be remaining chocolate cream which you can use to decorate the pastries after baking.
- Cover assembled pastries loosely with a large sheet of plastic wrap. Let this rise at room temperature for 2 hours until the size is doubled.
- Preheat oven to 350 F. Beat one egg with 1 tbsp of milk to make the egg wash. Using a pastry brush, gently brush the surface of the brioche dough with the egg wash. Give it a good amount of the mixture but be careful not to let the liquid drip on the sides. Bake on the preheated oven for about 15 minutes or until the top surface of the buns are lightly golden. To decorate the pastries, use the leftover chocolate cream to pipe some lines on the top of the buns. If the mixture has become to thick to pipe, simple put a chocolate dot on the top. Store them in a closed container at room temperature.
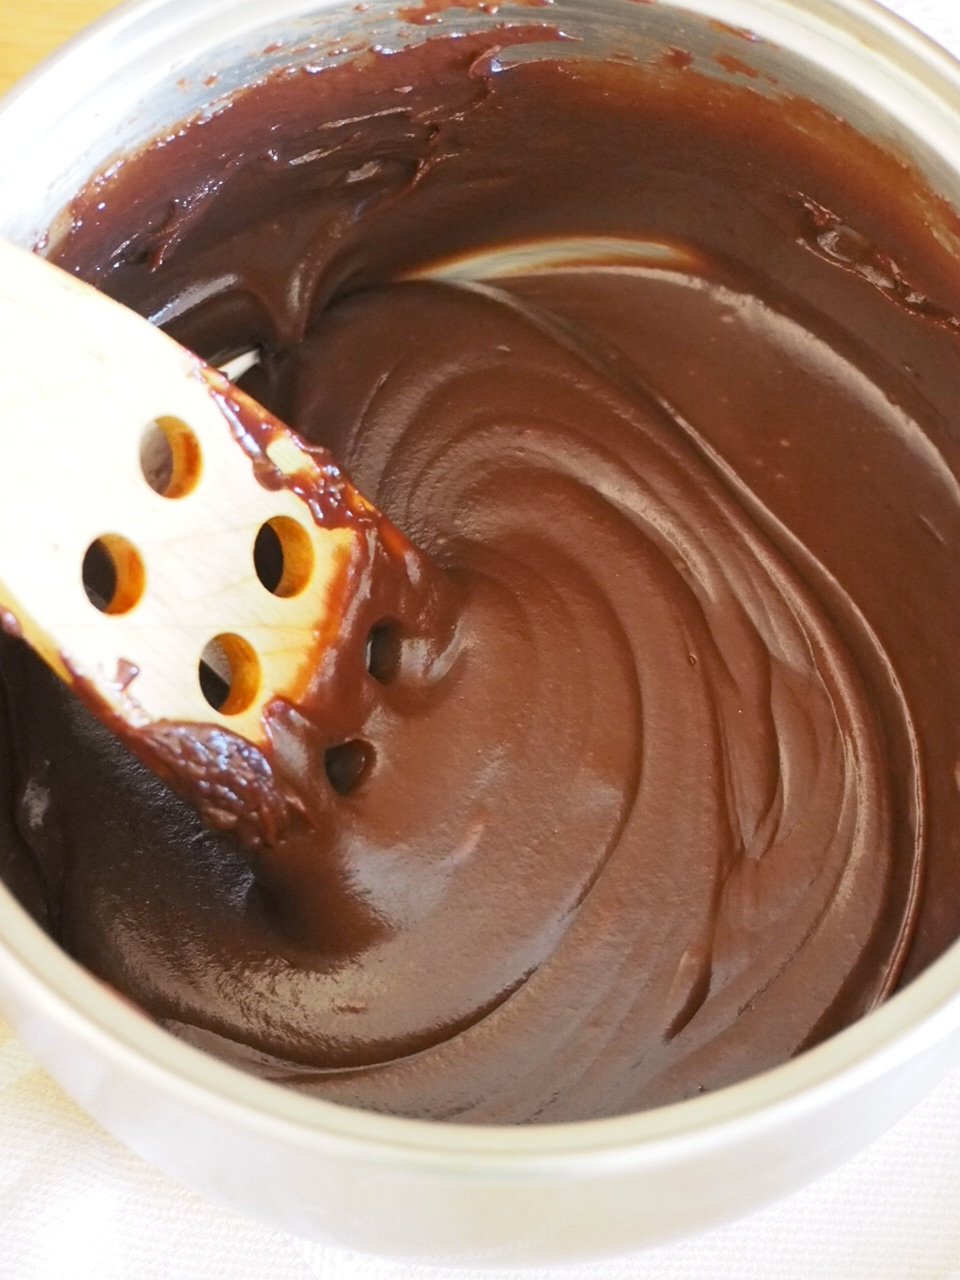
MAKE THE CHOCOLATE CREAM FILLING
- In a medium sauce pan over medium heat, add the butter. Once the butter has melted, add the chopped chocolate and stir the mixture until the chocolate has melted. Add the condensed milk and stir the mixture constantly for about 7-10 minutes, until it is thick and spreadable. The consistency can be compared to a curd or pudding but slightly thicker. Let cool before using.
Notes
Nutrition
This post contains affiliate links. Please see my disclosure and privacy policy to learn more.


Hi , I was trying your brioche recipe …Eveything was going well until I started rolling it for making buns . The dough was very greasy , I used 169 gms of butter (1 and 1/2 stick as mentioned ) . What I also wanted to ask was,in the final stage of proofing , where it is mentioned that it has to be kept in the refrigerator for 6 hours or overnight ..overnight would also be in the fridge or room temperature . Somehow I have rolled and put them for proofing …now let’s wait for the baking process …I hope it comes out nice and fluffy.
Hi! Overnight in the fridge. That is the long chill. Let me know how it turned out 🙂
Absolutely amazing love love every thing in your blog. Wishing you happiness and your family also God bless you with more and more success.
Thanks a lot, Saja! I appreciate your well wishes!
How do you use the dough after it has been frozen? Thaw and use as usual?
Yes, thaw it and then shape and let rise for second time.
Hi is it possible to do a video of how you fill the brioche? In the small portion size and the braided ring that would be very helpful to me in making this. It sure looks delicious but I’m having trouble understanding how to fill them. Thank
Hi Carmela! I will add videos to both posts as soon as I can! Thank you for your feedback! 🙂
Brioche is one of my favorite breads and I’m sure the chocolate makes it even more delicious. A must try!