
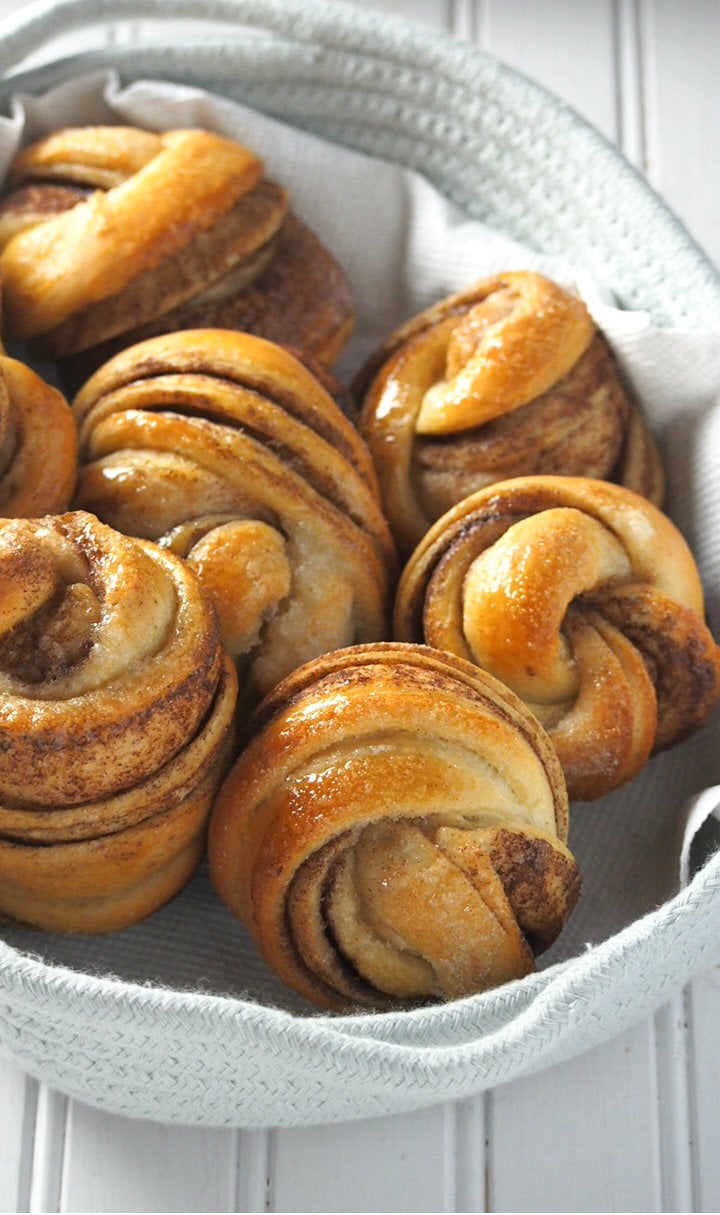
Dulce de Leche Ensaymada
These Dulce de Leche Ensaymada are filled with luscious dulce de leche, smeared with a lavish vanilla frosting and topped with creamy cheese! So soft and rich! Also try plain ensaymada, and ube ensaymada!

I present to you with glee and excitement, Dulce de Leche Ensaymada! This is one of the most special things I have made in a while and we are absolutely loving it.
I love packing them up nicely, individually wrapped and gifted to friends. It just feels so special. And that’s how ensaymada always feel at home. We can buy them packaged in a big bakery box with a nice open window at the top part so you can see all the cheese laden pastry inside.
To me that ensaymada box represents thoughtfulness and a special regard. So when I thought of making these, I knew I wanted it to be really extra and special. And the dulce de leche element definitely achieved that!

Recipe Overview
Okay I wouldn’t say it’s quick to make, It is a deluxe baked good after all! You have to make the dulce de leche first, which is mostly hands off. And making the dough is also a stand mixer job. You need to plan ahead with this one though. I allot 2 days to make this. But that’s because the proving, chilling and rising time are quite long but really, no hard work is involved.
- Make Dulce de Leche.
- Make the Sponge.
- Make the Dough.
- Chill.
- Shape.
- Bake.
- Rise.
- Assemble.
Let’s Make It

Dulce de Leche
Preheat oven to 425 ℉. Open a can of condensed milk and pour into a 9 inch pie dish. Cover well with foil and place in a rimmed baking pan. Pour water into the pan so that the pie dish is submerged by half.
Place the pan into the middle rack of oven. Cook for 1 hour up to 1 and ¼ hour, until the condensed milk turns light brown (I peak at the 50 minute mark to gauge). Pour a bit of water in the pan as needed to prevent it from drying out.
Take it out from the oven. Let the dulce de leche cool completely, then transfer to a jar and refrigerate until needed in the recipe.

The Sponge
Stir together milk, egg and yeast using a wooden spoon in the bowl of a stand mixer. Add 1 cup of the flour and stir to incorporate.
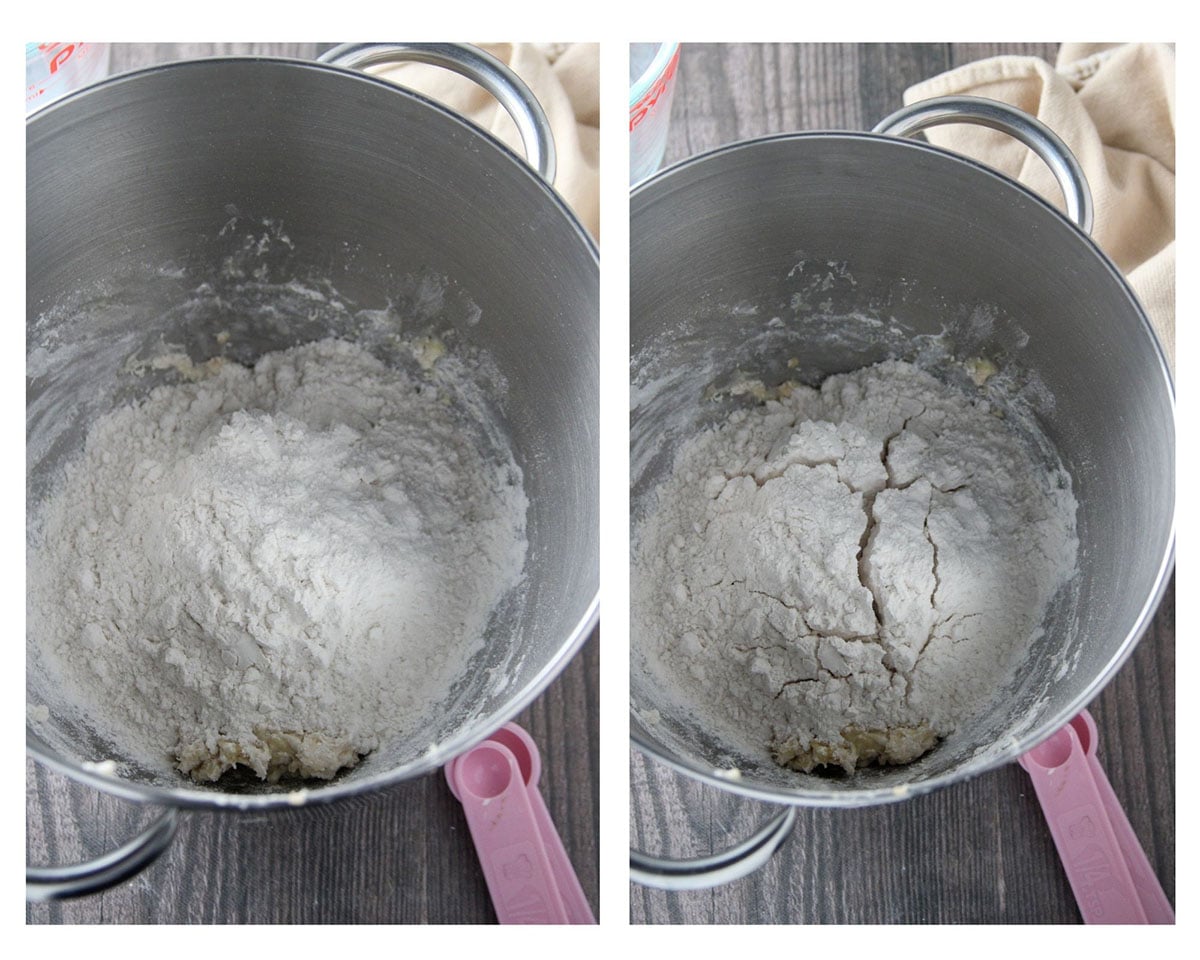
Now sprinkle the remaining half cup of flour over top to cover the mixture. Do not stir. Leave this covered for 45 minutes. This flour will yield cracks, indicating that the sponge has risen and the yeast is active. Stir in the flour well, so that no dry streaks of flour is present.
The Rest of the Bread Dough
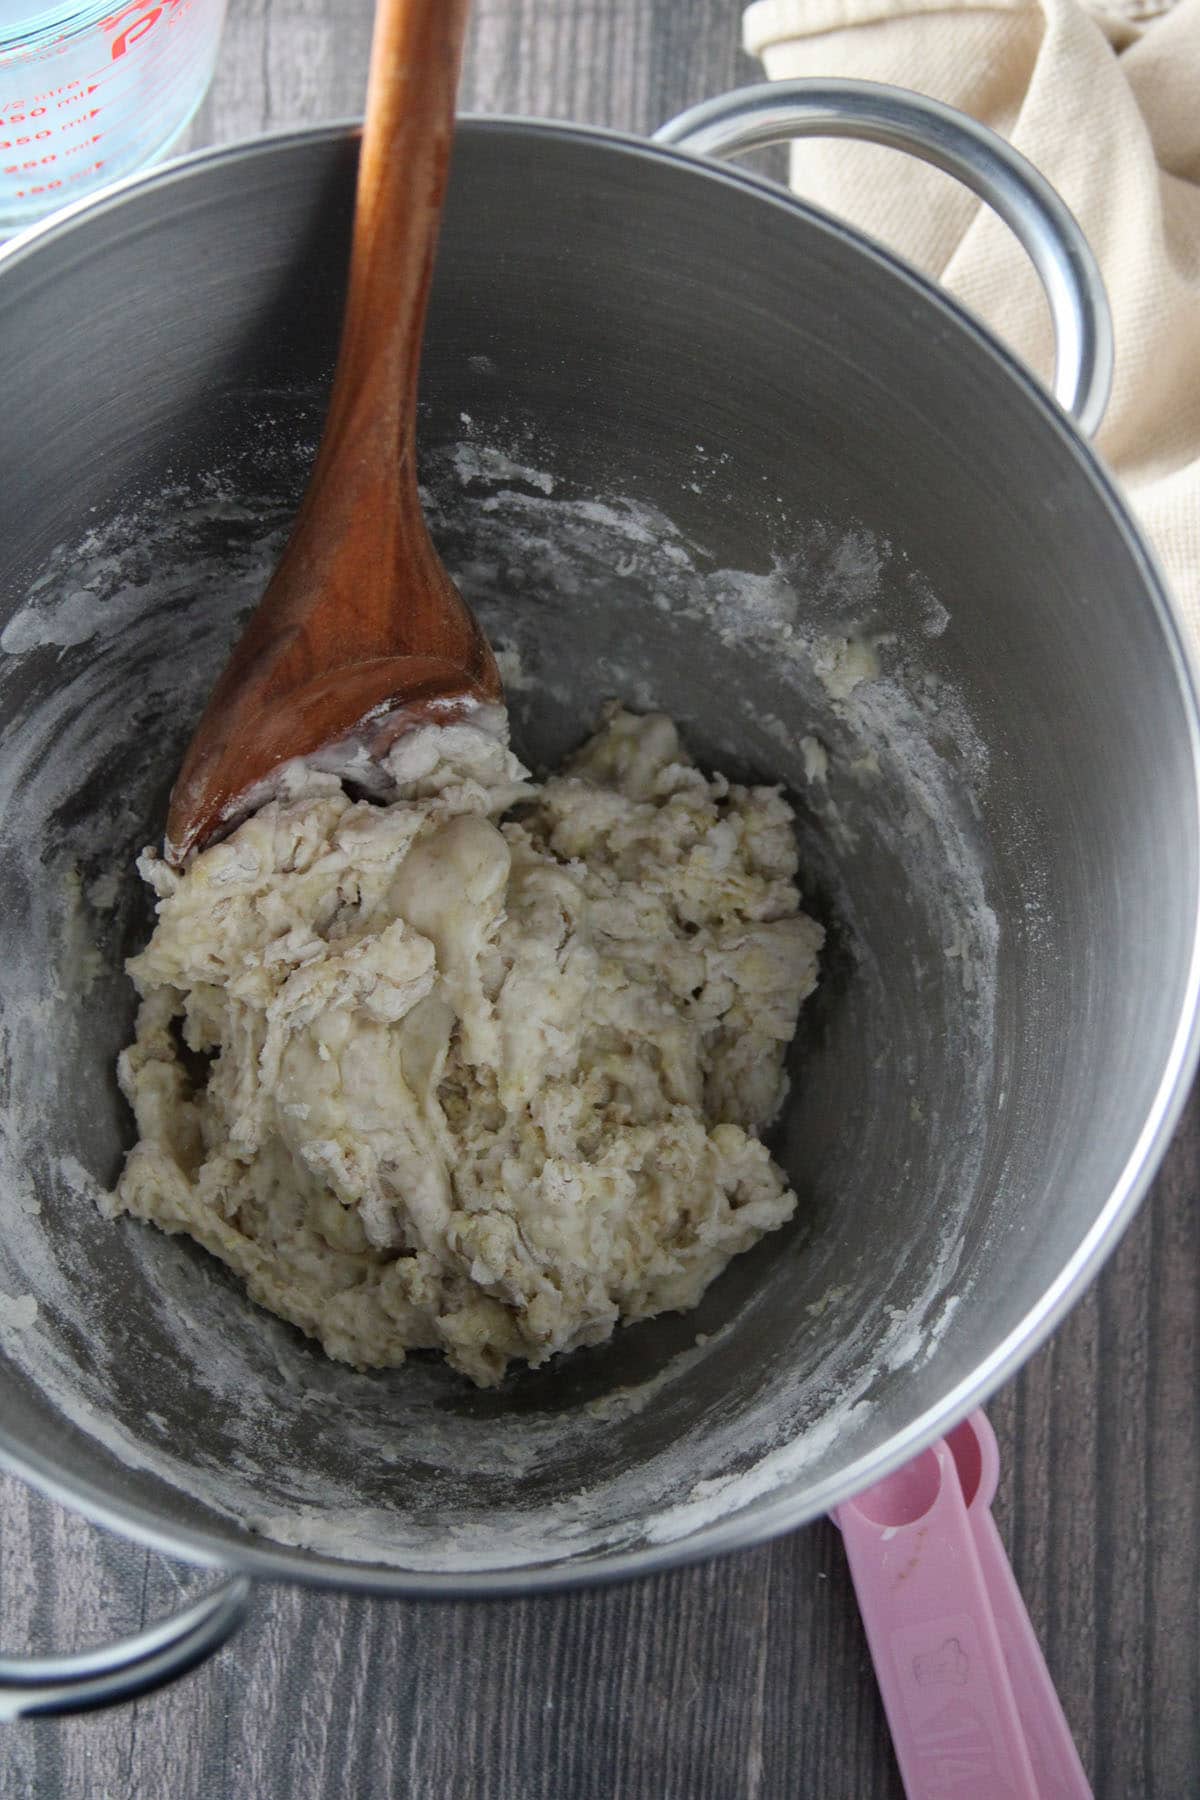
Add the sugar, lightly beaten eggs, and salt. Stir. Then, add the flour gradually while stirring, until a shaggy ball of dough is formed in the center of the bowl. You may have a little bit of flour left, that is okay.
Using the dough hook attachment, knead the dough for 3-5 minutes, or until it starts to clean sides of the bowl. If the dough is too sticky and not gathering, sprinkle the remaining flour plus up to ¼ cup of extra flour gradually. The dough should start to slap the sides of the bowl and gather in the center. You can scrape the sides and bottom of the bowl occasionally to help the dough release.

Now add the softened butter bit by bit. Allow the butter to incorporate before adding more. The dough will starts to collapse again. Just keep kneading and it wont take long until it starts to gather into a smooth, shiny dough once again, cleaning and slapping the sides of the bowl.
Flour your hands lightly, gather the dough into a ball. This is smooth, flowy and satisfying. In my opinion the prettiest bread dough I ever handled!
Place the dough into a bowl, cover with a plastic wrap and chill it in the fridge for 4 hours or up to overnight.

After chilling, let the dough rest at room temperature for about 5 minutes. Meanwhile, lightly grease 12 brioche tins or silicon muffin tins. On a clean surface (floured lightly, but doesn’t have to), shape the dough into a big log. Then use a knife or dough cutter to divide the dough into 12 equal pieces.
Shape each portion into a smooth ball. Place each ball into a greased tin. Place the tins into a large baking tray. Cover with plastic film or kitchen towel. Let the dough rise for 2 hours.

Preheat the oven to 350 ℉. Make the egg wash by beating together egg and milk. Brush the top of the dough with egg wash.
Bake the ensaymada at 350 F for 15 minutes or so, until the tops are golden. Place the tins on a wire rack and allow to cool completely.
Meanwhile, make the icing and prepare your shredded cheese .

Fill the Brioche to Make Dulce de Leche Ensaymada
Using a bread knife, slit a small hole in the center of the bread. Make sure not to go deep or you will create hole underneath.
Transfer a good amount of the the Dulce de Leche to a piping bag with a plain piping attachment, or in an icing injector. Pipe Dulce de Leche into the hole just until it oozes out a bit at the hole. Repeat with the rest.
Spread buttercream on top of each ensaymada. Top with a generous amount of grated cheese. If desired, pipe more dulce de leche on top. Oh yum!


Storage and Re-heating
- I usually wrap this individually in plastic film, for giving away to friends . Or of course, keep them in an airtight container.
- Store ensaymada in the fridge for up to 5 days. Reheat for 5-8 seconds in the microwave before serving.


Dulce de Leche Ensaymada
Equipment
Ingredients
Sponge
- ⅓ cup (85.94 g) milk 105-115 ℉
- 2¼ tsp active dry yeast
- 1 large egg at room temperature
- 1 ½ cup (198.13 g) all-purpose flour
The Rest of the Dough
- ¼ cup (52.83 g) sugar
- 3 large eggs at room temperature, very lightly beaten just to liquify.
- ¾ cup (170 g) unsalted butter softened to room temperature, cut into little cubes
- 1½ cup (198.13 g) all-purpose flour plus up to ¼ cup extra
Filling
- 1 300 ml can of condensed milk or sweetened condensed milk
Buttercream
- ¾ cup (170 g) butter softened to room temperature
- ¾ cup (95.1 g) icing sugar
- 1 tsp vanilla extract
Toppings
- 1 cup grated processed cheese or more more more!
Egg wash
- 1 tbsp milk
- 1 large egg
Instructions
Make the Dulce de Leche
- Preheat oven to 425 ℉. Open a can of condensed milk and pour into a 9 inch pie dish. Cover well with foil and place in a rimmed baking pan. Pour water into the pan so that the pie dish is submerged by half.
- Place the pan into the middle rack of oven. Cook for 1 hour up to 1 and ¼ hour, until the condensed milk turns light brown ( I peak at the 50 minute mark to gauge). Make sure that the water does not dry out in the pan. Pour a bit of water as needed.
- Let the dulce de leche cool completely, then transfer to a jar and refrigerate until needed.
Make the Sponge
- In the bowl of a stand mixer, stir together milk, egg and yeast using a wooden spoon. Add 1 cup of the flour and stir to incorporate. Now, sprinkle the remaining half cup of flour to cover the mixture. DO not stir. Cover this with a clean towel or plastic wrap. Let sit for 45 minutes to 1 hour or until the surface of the flour yield some cracks. This indicates the the sponge has risen and your yeast is active. Stir in the flour very well with a wooden spoon until no dry flour remains.
Make the Rest of the Dough
- Add the sugar, eggs, and salt. Stir. Then, add the flour gradually while stirring until a shaggy ball of dough forms in the center. You may have some flour left or none. That is fine.
- With the dough hook attachment, knead the dough for 3-5 minutes on medium high speed, or until it starts to clean the sides of the bowl. If the dough is sticky and not gathering, sprinkle the remaining flour plus up to ¼ cup extra. The dough is ready for the butter when it gathers nicely in the center and is cleaning the sides of the bowl.
- Now add the softened butter bit by bit as the mixer runs. Allow the butter to incorporate before adding more. The dough will starts to collapse again. Just keep kneading until it starts to gather into a smooth, shiny dough once again, cleaning and slapping the sides of the bowl.
- Flour your hands lightly, gather the dough into a ball. This is smooth, flowy and satisfying. In my opinion the prettiest bread dough I ever handled! Like a baker's slime! Place the dough into a bowl, cover with a plastic wrap and chill it in the fridge for 4 hours or up to overnight. I usually just stick it overnight.
- After chilling, let the dough rest at room temperature for about 5 minutes. Meanwhile, lightly grease 12 brioche tins or silicon muffin tins. On a clean surface (floured lightly, but doesn't have to), shape the dough into a big log. Then use a knife or dough cutter to divide the dough into 12 equal pieces.
- Shape each portion into a smooth ball. Place each ball into a greased tin. Place the tins into a large baking tray. Cover with plastic film or kitchen towel. Let the dough rise for 2 hours.
- Preheat the oven to 350 ℉. Make the egg wash by beating together egg and milk. Brush the top of the dough with egg wash. Use the rest for omelet!
- Bake the ensaymada at 350 F for 15 minutes or so, until the tops are golden. Place the tins on a wire rack and allow to cool completely.
Make the Icing
- In a bowl, beat the butter until fluffy. Add the icing sugar and vanilla and beat until smooth.
Make your Ensaymada
- Using a bread knife, slit a small hole in the center of the bread. Make sure not to go deep or you will create hole underneath.
- Transfer a good amount of the the Dulce de Leche to a piping bag with a plain piping attachment, or in an icing injector. Pipe Dulce de Leche into the hole just until it oozes out a bit at the hole. Repeat with the rest.
- Spread buttercream on top of each ensaymada. Top with a generous amount of grated cheese. If desired, pipe more dulce de leche on top. Oh yum!
- I usually wrap this individually in plastic film, for giving away to friends I also wrap them in parchment individually but I find that it doesnt preserve the softness as much as the plastic. Or of course, keep them in an airtight container.Store ensaymada in the fridge for up to 5 days. Reheat for 5-8 seconds in the microwave before serving.
Notes
- Condensed Milk or sweetened condensed milk? I get lots of questions about this one. But whichever of the two is written in the can label, both of them will work.
- Dulce de Leche. You may not use all of the Dulce de leche. You can keep it in the fridge for up to a week. Spread it on toasts, drizzle warmed over ice cream or eat them by the spoonful (this is us!).
- Tart/ Brioche Tins. You can use any muffin tins. The silicon ones will work! You can also use nothing, just place the balls of dough in a parchment lined baking sheets. However the tins will give it a good height, and more room to put filling in. These are the tins I used. I don’t think they are brioche tins, specifically, but they work beautifully!
- Piping the Dulce de Leche. A piping bag will work, but to be honest I have not tried it. I do not have the perfect bag or attachment. But this cookie decorating set is just perfect for the job. Makes filling pastries or bread a breeze!
- Cheese. Okay, cheese! I love using Filipino processed cheese because its creamy and not too tangy. I used Cheezee brand but Eden or Magnolia are also perfect choices. If you cannot find these, I suggest Velveeta but use less amount as it may be too sharp or salty for the ensaymada vibe.


Such a special baked good!