
How to Improve Food Photography For Blogging and Social Media
One of the things I struggled with when I was starting to blog was taking photos of my food. To improve food photography for this blog was one of my goals, But my belief then was that there was nothing to beautiful and mouthwatering food photography other than taking photos of food as soon as I finish cooking or baking them, right on the kitchen table, and under the dim lights of the kitchen.
But I was wrong! There are a lot of things to be learned if I wanted to improve food photography and make photos of my food look delicious and appetizing as they really are. So I thought of studying more about this subject because I realized that there must be something the other bloggers are doing for their food photography to stun and make food look really delicious.
In my quest to learn more, I bought this e-book called Tasty Food Photography by Lindsay of Pinch of Yum. I have always admired Pinch of Yum’s food photography and the e-book has made me learn so much. It is the one initial step I took and my photos started to improve ever since.

Although I was using a point and shoot camera during that time, and the book was primarily written for DSLR/SLR camera users, I have seen lots of improvement with the way my photos looked because there’s a section in the book that tackles techniques of taking better food photos using a point and shoot camera or even a cellphone camera.
Eventually, my husband bought me a compact camera called the Olympus E-PM2 which is not a DSLR, but has features that is pretty much like the DSLRS without the heaviness and bulk. I never thought that I can come close to the looks of photos taken by DSLR cameras with just my digital camera, but with the help of Tasty Food Photography eBook, my photos have been accepted to a photography site called Foodgawker and they have been looking a lot better.
Here is a list to sum up the things I put to practice to improve my food photography:

How To Improve Food Photography
Use Natural Light
This a basic and very important tip that will work whatever kind of camera you are using. Natural daylight highlights your food like no other. For me, just follow this tip and your photos will improve a hundred folds. I used to take all my photos in the kitchen after I cook or bake, which means it doesn’t matter to me if it was night time or there was no natural light around, as long as I am done cooking, I will start to take photos.
But I was not aware that I was committing a very serious mistake. Photos shot under natural light look way better than ones that were shot under the kitchen lights especially if it was shot during night time.
In the book, Lindsay illustrates different ways you can use natural daylight to highlight your food. Light can be coming from the left, right , or back. It is amazing how such simple techniques can bring life to the photos.
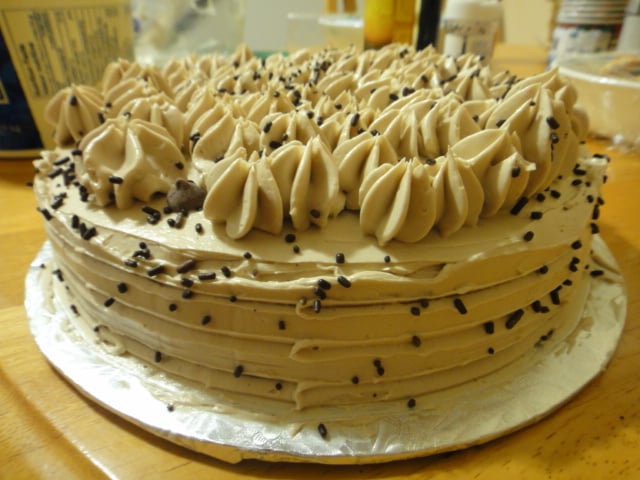
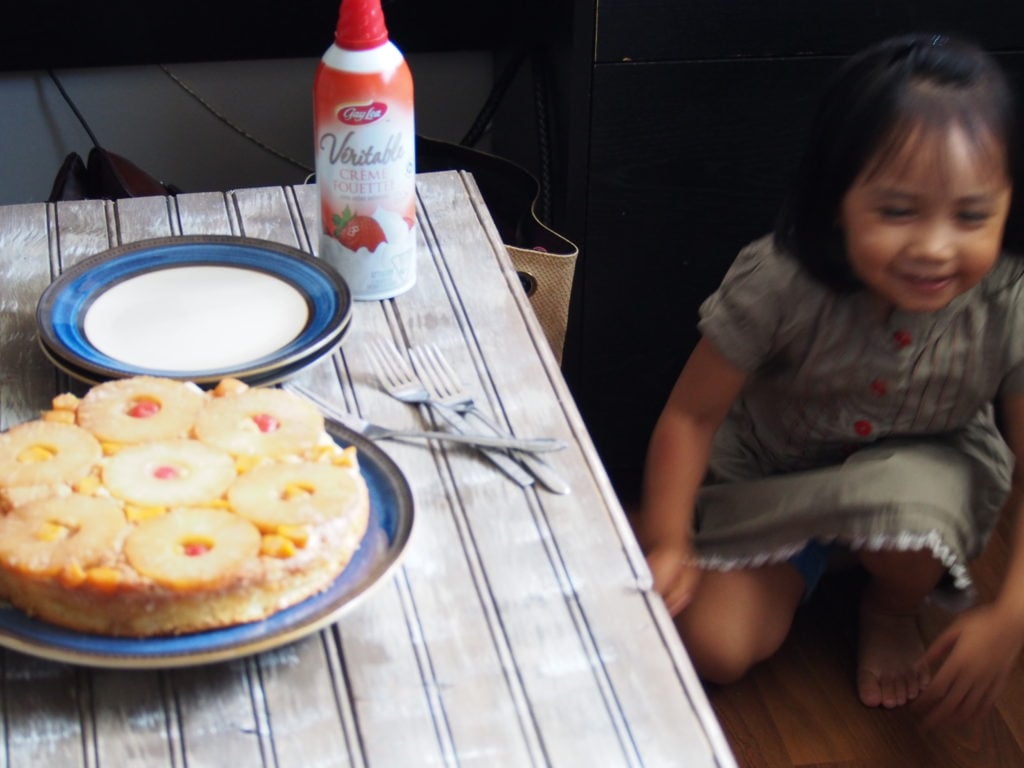
The photos below were taken using a point and shoot camera. The one on the left was taken at night time, after I finished baking the cake. The one on the right was taken during daytime, with natural light coming from the window from the right. Notice how the photo on the right is so much better just because natural daylight was used to light the food.
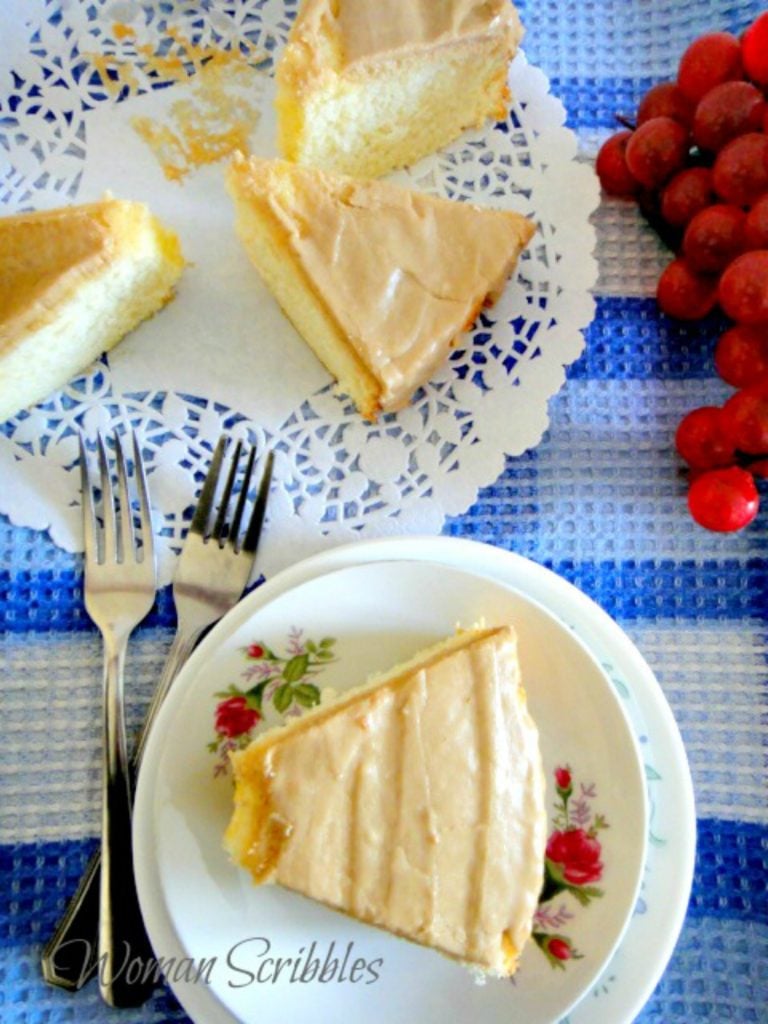
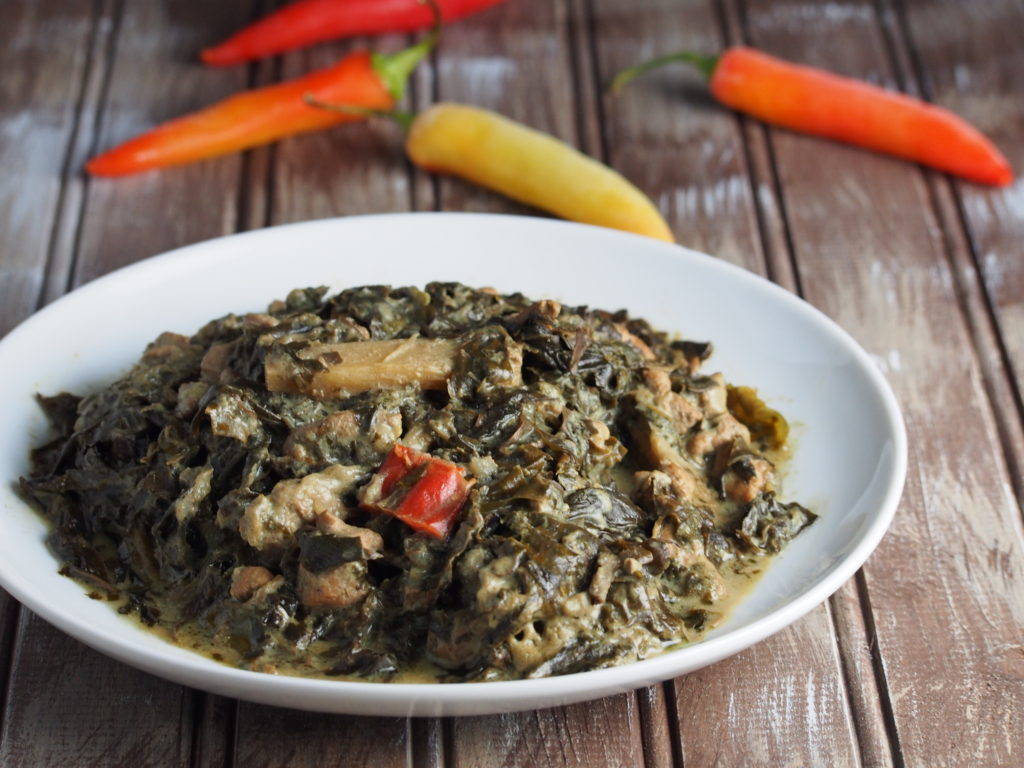
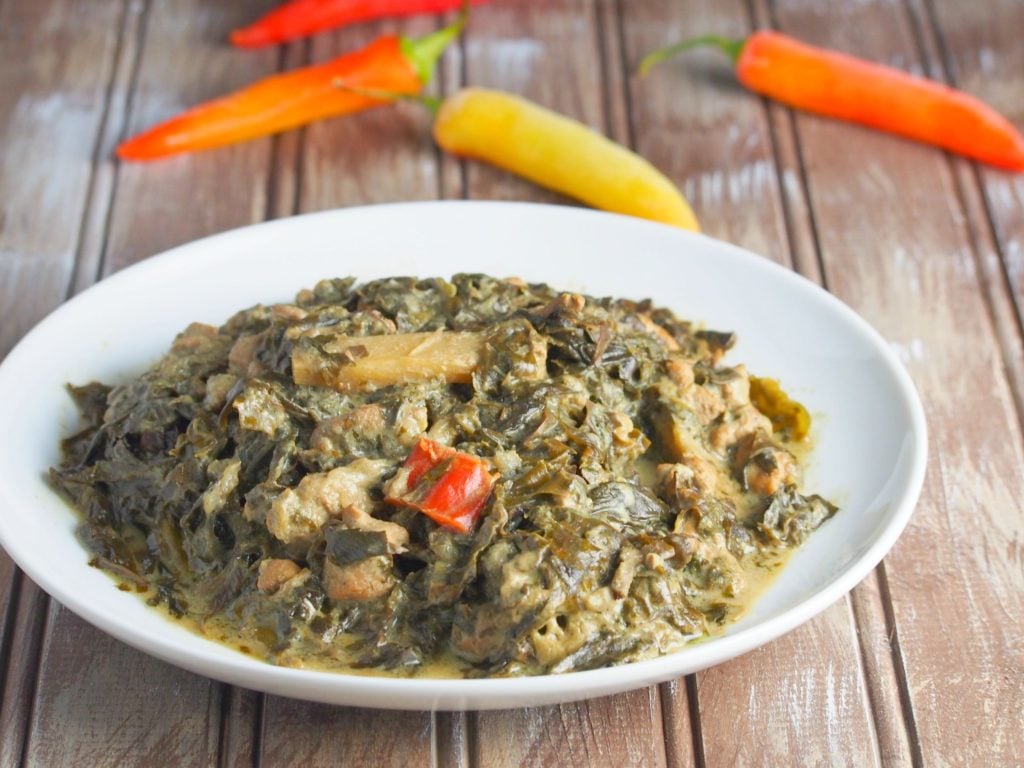
And another example, these were also taken with a point and shoot camera. The one on the right was taken with natural daylight while the one on the left was taken at night under the kitchen lights.
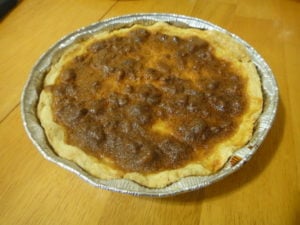
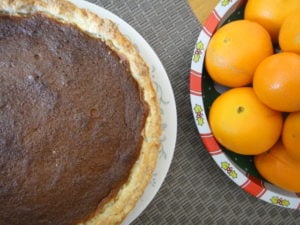
So with these two examples, you see that the lights of the house ( kitchen lights) is basically not ideal for using with food photography especially at night time. I think it is safe to say that you must , at all costs, avoid taking photos at night and use natural daylight instead.
Plan the shots
*Plan the time.
After cooking is not necessarily the time you need to start to take photos. If daylight is not available, then you can plan the time to shoot when there is natural light coming through any part of the house. What I do if baking happens at night is I schedule the shooting the next day when there is natural daylight available. If cooking dinner, I usually save enough food for taking photos in the day.
This can be a challenge during gloomy and rainy days, especially if you do food photography for blogging. It can really disrupt your scheduled tasks. I live in Canada, and most part of the year is winter which means days are short and nights are longer. For times like these, I use an artificial daylight set up which is the Lowell Ego lights. It simulates natural daylight so I am not using the lights from our kitchen at night. Although it is not necessary , especially if you only want to occasionally post food photos to social media, this artificial daylight is a good set up to have when the time comes that you want to take your food photography to the next level.
Otherwise, It is best to wait to for natural daylight before you take that shot.
*Plan the set up.
It is also not necessary that the kitchen table or the stove be the only spots where you take food photos. You can get creative and move your set up to other locations where there is natural daylight coming through. For me, this means that sometimes I have to do the set up in the living room where there is a big window. I use a small table that I can move anywhere there is natural light and I arrange the set up there. I also use some boards– pieces of wood panels that I stuck together to form a pretend table. You can make one too. Here is a good tutorial to make photography wood boards.
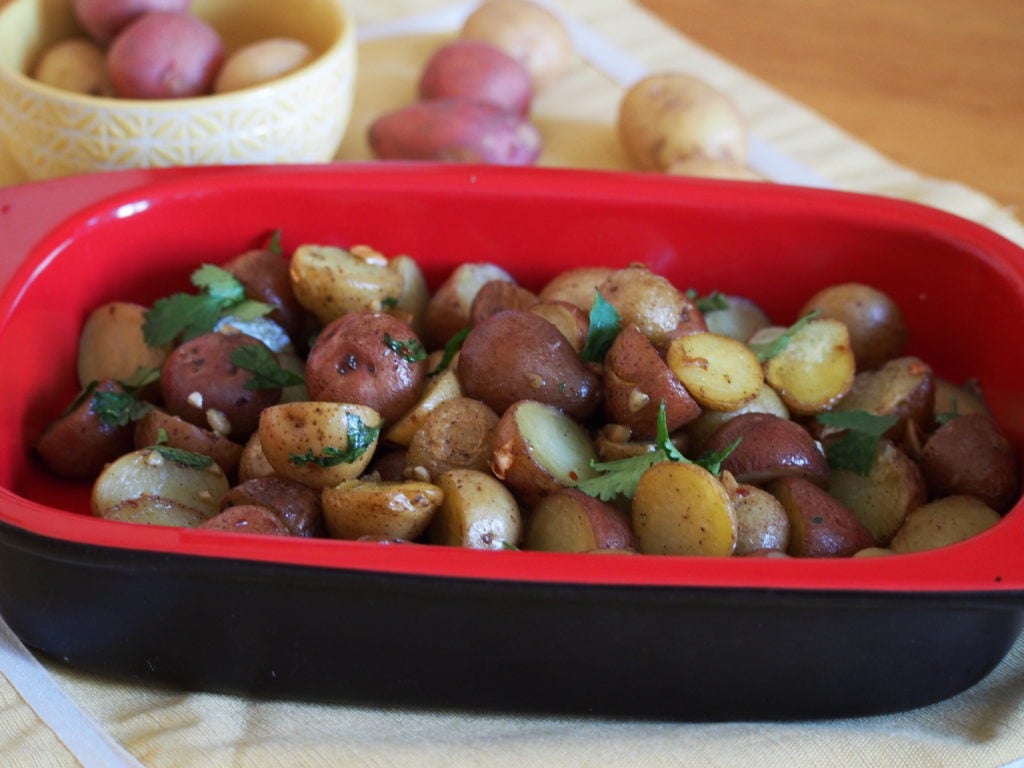
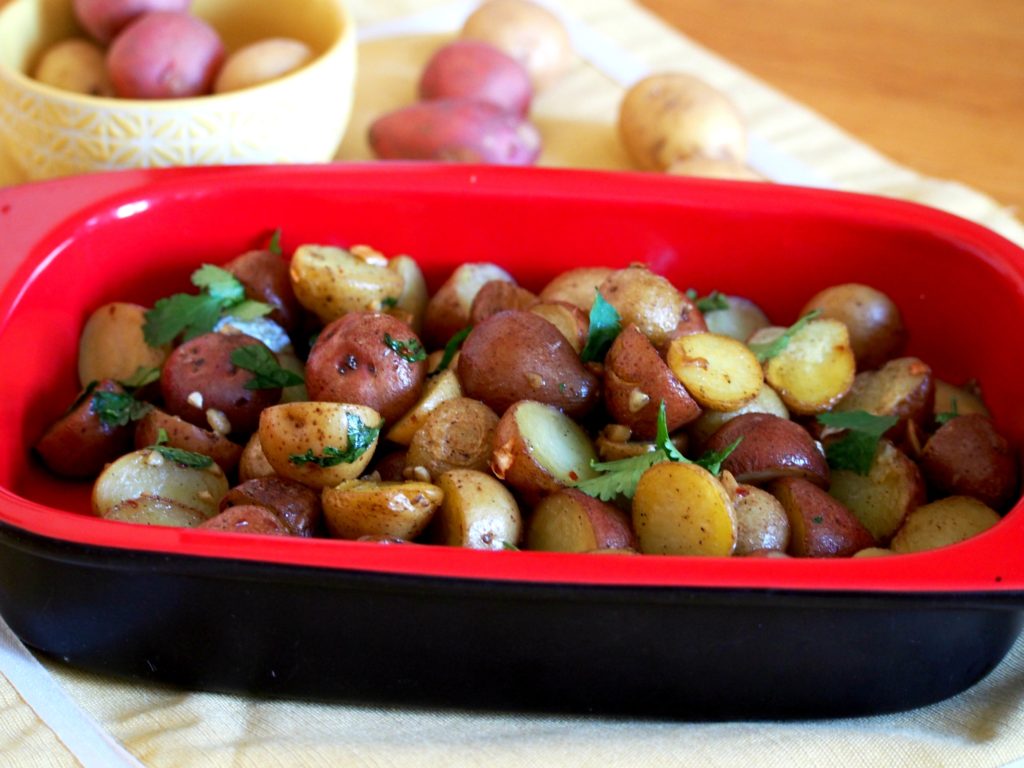
The photo below shows one of my usual set up: I position my wood board beside a window so I get the most natural light to hit my food subject. You can see in here that the beautiful daylight is coming from the right.
And here is the photo after the shoot and edit.
*Plan the Composition
Composition is the arrangement of the elements in a photo. In food photography, you have your food as the main element, and other elements will be in the photos too such as props and backgrounds. Composition is how these elements will be positioned in the photo in a way that they will be telling a story or simply conveying something. In the e-book Tasty Food Photography, Lindsay shares her composition tips such as shooting vertically, and keeping the subject out of the center of the picture. These tips helped me a lot when I was stuck for composition ideas.
Props and backgrounds play an important part in the composition. The right amount of props will highlight the food appropriately, and too much can take away the viewer’s attention from the food subject. Also, it is important to add only relevant props to strengthen the composition.
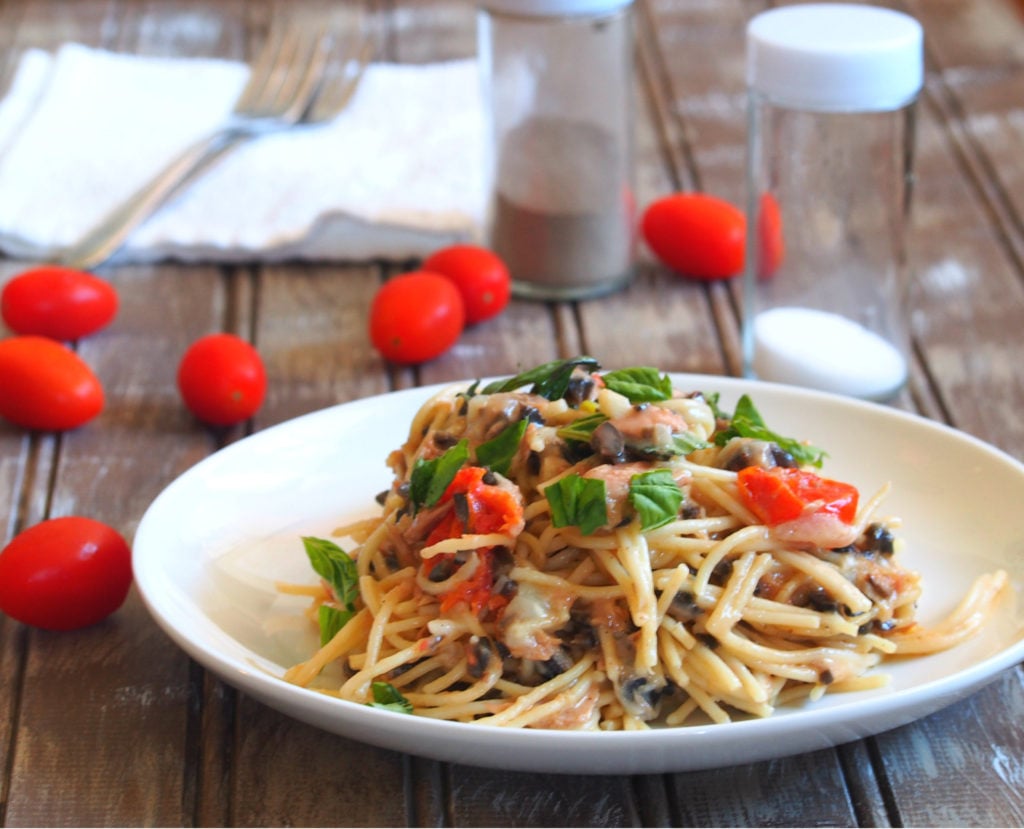
The photo of Tuna Pasta below has tomatoes, salt and pepper for props. These props are all relevant to the food subject. This composition conveys that the pasta is served and waiting to be eaten.
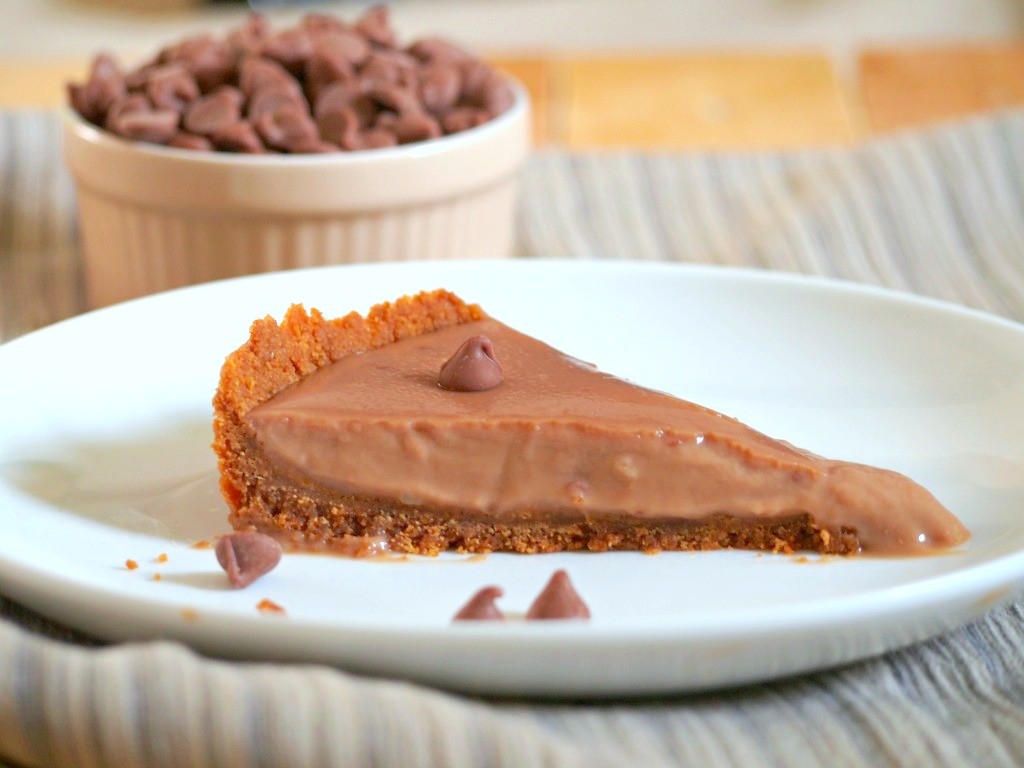
The chocolate chips prop in this photo is relevant to the subject because chocolate chips are part of the recipe for making the chocolate pie. The linen adds grace to the photo.
This Egg Pie photo uses egg and another egg pie as props. Also, this photo has a blurry background also known as the bokeh. Lindsay explains the technical side on how to achieve this. It is basically impacted by the technical aspect called Aperture, which is the number that starts with f. Generally, the lower the f value , the more blurred the background will be. This value can be adjusted in cameras that have the manual mode.

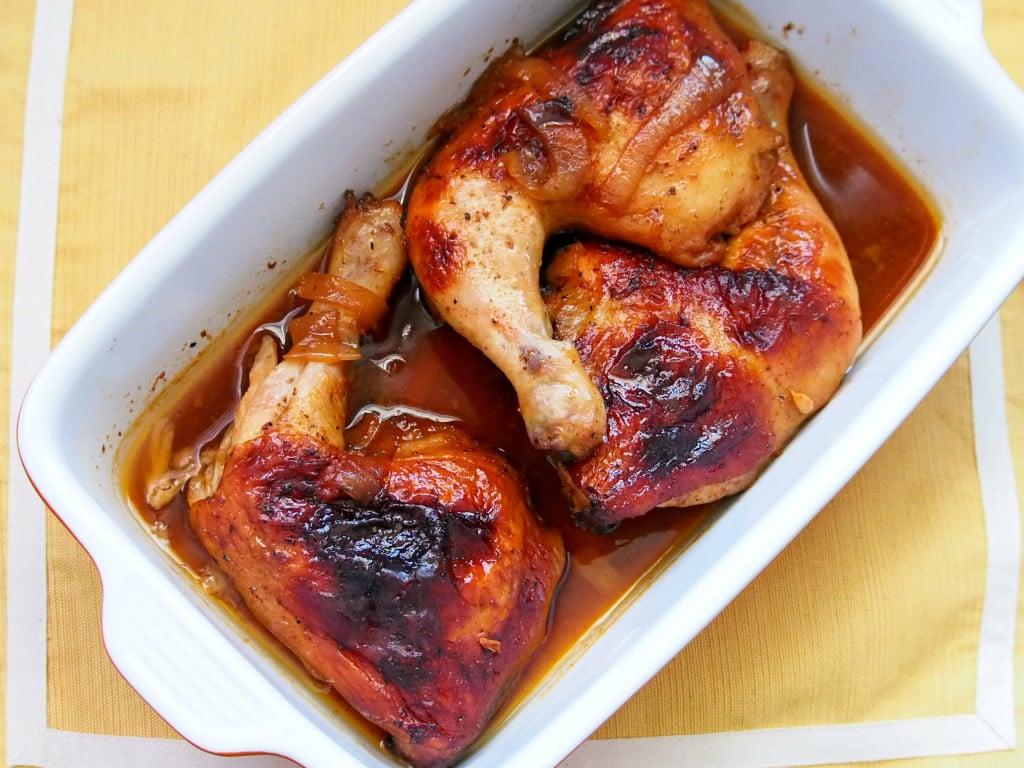
Sometimes no props says more like in this photo of Lemon Barbecue chicken.
The e-book contains more valuable tips and advices to create a great composition. It provides lots of props and background ideas. My favorite part was how Lindsay demonstrated lots of composition examples that varies in mood and atmosphere just by changing up the props and the positioning of the elements in the photo.
Shooting Angles
You can shoot photos from many angles depending on how you want the viewer to see the food. These three are the most common angles that are used in food photography:
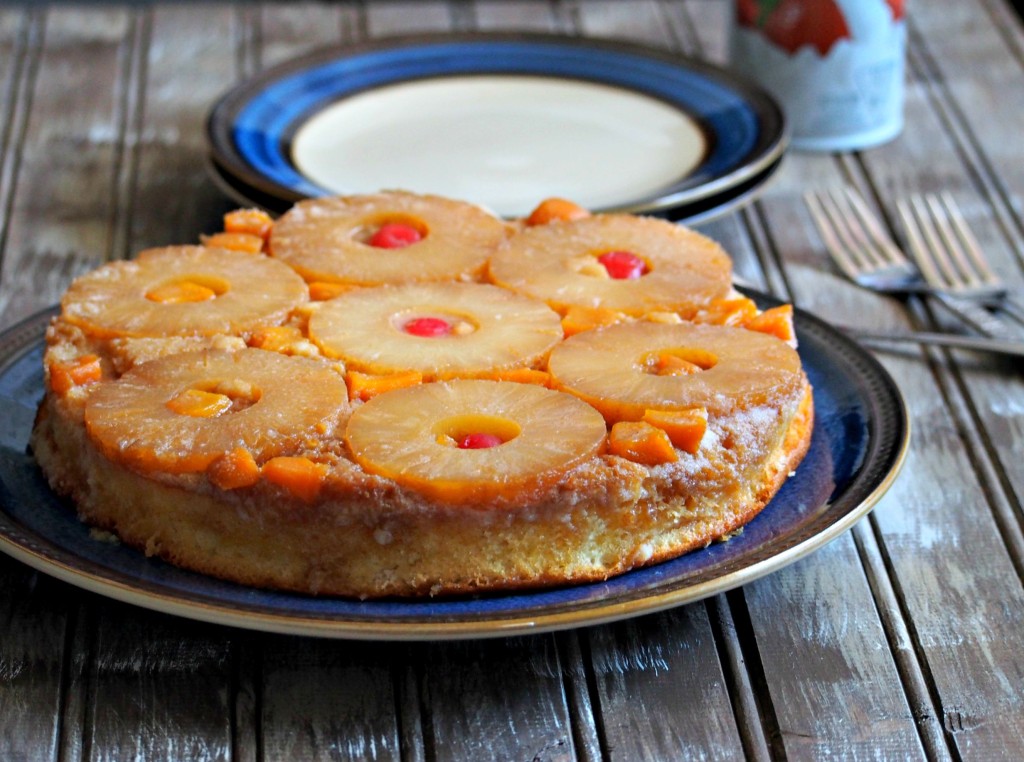
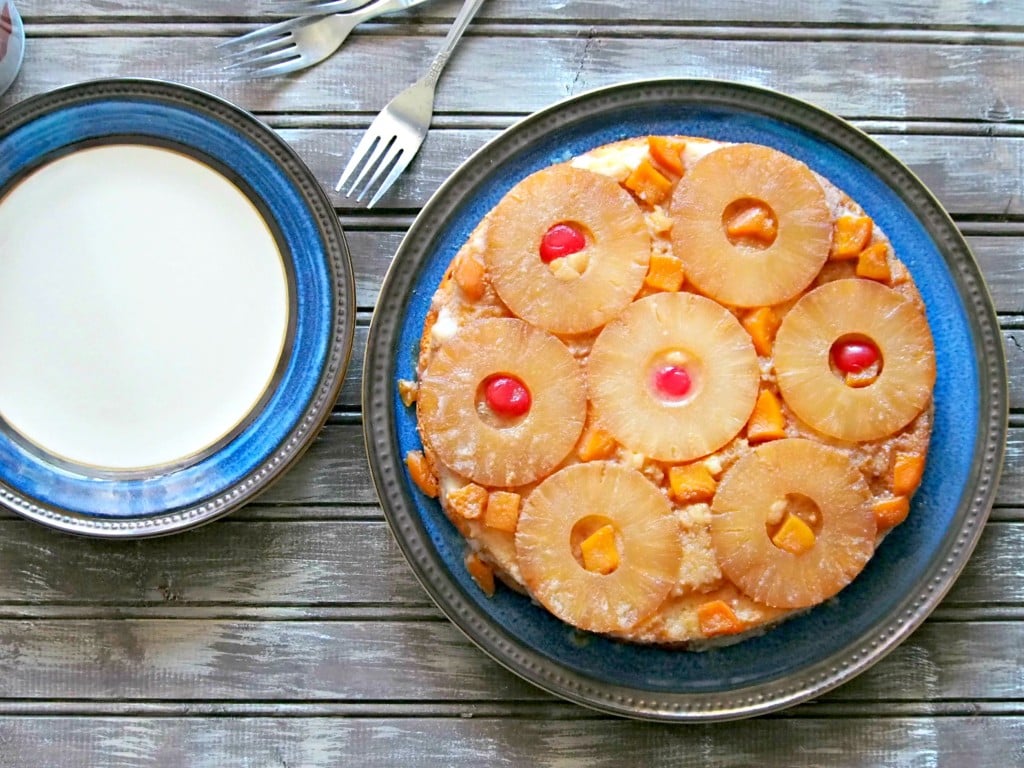
*Overhead
The photo of Pineapple Upside down Cake was shot overhead to highlight the festive details of the cake on the top.
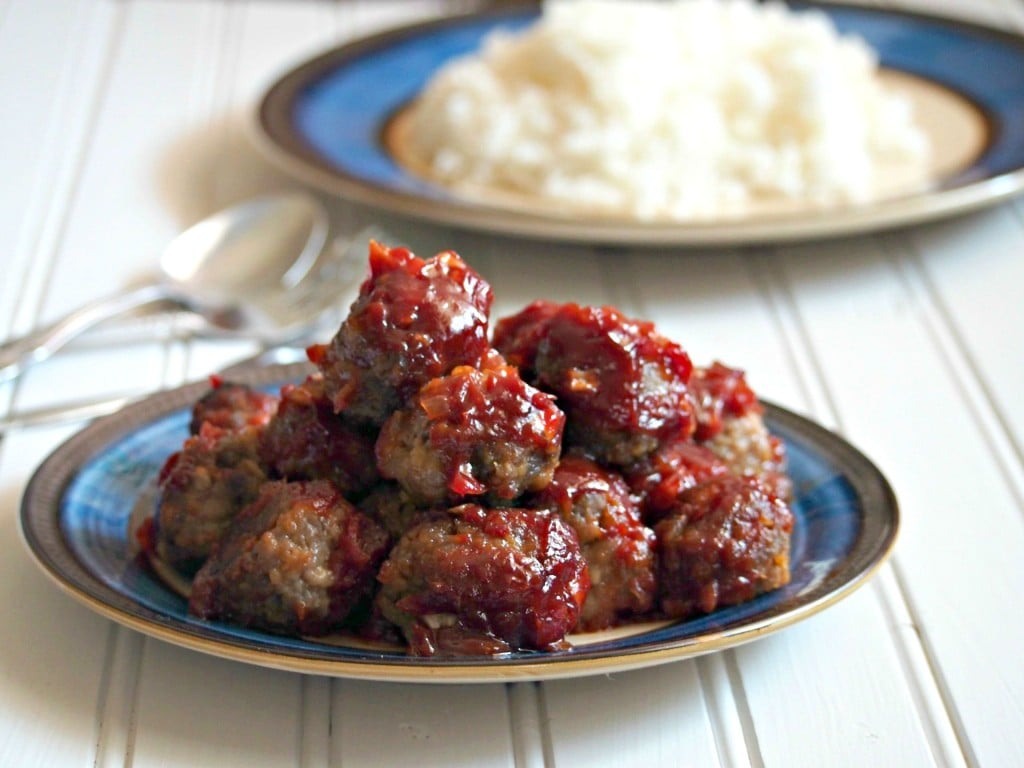
*Three quarters view
The photo of meatballs below is shot in an angle that make it seem like the viewer is seated and looking at the food on the table right in front of him.
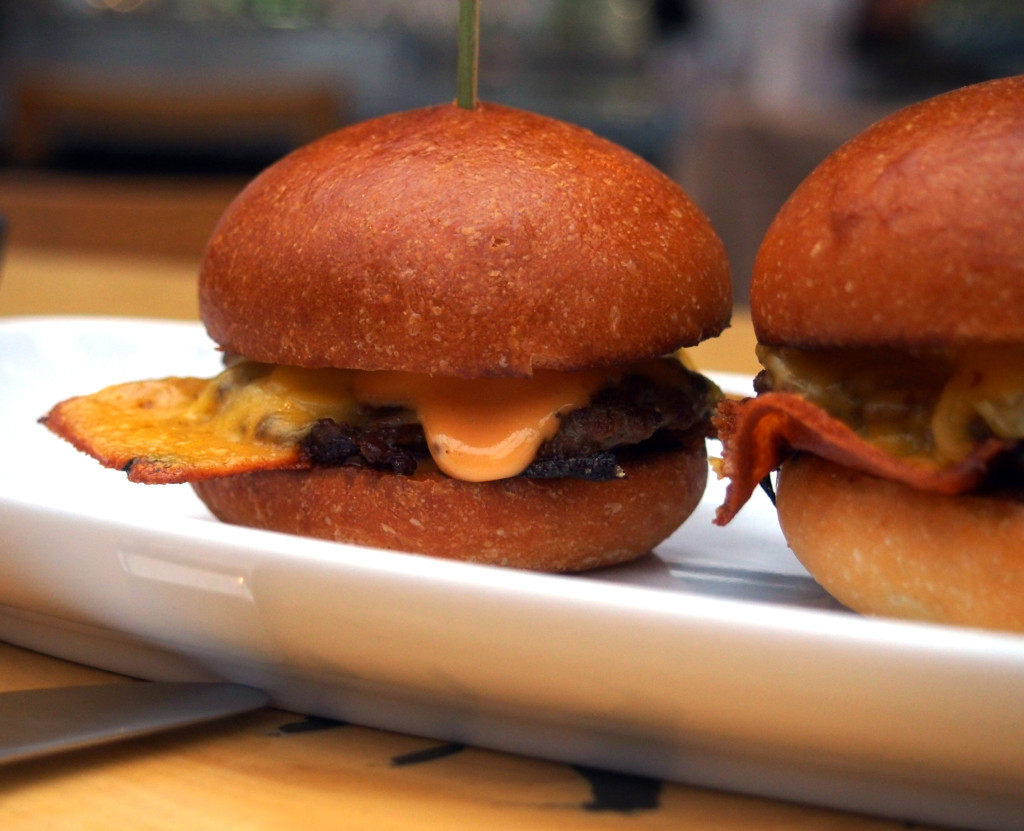
*Eye-level
This photo of sliders is taken on eye -level or straight on. This allows the viewer to see the yummy details between the two burger buns: Melting cheese, patties and the crispy cheese.
Editing Photos
Editing is an essential part of food photography. It is like the finishing touches or the finale before you show your masterpiece out in the open. It provides further enhancement to the photos that may have been lacking at the time the photo was shot. I use Pixlr to edit mine. It is free and very easy to use.
Exposure/ Lighting – I adjust this to add brightness to the photo. Keep in mind though that a photo shot in poor lighting ( lack of natural or artificial light) can not be edited to come out beautifully. Shooting with appropriate lighting is still the best foundation even if editing is available.
Here is an example of before and after edit of exposure , from left to right.
Saturation-I adjust saturation to boost the colors in the photo. It adds more vibrancy and life.
Here is an example of before and after edit of saturation.
There are lots software and online programs for photo editing. Some are free like Pixlr and Picmonkey. Some of the paid ones are Lightroom and Photoshop. I have not used any of the paid ones yet as I find the free ones still working for me. But I am open to try them as I continue to learn in the art of food photography.
Practice
As with anything, practice makes perfect. I am not an expert in Food photography. I am also in the beginning phase, and let me say , in the learning phase. These things I have shared with you are the things I have learned and things I am doing to improve my food photos. These are guidelines that I follow that made me see a difference in the way my photos are turning out.
Food photography is a continuous learning. It is a fun and fulfilling to do and the more you practice, the more it becomes natural to you. My hope is that these will also inspire you to learn more about food photography and to take more food photos.
I hope we all give food the limelight it deserves.
If you are interested in buying the book, tasty Food Photography, you can just click the image for more details:

This post contains affiliate links for products that I use, love and highly recommend.
Thanks so much for the TFP love Sanna. 🙂 We appreciate you. And a big congrats on your photos. They look great!
Thanks a lot too, Bjork!
Great tips! I’m an avid follower of lindsay too. I hope I can attend one of her photography workshops someday.
Loove Lindsay! She is such an inspiration!