
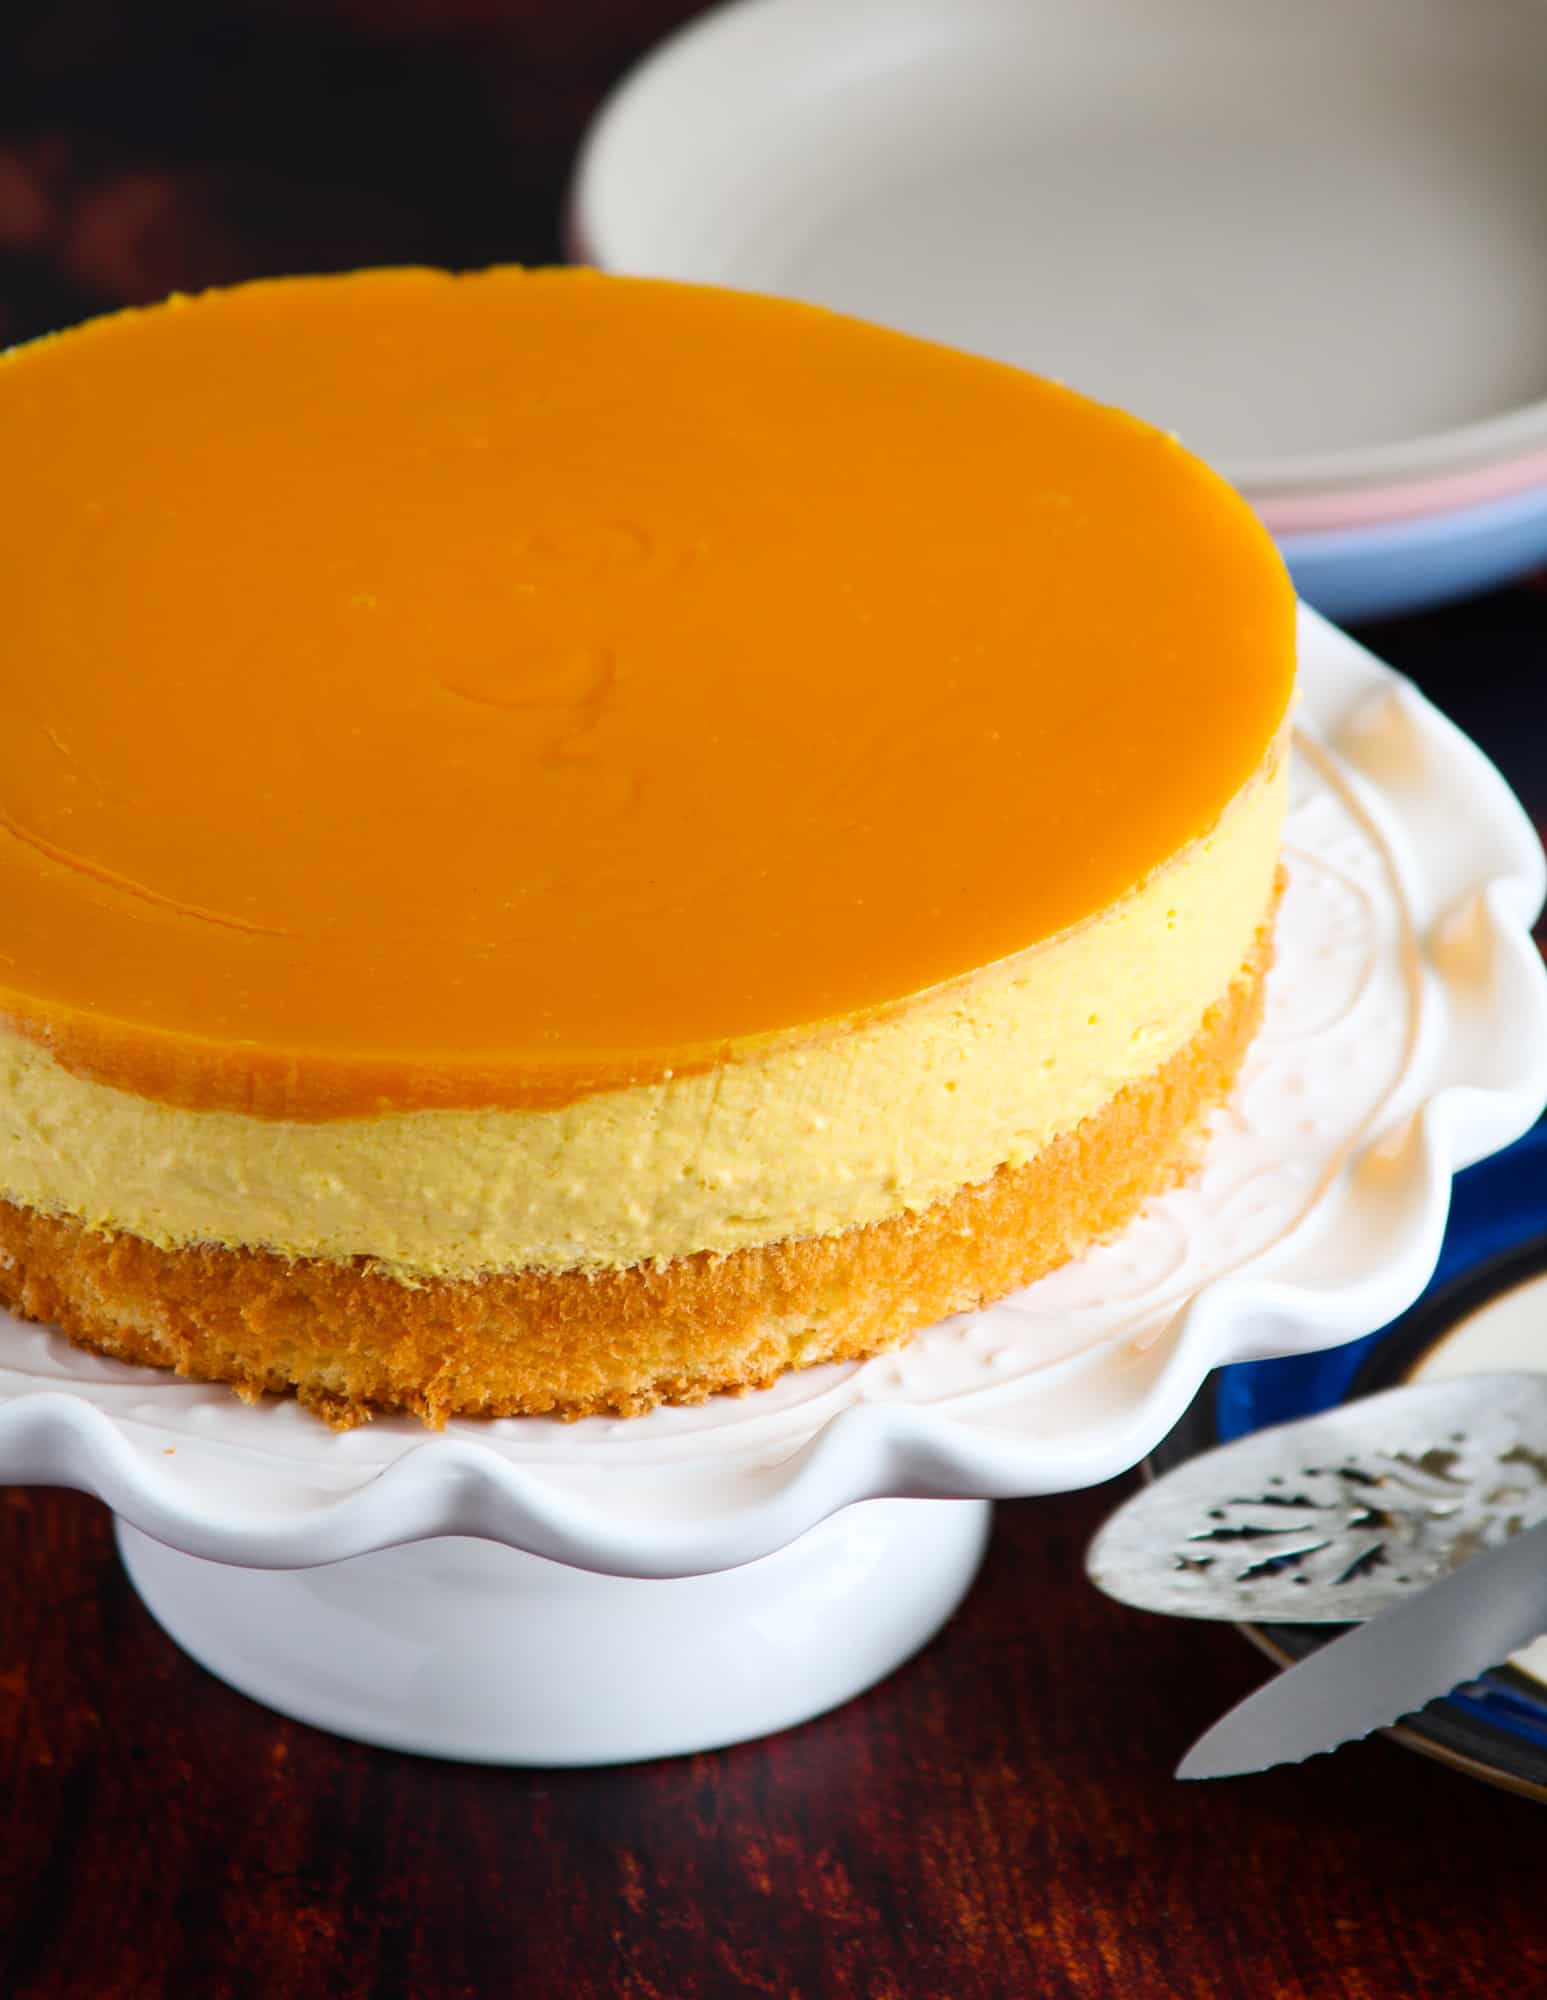
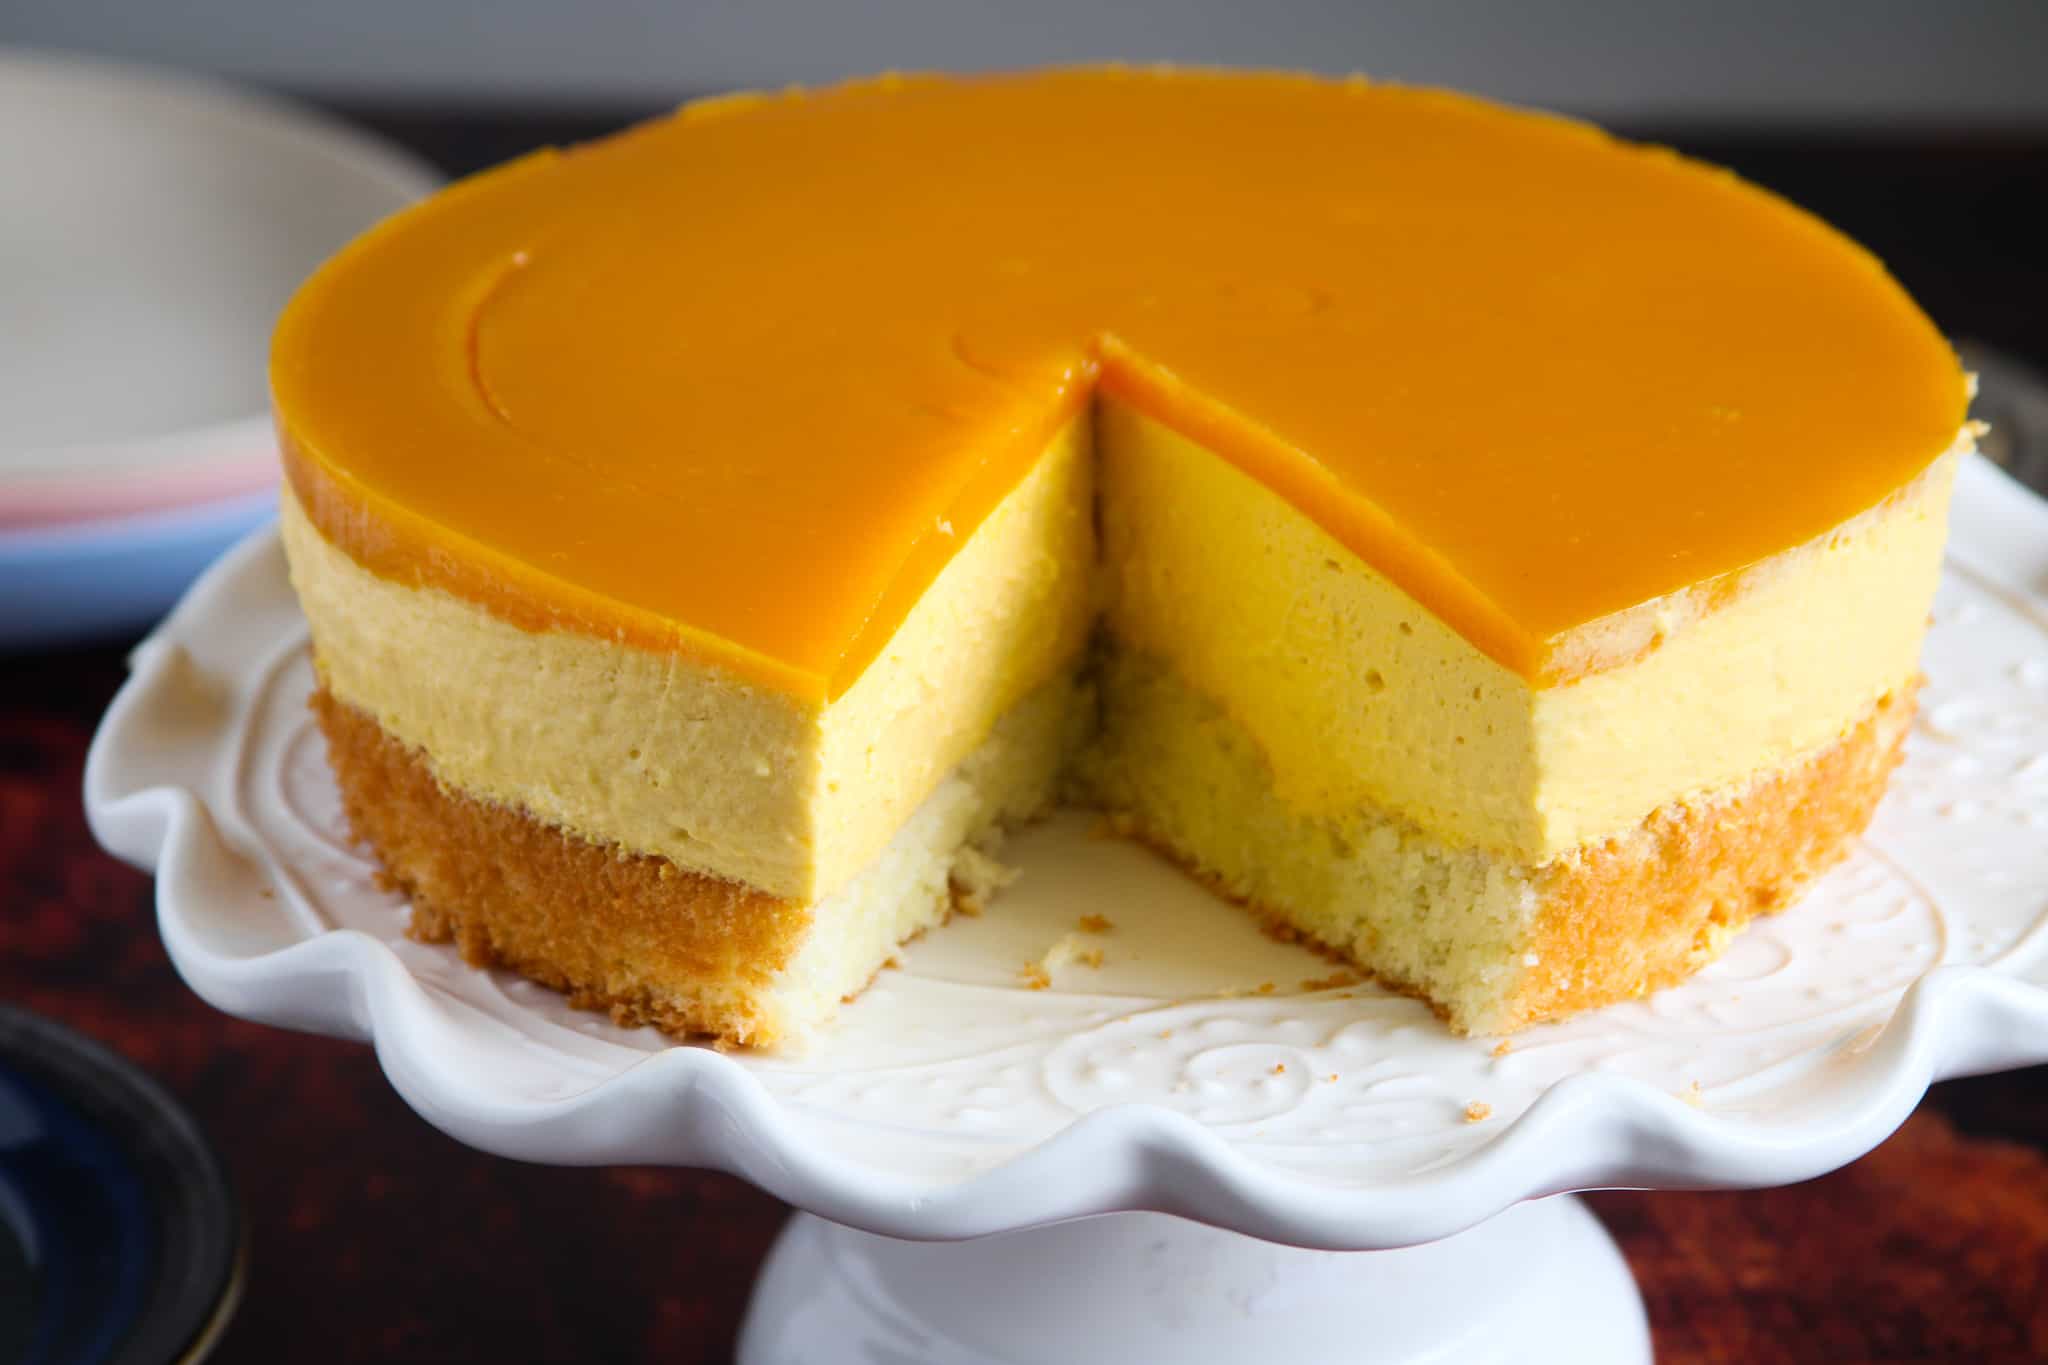
Mango Mousse Cake
Need a mango treat? This Mango Mousse Cake is a decadent cake made of a moist sponge cake topped with a creamy mango mousse, then finished with a sweet mango gel topping. This is your serious mango craving fix that you can make all- year round!
The previous update of this post was July 23, 2021 and is updated on the date above to add recipe annotations regarding the tempering process of both the mango mousse and mango gel.

As mangoes arrive at our house one carton full after another, I get reminded to make this simply elegant Mango Mousse Cake.
It is my way of celebrating the mango season by giving it the limelight it deserves.
Between my father, and my nanay, it will seem that we have a steady supplier of mangoes. We don’t. They just kind of panic buy each time they see a box of nice, plump mangoes in Asian supermarkets.
Canned Mango Pulp
- But here is the thing though, this mango mousse cake, they are not made using fresh mangoes. I used the canned, pureed ones. While you can use fresh mangoes to make this cake, I can’t remember the last time I did so.
- There is hardly any difference between the two, except I get spared from using the blender as an additional step when using the fresh ones. The canned ones are wonderful and tasty as fresh, and the convenience of using them cannot be beaten.
- The ones like Kesar Mango Pulp or Alphonso Mango Pulp are the ones I always use. Note that these mango pulps are different from the mango nectars and mango juices. These canned mango pulp can be found in the Oriental/ Oriental aisle of supermarkets. Again, they are not nectars nor juices. They are mango pulp.
What if I Want to Use Fresh Mangoes?
- But of course, you can! You just need to puree the pulp in a blender. About 6-7 large Alphonso, Manila or Autulfo mangoes are needed in this recipe.
- The goal is to yield 3 cups of puree. Also, since the sweetness of the fresh mangoes varies, you may need to adjust it by adding sugar.
- I do so by stirring the mango puree and the desired amount of sugar over medium heat in a saucepan, just until the sugar dissolves.
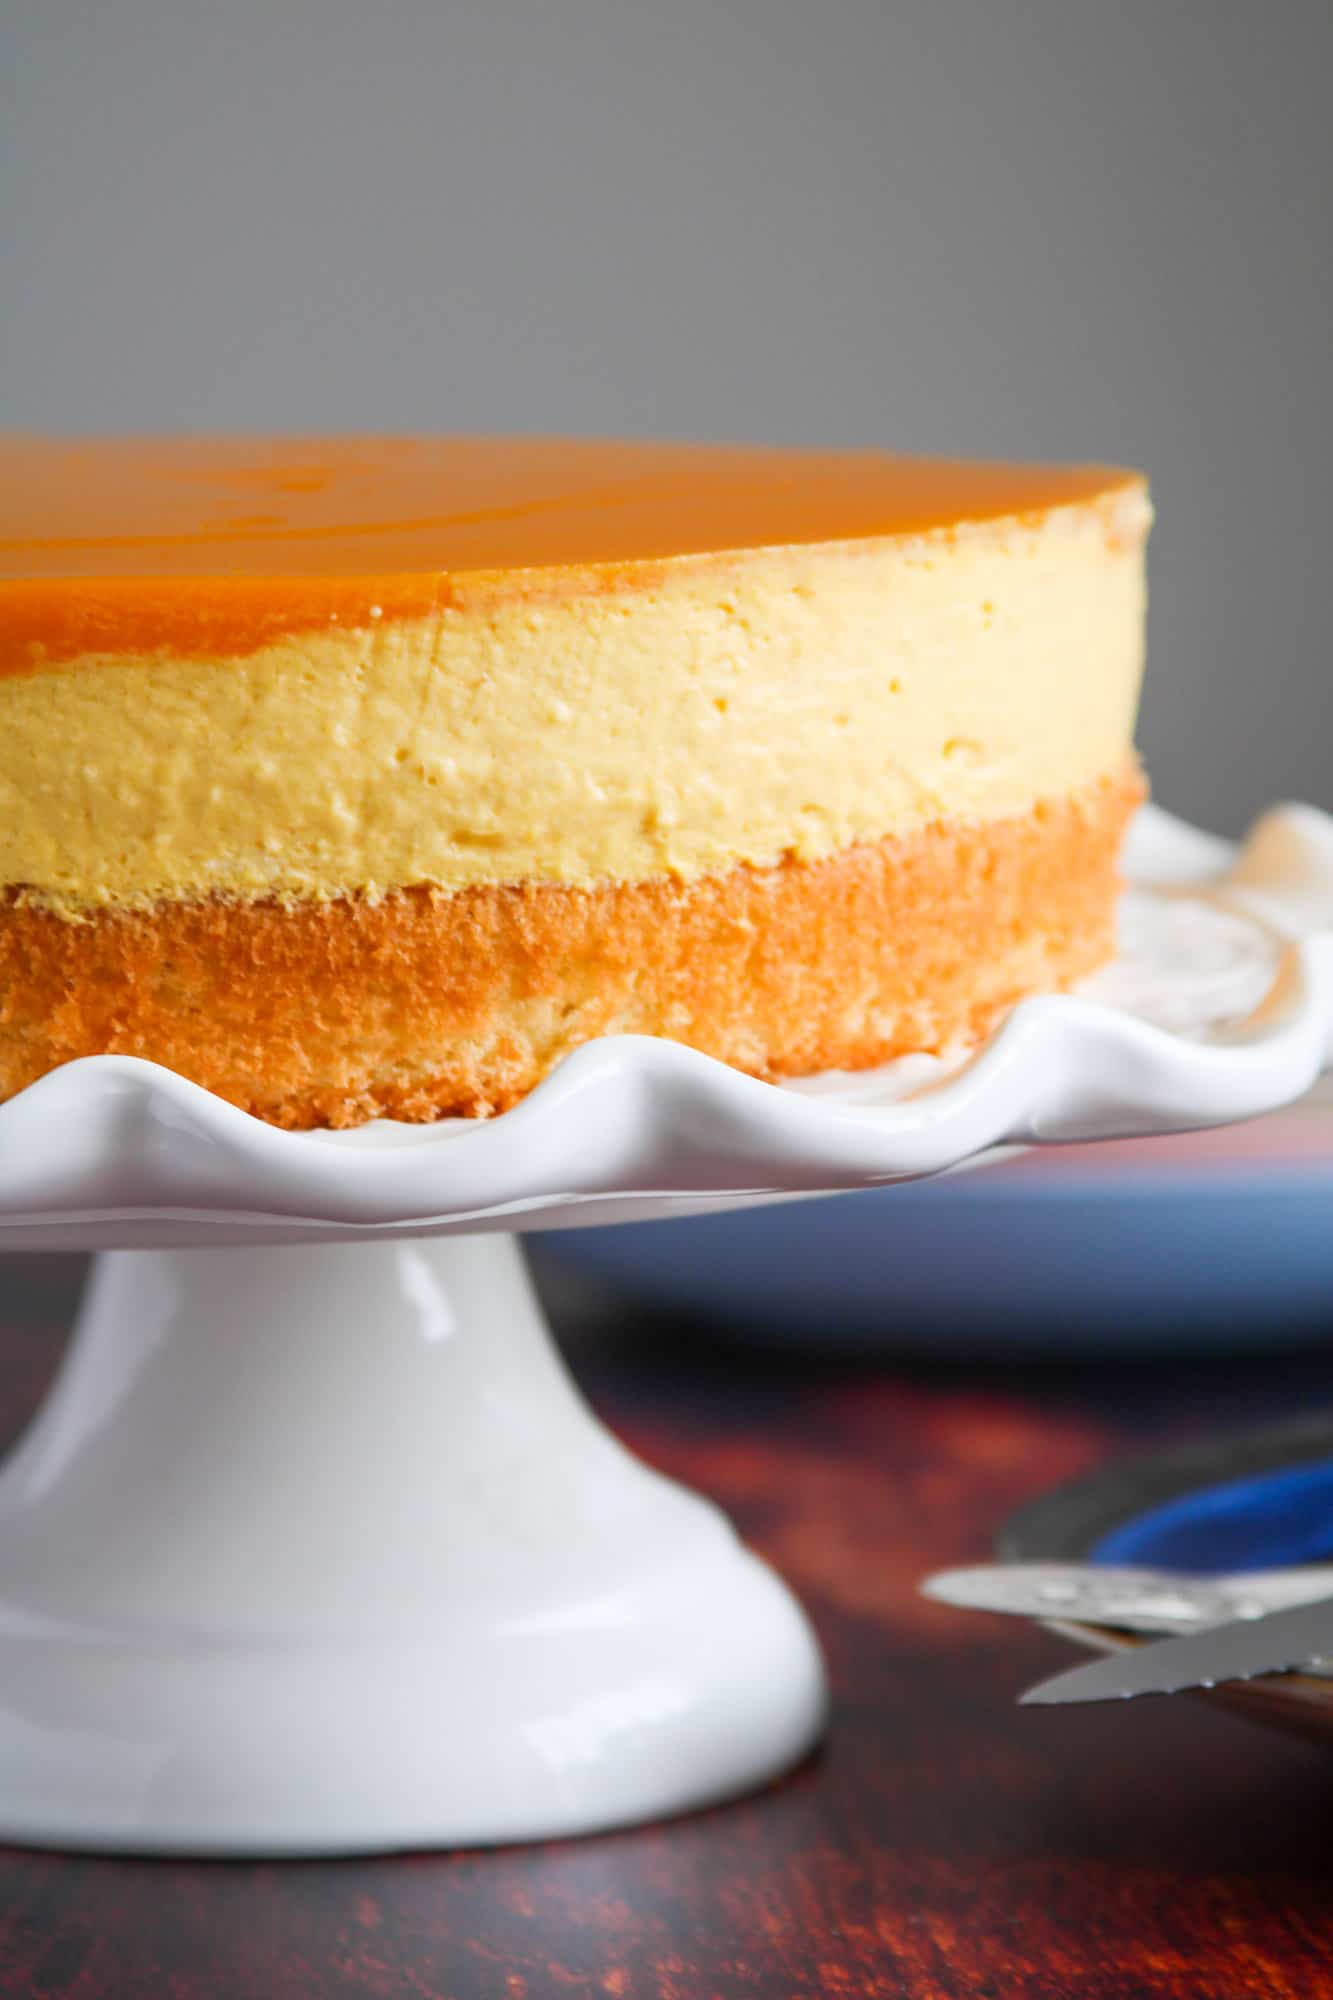
Mango Mousse Cake: The Process
- Make the Sponge Cake
- Make the Mango Mousse
- Make the Mango Gel
Sponge Cake
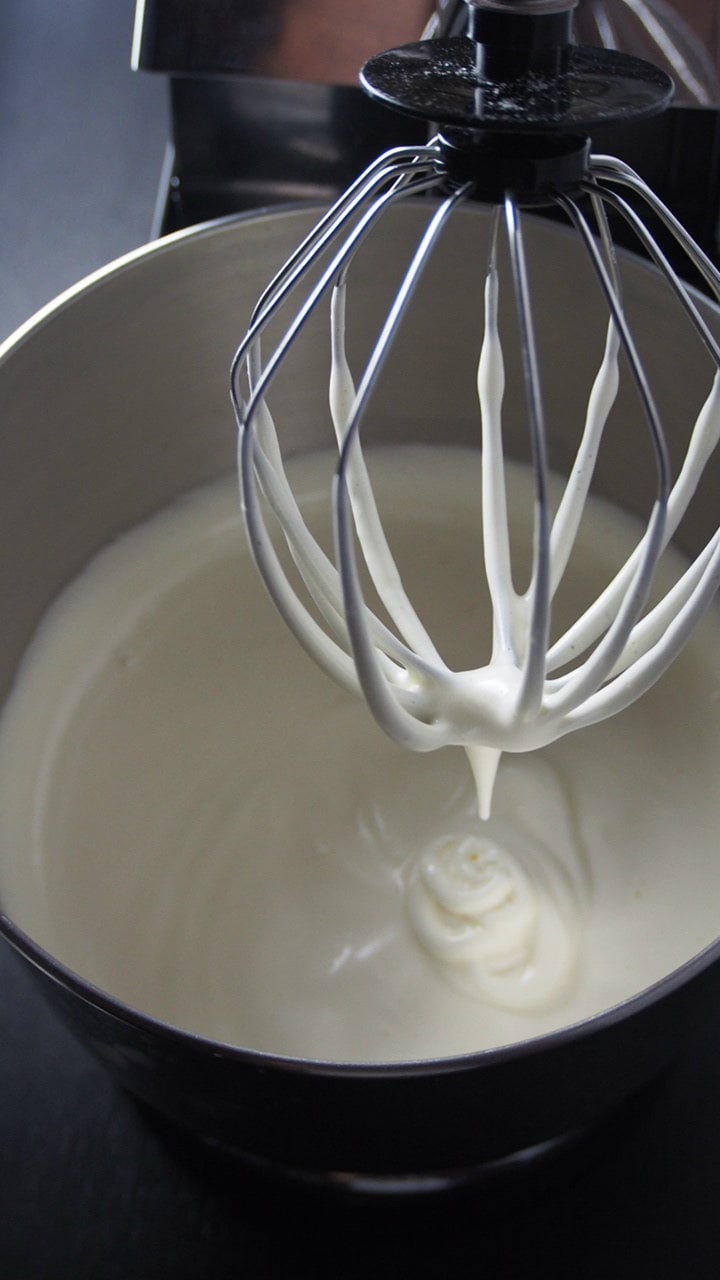
The heart of sponge cakes is the beaten whole eggs. In the bowl of a stand mixer (or handheld mixer), beat the eggs until foamy. Then add the sugar gradually and keep beating for about 7-10 minutes until the mixture is thick and pale.
When you lift up the beater, the batter should drip down and hit the surface and form ribbons that do not sink right away.
Sift the powders ( flour and baking powder) over the egg batter gradually. Fold after each addition until no streaks of flour remain. Always check the bottom of the bowl for pockets of flour that you may have missed.
Pour and scrape the batter into an 8- inch springform pan that is lined with parchment paper at the bottom. Bake at 350 F for 20-25 minutes.
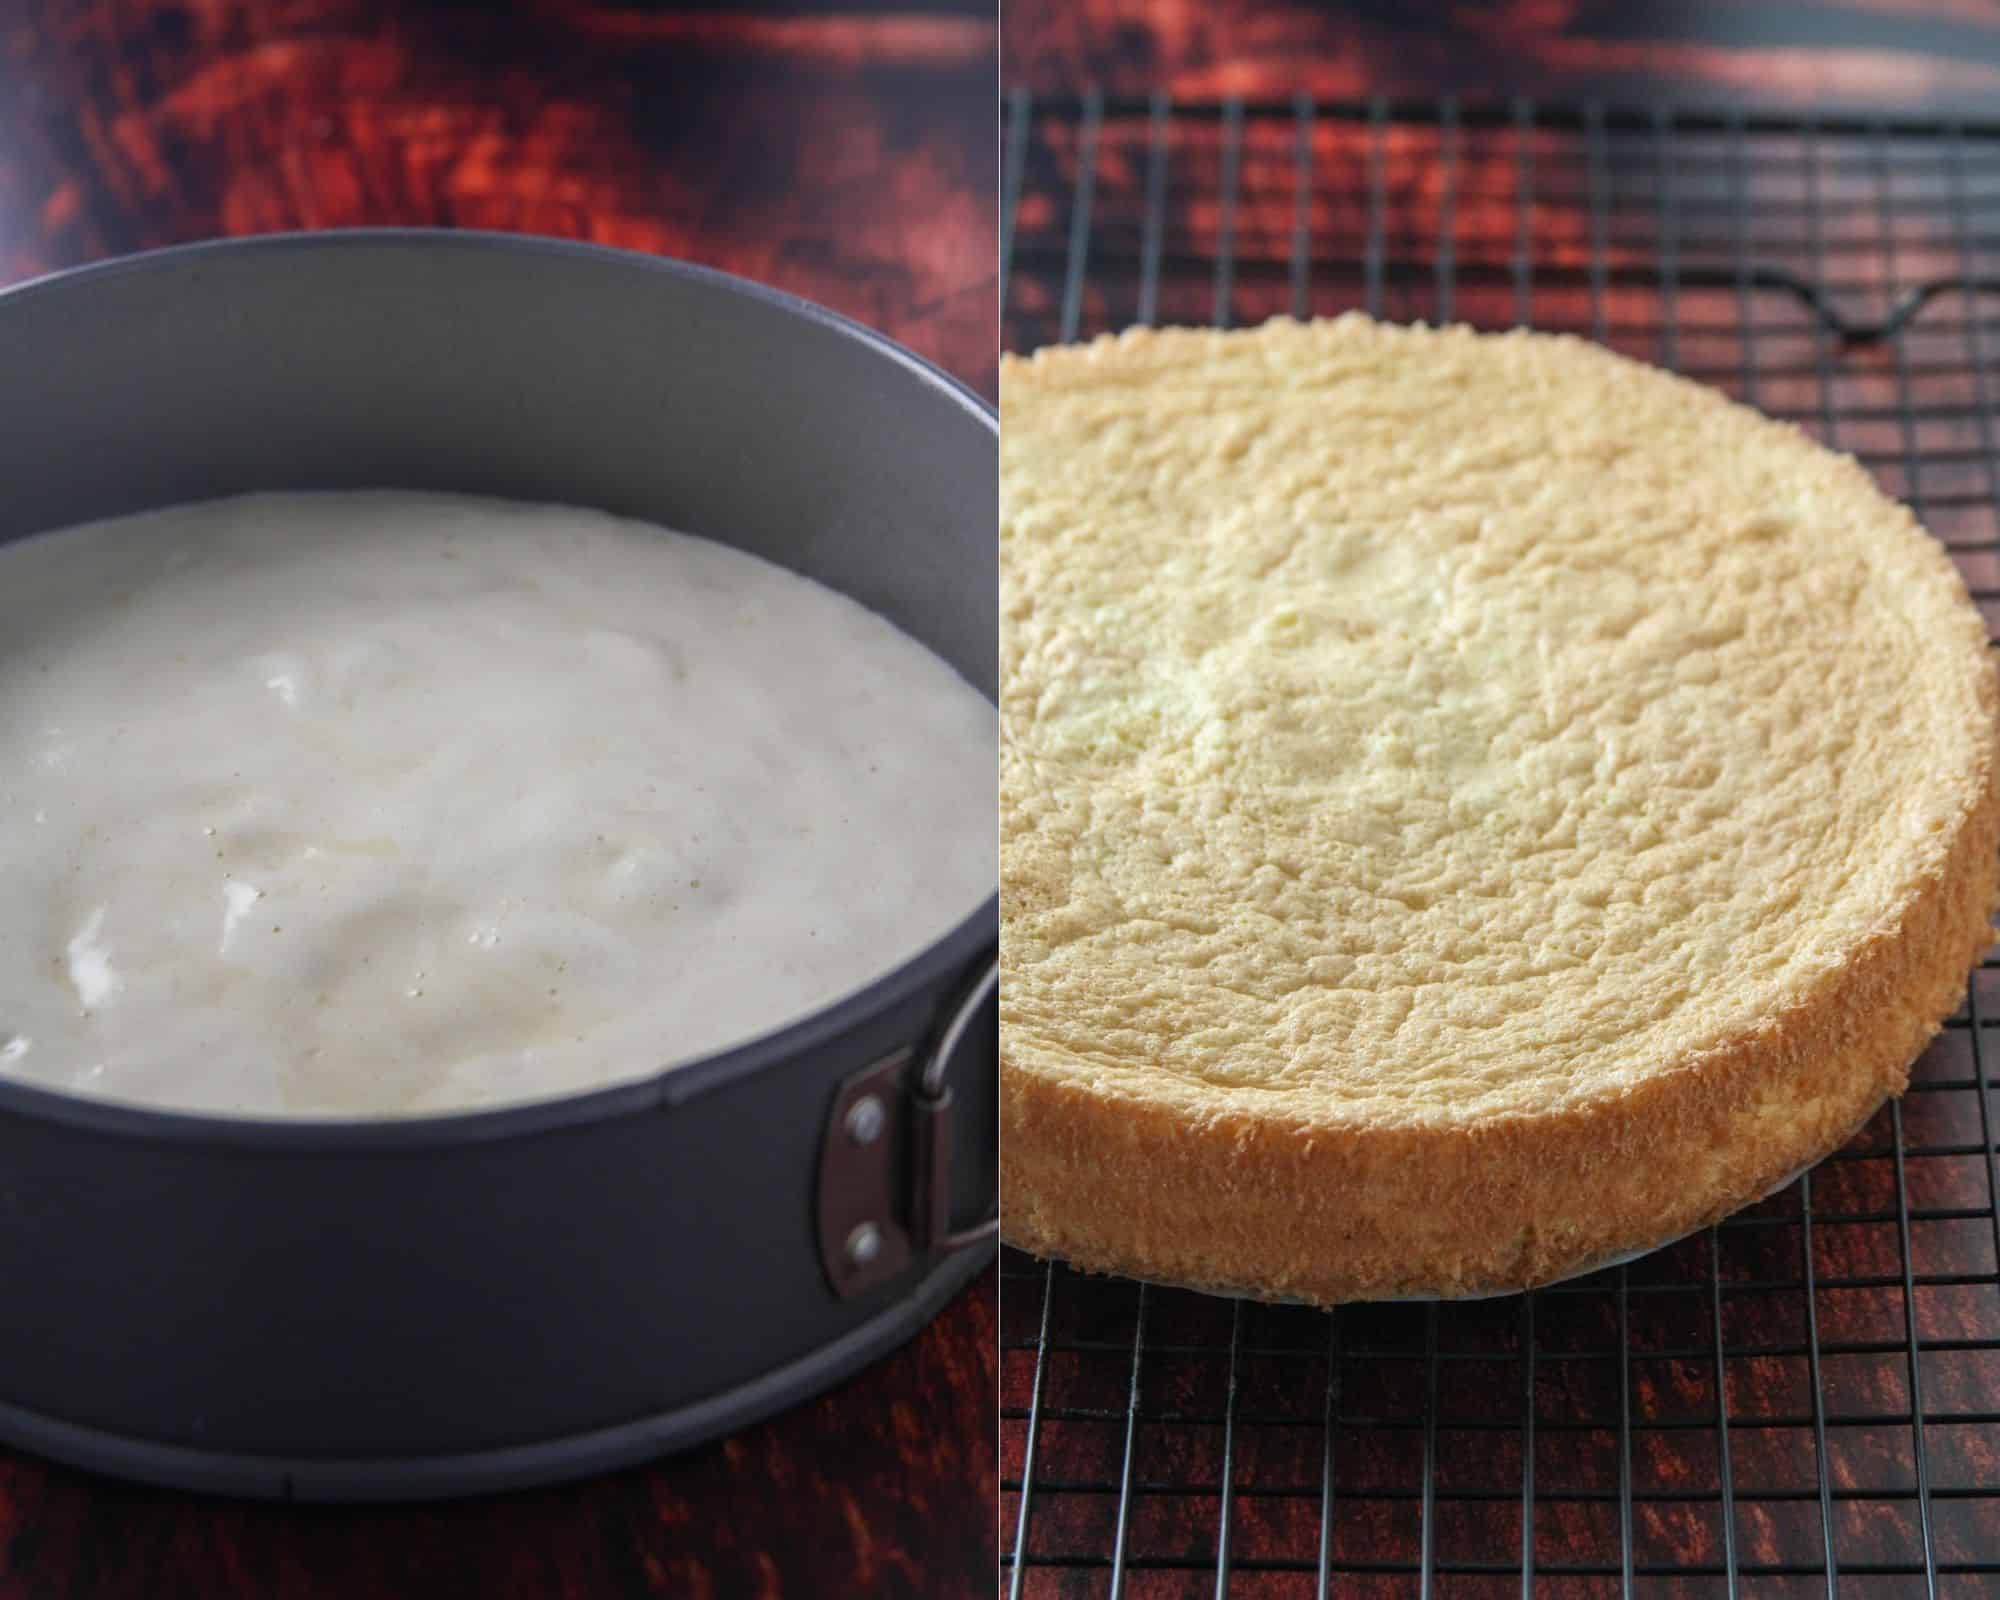
Let the cake cool slightly in the pan. Then unmold it by removing the cake ring and let it cool completely on a wire rack with only the parchment paper attached to it.
Return and enclose the cake in the springform pan and brush the surface with enough stock syrup. Recipe for stock syrup in the recipe card.
steps for making the Mango Mousse: A stabilized whipped cream
- The mango mousse is a mixture of whipped cream and mango puree. For the mixture to set, unflavored gelatin is added to it.
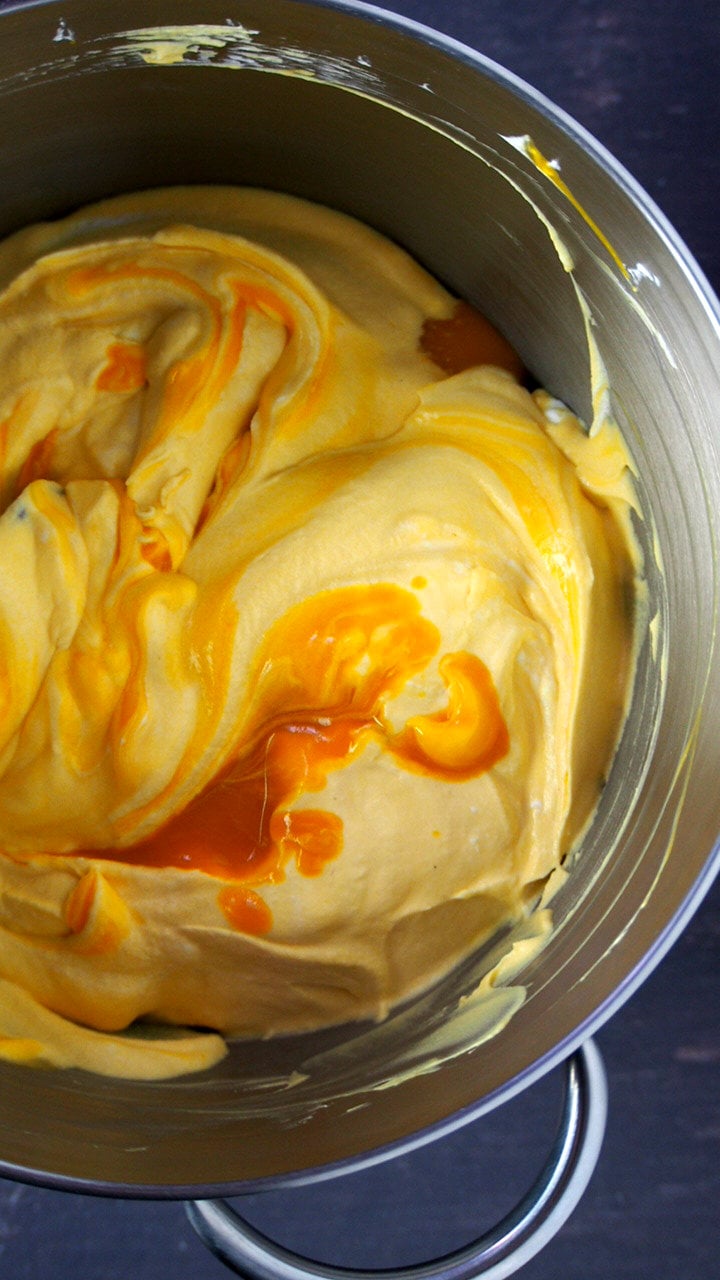
- Whip the cream in the bowl of a stand mixer until it is fluffy and thick. Fold the whipped cream gradually into the mango puree until well combined.
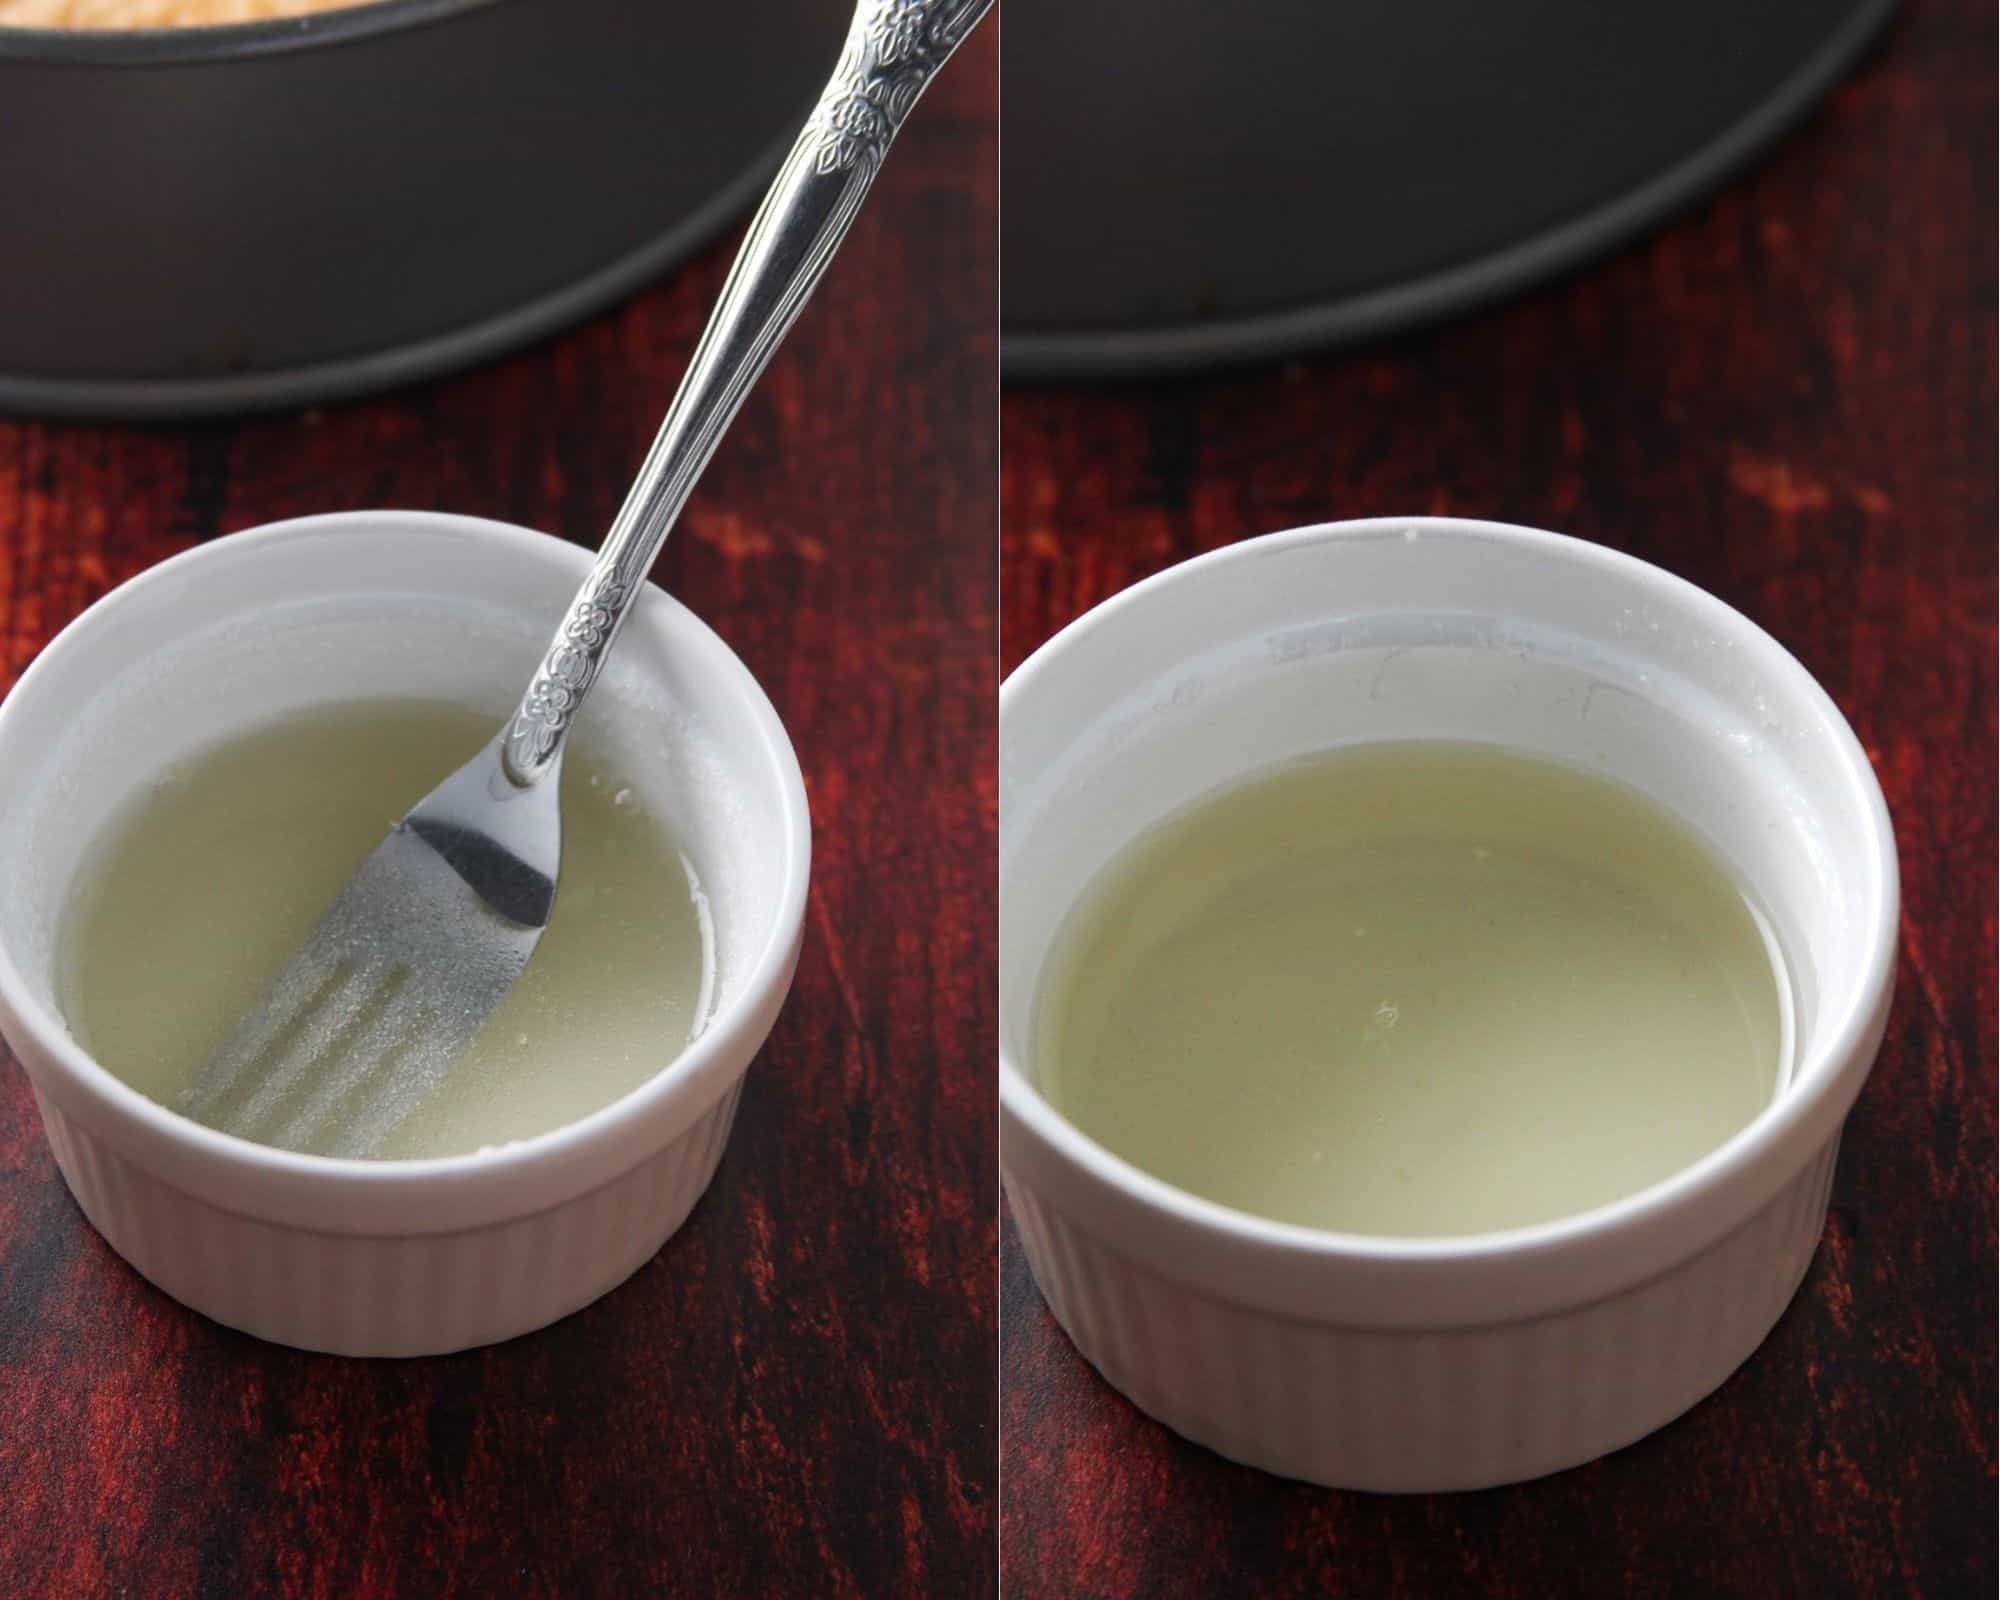
- For the gelatin, stir water and gelatin powder in a small microwaveable bowl until the powders are dissolved. Let this sit for a minute or two. Microwave the mixture for 15 seconds or so, until the mixture is clear and liquidy. Let this cool slightly.
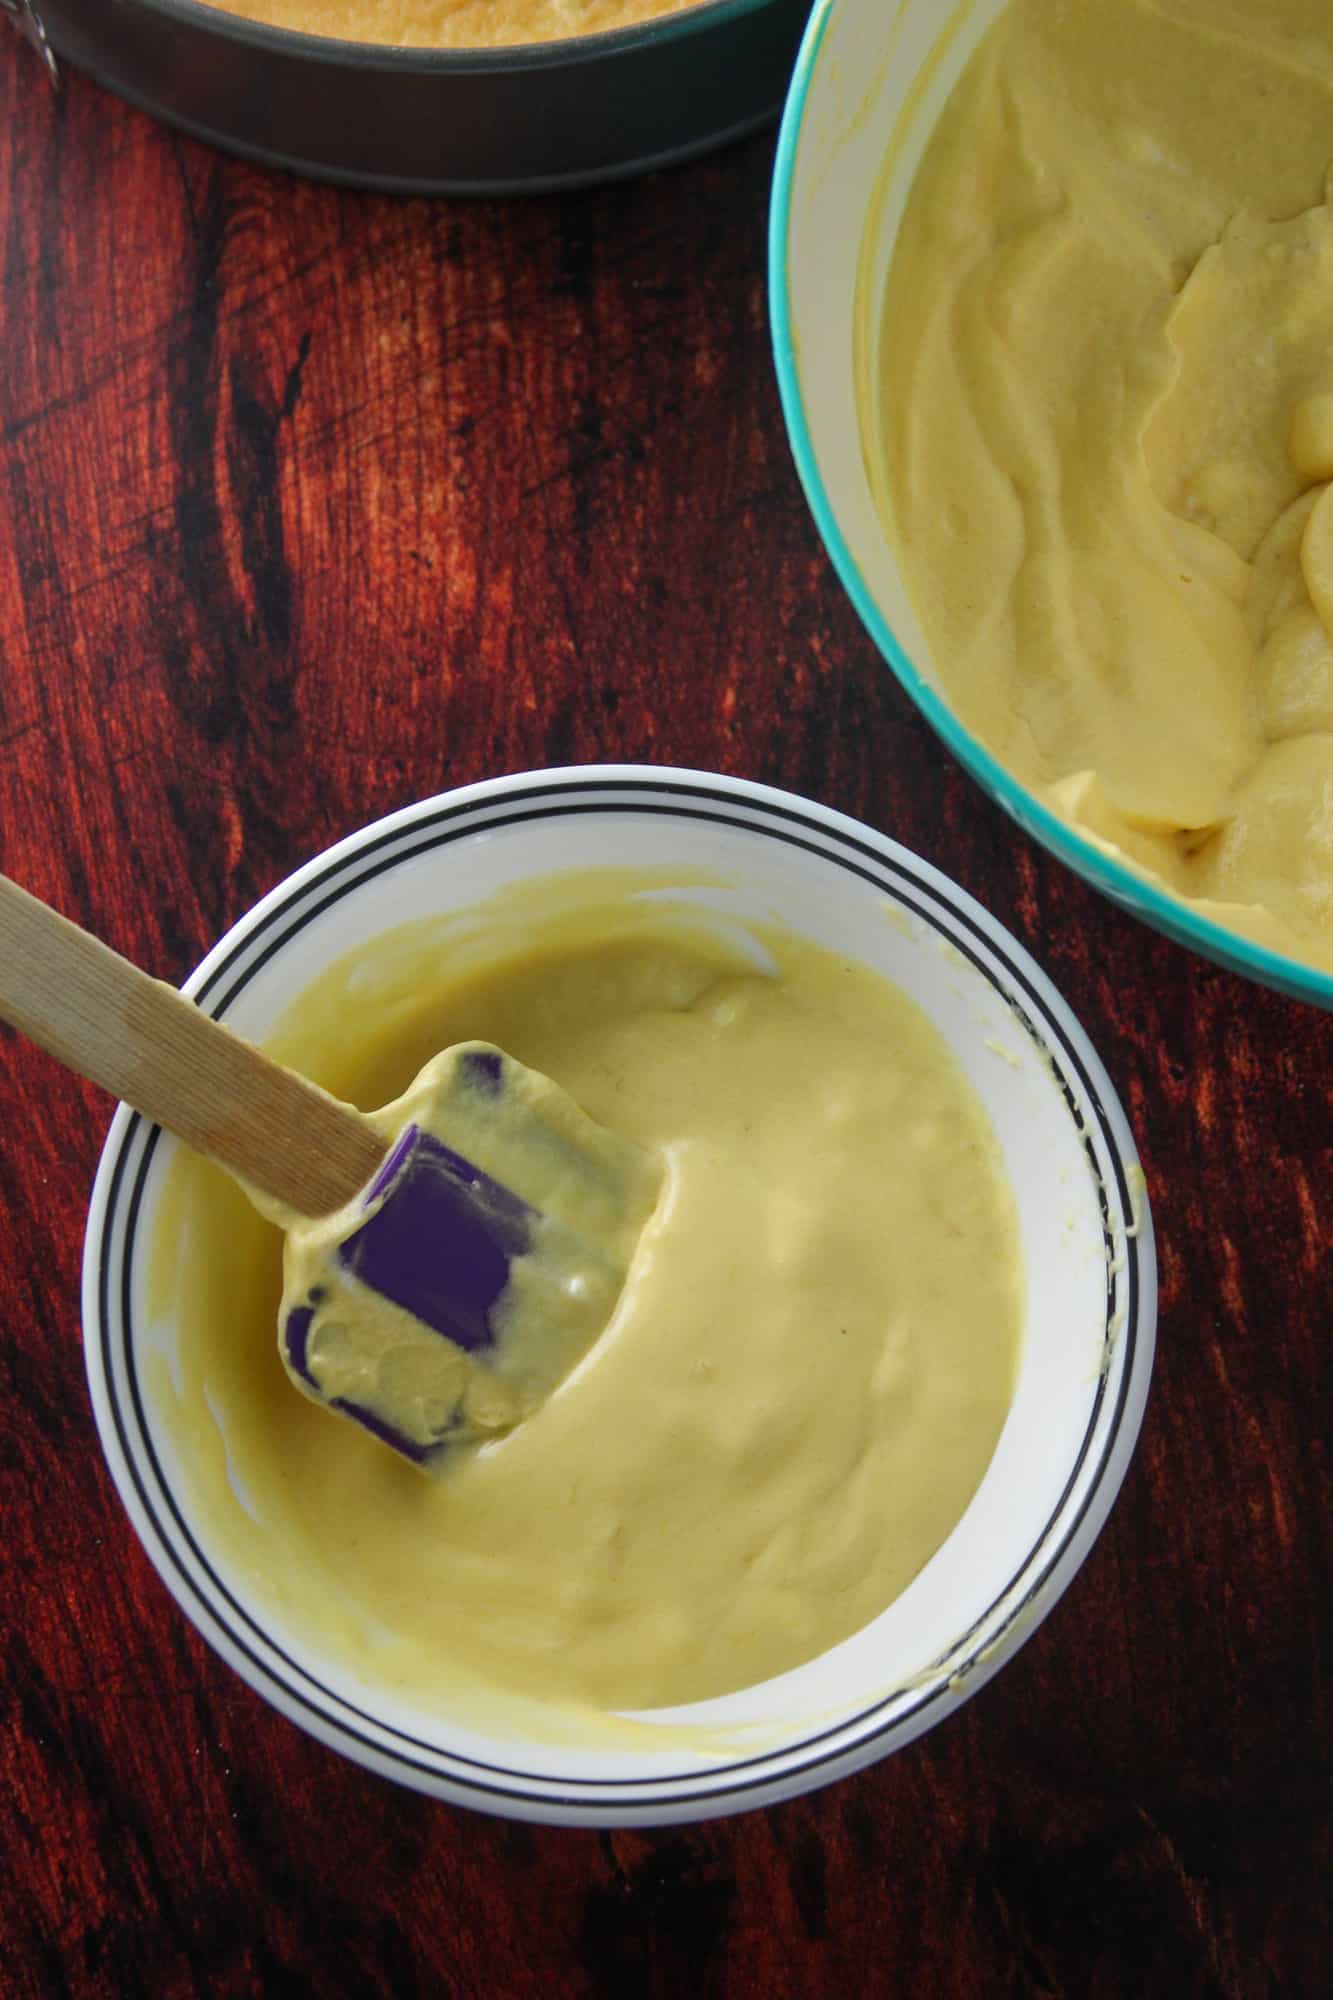
- To add this mixture to the whipped mango cream, first we temper: scoop out about 1/4 cup of whipped cream into a small bowl. Pour the gelatin mixture slowly into the cream while stirring the mixture quickly, constantly and thoroughly. Tempering: Adding a small amount of a component with a different temperature to another component to equalize the temperature difference, then adding that mini mixture of the two back to the main component.
- Then, fold the gelatin-cream mixture back to the whipped mango cream in the bowl and stir well and right away.
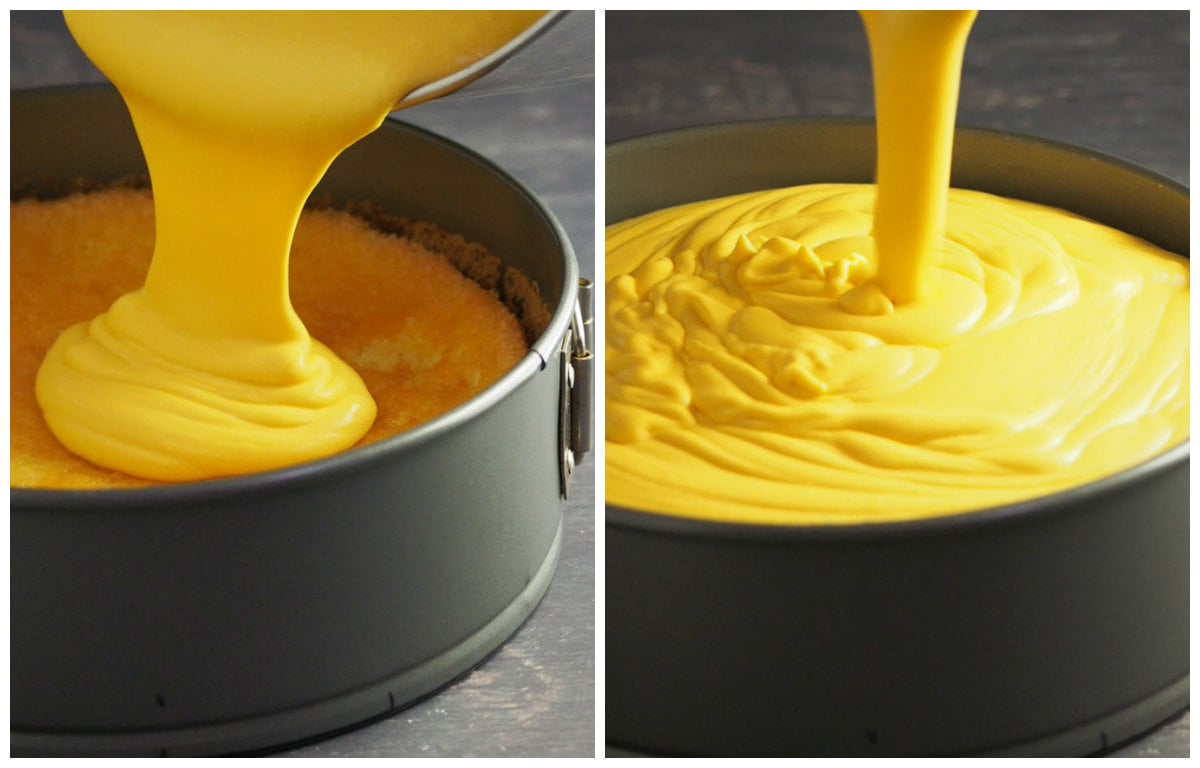
- Pour the mango mousse over the sponge cake. Just pour it away and let the mixture occupy the entire surface. Refrigerate the cake for 8 hours or until the mousse is set.
Mango Mousse Tips
- Lumpy Mango Mousse. The mousse turns lumpy if the hot gelatin mixture is added abruptly to the whipped cream mixture. The hot gelatin mixture solidifies as soon as the cold cream comes into contact with it. To avoid this, the tempering process is included in the instruction. Also to avoid lumps, make sure to cool the gelatin mixture slightly after microwaving it.
- During tempering, pour the gelatin mixture slowly into the small amount of cream while stirring it in constantly and quickly into the cream.
Mango Gel Topping
- Stir sugar together sugar and mango puree. You can add more sugar (or less) if you prefer. The mango gel is also set using gelatin powder.
- Sprinkle the unflavored gelatin over the water and let the mixture stand for half a minute. Microwave the mixture until it is clear, about 10 seconds or so. Cool slightly.
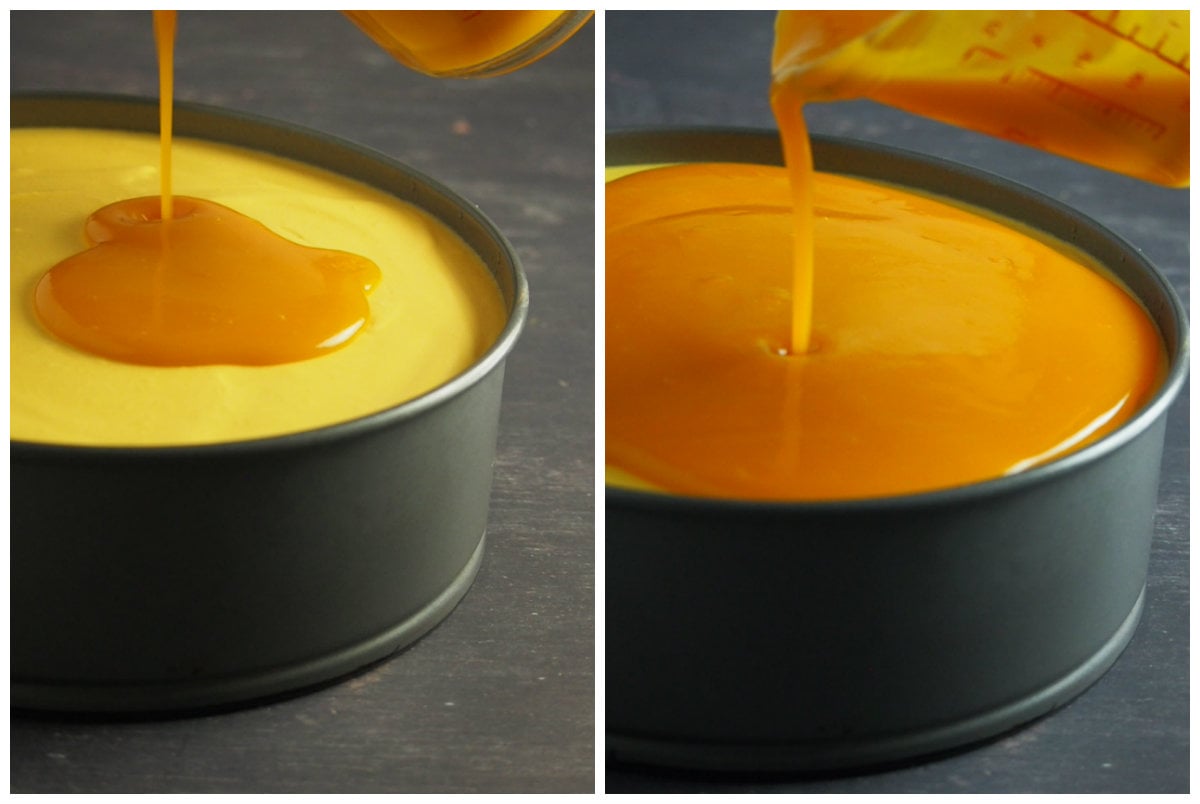
- Again temper. Scoop out about 2 tablespoons of the mango mixture and place it in a small bowl. Slowly pour the gelatin mixture to the small amount of mango puree while you stir them together quickly with the other hand. Stir the mixture back to the entire mango puree until smooth. Gently pour over the mango mousse. Refrigerate the cake for at least 2-4 hours or until set.
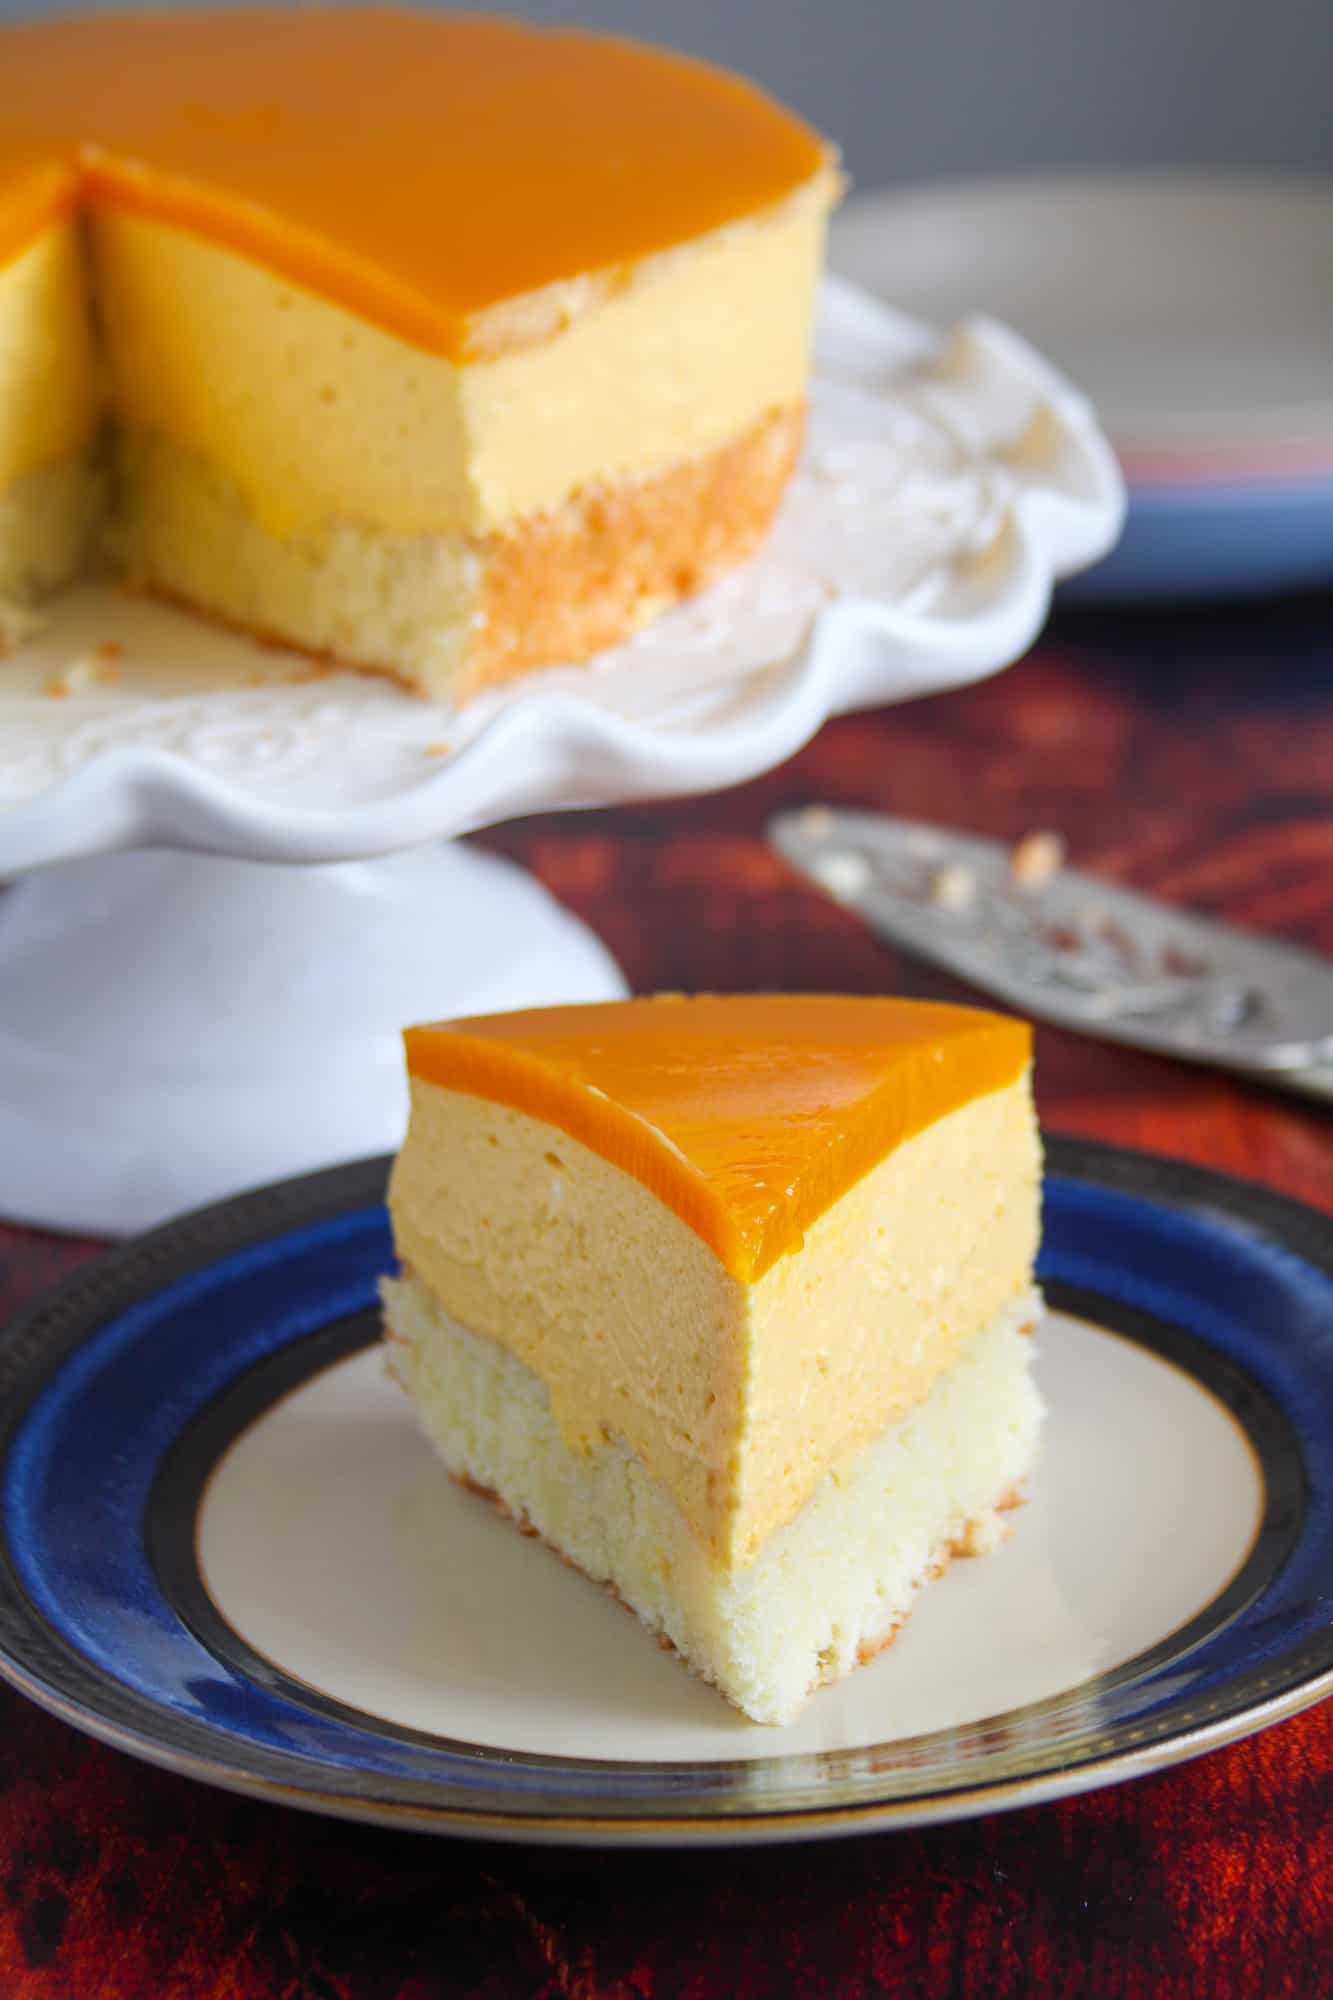
So as I feast on the fresh mangoes that abound in our house, I also indulge in this mango mousse cake. You just can’t have too many mangoes.
They are wonderful. Enjoy this cake!
If you want more cake recipes, check these out:
- Raspberry Cake with Chantilly Cream
- Chiffon Cake with Pineapple Glaze
- Mango Roll Cake
- Blueberry Cheesecake
- Apple Streusel
- Mango Chiffon Cake with Mango Swiss Meringue Buttercream

Mango Mousse Cake
Need a real mango treat? This Mango Mousse Cake is a decadent cake made of a moist sponge cake topped with a creamy mango mousse, then finished with a sweet mango gel topping. This is your serious mango craving fix!
Ingredients
For the Sponge Cake
- 3 large eggs at room temperature
- 1/2 cup sugar
- 1/2 cup all-purpose flour
- 1/4 tsp baking powder
For the Mango Mousse
- 1 and 1/2 cups heavy cream
- 3-6 tbsp of icing sugar
- 2 cups of Mango Puree ( canned ones)
- 1 sachet of Knox unflavored gelatin powder ( 7 grams)
- 50 ml water
For the Mango Gel Topping
- 1 cup mango puree (canned)
- 3-6 tbsp of sugar (or more)
- 1 and 1/2 tsp Knox unflavored gelatin powder
- 7 tsp water
For the Stock Syrup
- 1/4 cup water
- 1/3 cup of sugar
Instructions
Make the Sponge Cake
- Preheat oven to 350 F. Grease the bottom of an 8-inch round cake pan and line it with parchment paper. In a bowl of a stand mixer, beat the eggs for about a minute until foamy. Add the sugar gradually and continue to beat until the eggs have tripled its volume. You will know when it is ready if you lift the beater and the batter falls back on the surface forming ribbons that do not sink in right away. This should take about 7-10 minutes.
- Combine the flour and baking powder and sift this mixture over the egg batter gradually, folding gently but thoroughly after each addition using a rubber spatula. Check the bottom part by scraping from under to make sure that no streaks of flour remain.
- Pour and scrape the batter into the prepared pan and bake at 350 F for 20-25 minutes, or until a toothpick inserted at the center of the cake comes out clean. The cake is lightly golden.
- Let the cake cool slightly in the pan, then unmold and transfer it into a wire rack, with only the parchment paper attached to it. Let it cool completely. Once cool, remove the parchment backing and return the cake back into the pan. Replace the cake ring of the springform pan to enclose the cake once again.
- Brush the surface of the cake with just enough stock syrup. You do not need to use up the entire stock syrup. I am often left with about 1/2 to 1/4 of the entire amount. You can save the rest for use with desserts, or for drizzling on fruits. Store it in the fridge, covered.
Make the Mango Mousse
- Whip the heavy cream with the icing sugar until stiff peaks form using a stand mixer or a hand-held mixer. Fold the whipped cream gradually into the mango puree until the mixture is uniform in color.
- Bloom the gelatin: place 50 ml water in a small microwavable ramekin or bowl. Sprinkle the gelatin powder over the water. Stir until the powders are dissolved. Let the mixture stand for about a minute or so. Heat the mixture in the microwave for 15 seconds until it is clear and liquidy. You can heat for an additional 5 seconds at a time if necessary. Let this cool slightly.
- Temper the Cream. To combine the gelatin and mango whipped cream, first scoop about ¼ cup of the whipped cream out into a small bowl. Slowly pour the gelatin mixture into the small amount of cream while you stir them together vigorously with your other hand. Quickly stir in the gelatin-cream mixture back to the rest of the whipped mango cream in the bowl until well-blended.
- Pour the mousse over the cake in the pan, letting the mixture fill up the entire surface. Place the pan in the fridge for 8 hours or until the mousse is set. You do not need to cover it.
Make the Mango Gel Topping
- Stir sugar in the mango puree. You can add more sugar (or less) if you prefer.
- Again bloom the gelatin. Place water in a small microwaveable ramekin or bowl. Sprinkle the unflavored gelatin over the water and stir until dissolved. Let the mixture stand for half a minute. Microwave the mixture until it is clear, about 10 seconds or so. If necessary, microwave for an additional 5 seconds at a time.
- Temper again. Scoop out about 2 tablespoons of mango syrup into a small bowl. Slowly pour the gelatin mixture into the small amount of puree while stirring it vigorously together with your other hand. Pour back the mixture to the rest of the mango syrup in the bowl and stir well. Gently pour over the mango mousse. Refrigerate the cake for 2-4 hours or until the gel is set.
Stock Syrup
Boil sugar and water until syrupy. Turn off the heat immediately and transfer to a jar. Refrigerate until needed.
Notes
The Mango Puree that I use are canned ones. They are called Mango Pulp and the type I use is called Kesar Mango Pulp.
Recommended Products
As an Amazon Associate and member of other affiliate programs, I earn from qualifying purchases.


Nutrition Information:
Yield: 10 Serving Size: 1Amount Per Serving: Calories: 325Total Fat: 6gSaturated Fat: 3gTrans Fat: 0gUnsaturated Fat: 2gCholesterol: 69mgSodium: 40mgCarbohydrates: 66gFiber: 1gSugar: 60gProtein: 4g
Values are approximate.


Hi Sanna,
How many grams is one of your Knox gelatin packets?
I found ones that are 7g/packet but want to make sure that it’s the right amount for the mousse recipe.
I was worried bc 1.5 tap is a bit over 7g which is a bit more than one packet for the gel topping!
Thank you.
That’s right, 1 packet is 7 grams. 🙂
Hi
I followed exactly what’s written and my mousse has come out really nice. Really well written and delicious recipe. Thank you so much!
I am so happy you loved it, Simi!
Hello, can i use agar agar instead of gelatin?
Hello there! Unfortunately, I have not tried using agar agar so I cannot telll exact amount to be used. 🙂
Made this as instructed and turned out very good. Do you recommend adding more gelatin to set it a bit more? Mine was pretty set but want it a bit firmer so it stays together better after being cut.
Hello there Tracy! You can definitely add a bit more gelatin for a firmer set. I am so glad you liked this!
Followed all the instructions but the mousse sadly did not set, the texture was grainy rather than smooth, and the taste was slightly off resulting in a flat tasting cake. 🙁
I just finished making this and it’s in the fridge now. The cake smelt like omelette. Is it really only 1/2 cup of flour?? Think it should have been 1 and 1/2 cup. So much effort may have gone to waste.
I made this just as written & it was awesome. Will be making again & again. Thank you!
Hi Alma! I am so happy that you loved it!
Do i boil the sugar and water for the stock syrup?
Hello Lani! Yes, boil the sugar and water until the sugar is dissolved 🙂
Hi Sanna i try your recipe Mango sponge mousse cake, really delicious everyone loves it. Thank you so much.
Im in the process of making this!!! Didn’t realise it would take 16 plus hours . Also I. Whipped the cream too much so my mango mouse is a little lumpy. Looking forward to completing it and eating it still
Hello Sofina! I hope everything went well for you 🙂
hello, i am using sheet gelatine, any advice on quantities?
thank you!
Hello Roxy! I wish I could help but unfortunately, I have not tried using sheets gelatines yet. 🙂 A thread on the web says that one pack of powdered gelatin is equal to three sheets. so use three sheets for the mouuse. and 1 and 1/2 sheets for the gel. I hope that helps!
https://cooking.stackexchange.com/questions/43794/how-much-powdered-gelatin-to-one-gelatin-leaf
Hi
What about butter? I don’t see it in your recipe
Hi Divya! There is no butter in the recipe. 🙂
At what point do you add the icing sugar? Is not mentioned in the recipe.
Thank you Minushi! I edited the recipe as needed. You will add the icing sugar to the heavy cream and whip them together until they form firm peaks.
Thank you!
The mousse did not set! Any advise or idea why? Thank you
Hello Sue. I am sorry to hear it didn’t turn out so well. Did you try chilling it for more than 8 hours?
I made this cake and the flavor was great but the sponge cake was kind of tough/dry. Is the stock syrup supposed to add moisture?
Hello, Michelle. I am so sorry it did not turn out as moist as you’d like. Yes, the stock syrup is supposed to add moisture to the cake. you can try adding more of it the next time.
Loved this recipe. Thank you so much!
Thank you so much! I am so glad that you liked it:)