
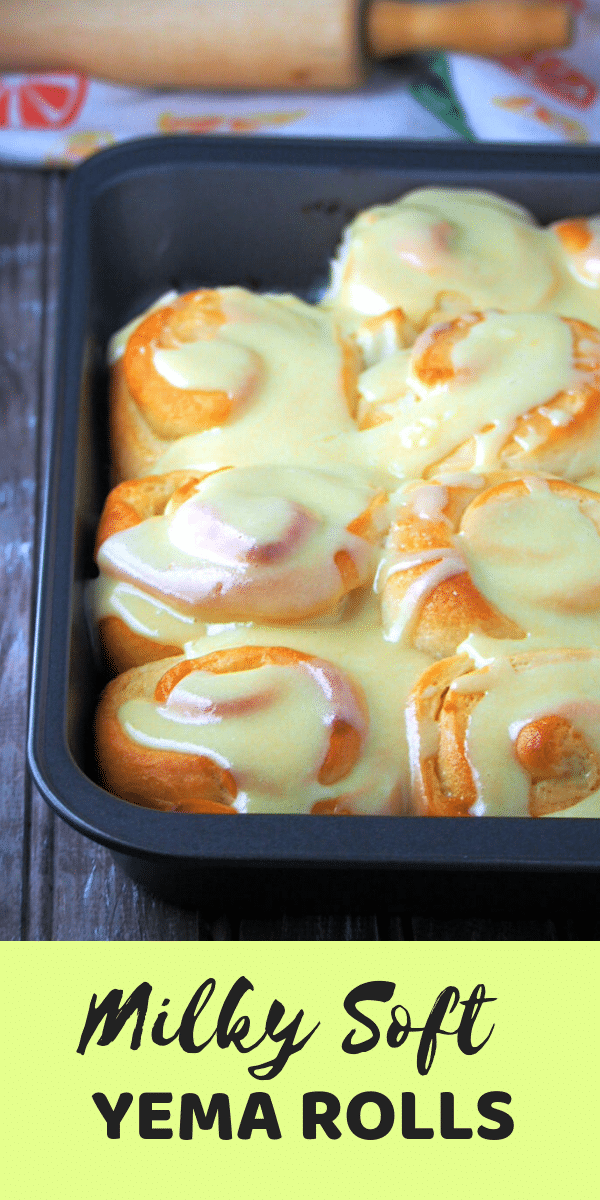
Yema Rolls ( Bread Rolls with Condensed Milk Icing)
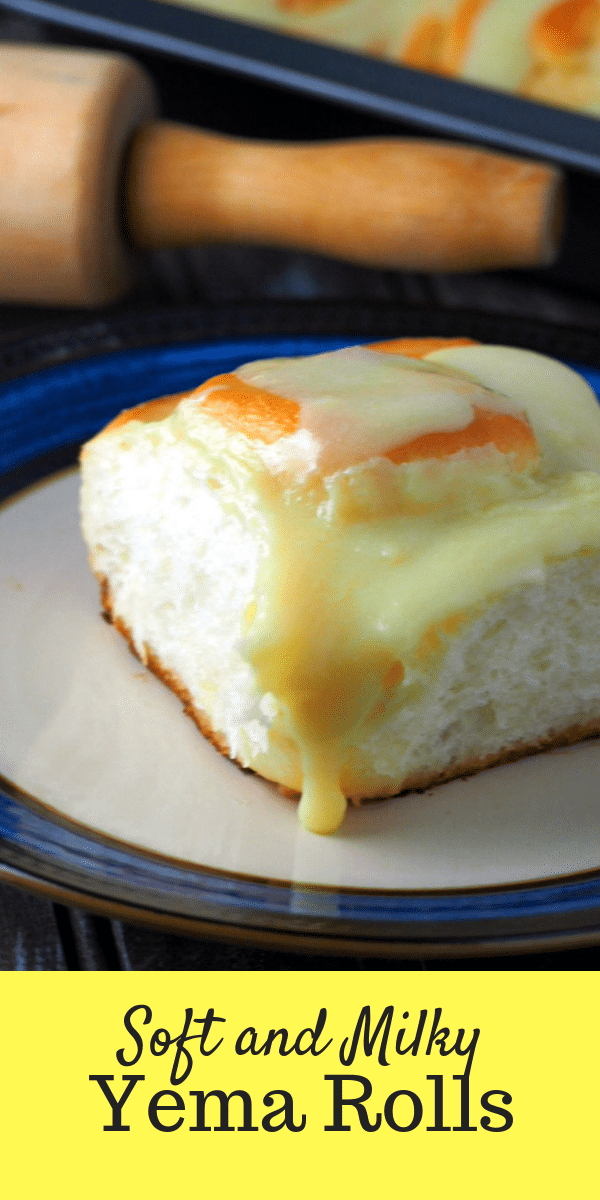
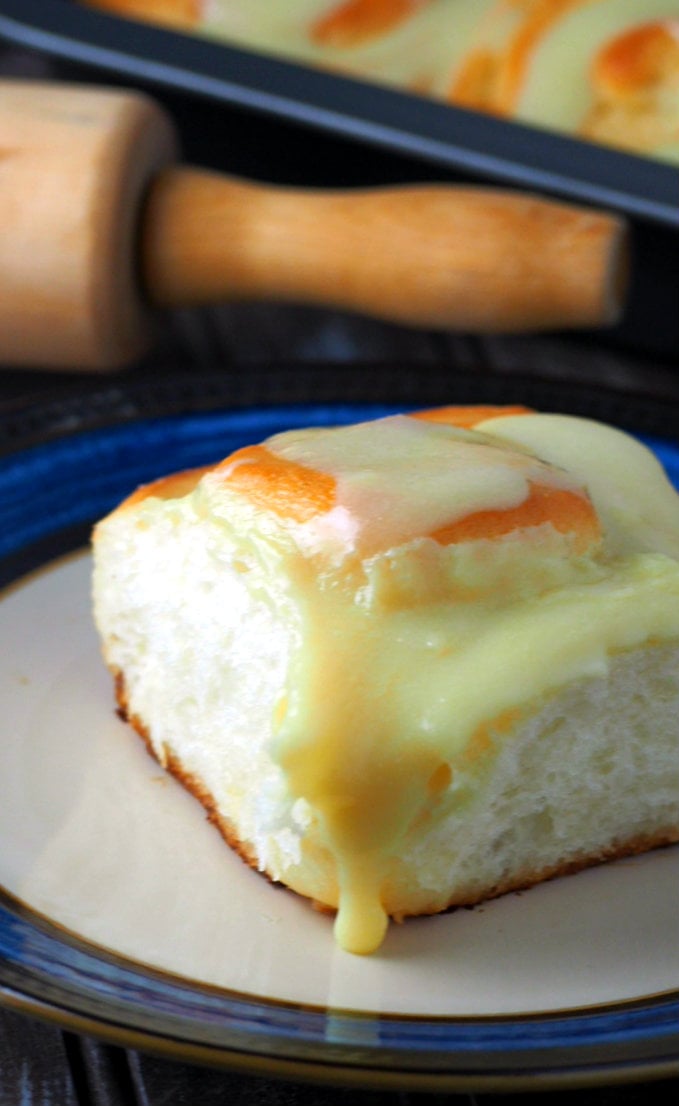
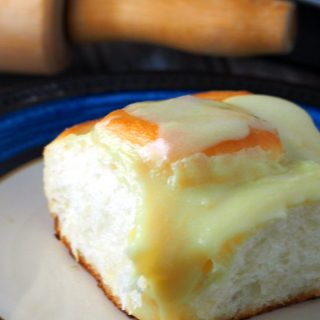
These yema rolls are tender and delicate bread slathered with a very creamy frosting that is primarily made with condensed milk. Sweet, milky and soft, these treats are just heavenly!
I have a deep love for condensed milk. This simple liquid goodness from a can is a nice indulgence because of its sweetness and thick luxuriousness. I remember as a kid, I used to lick the remainder of condensed milk in spoons and ladles every time our older folks made desserts out of it. Seriously, I can eat condensed milk straight from the can.
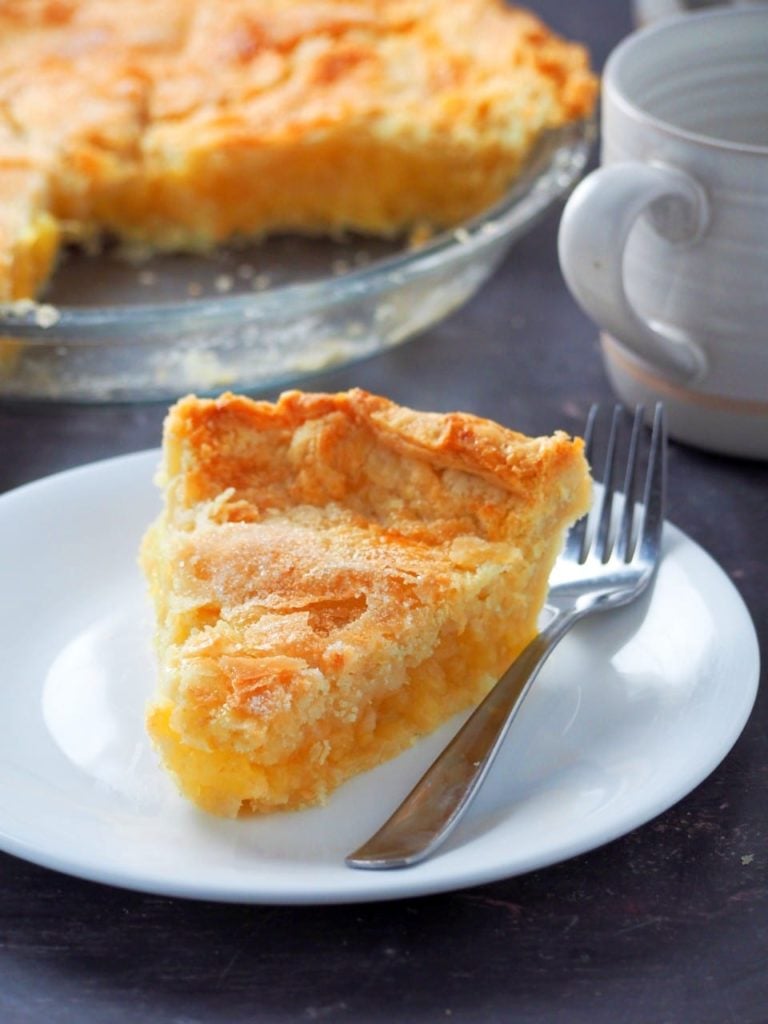
Yema is a native delicacy from the Philippines. It is a milky candy that is made with condensed milk. Think dulce de leche but with more richness and with a little bit of nuttiness, all compact and formed into soft, little bites.
Today, we incorporate yema in a tender, pillowy bread. These yema rolls are downright heavenly. Just imagine- bread filled with condensed milk butter, then smothered with a rich, milky frosting. Yema in bread form, guys. Totally irresistible.
How To Make Yema Rolls
First, proof the yeast by combining it with warm milk in a large mixing bowl. Let this stand for about 5 minutes, until it is creamy or foamy. Add eggs, butter, sugar and salt and mix everything with a wooden spoon.
Add the flour, stirring one cup at a time. Stir all the ingredients together until a soft sticky dough gathers in the center of the bowl.
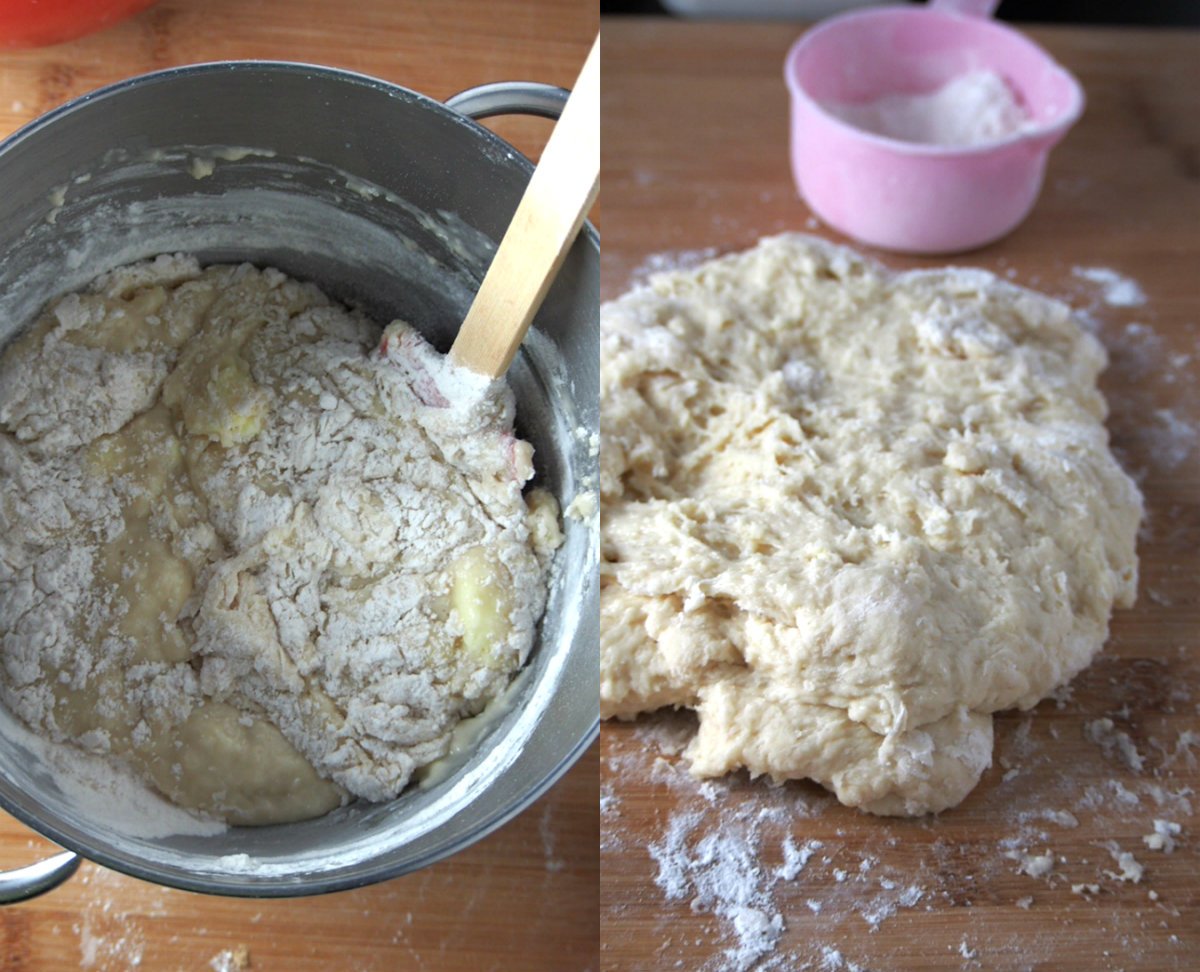
Turn the dough over on a lightly floured board ( Flour your hands as well. This is a sticky dough). Knead for 7-10 minutes, or until the dough is smooth, elastic and a bit tacky. Dust your work surface with flour as needed to help with the stickiness.
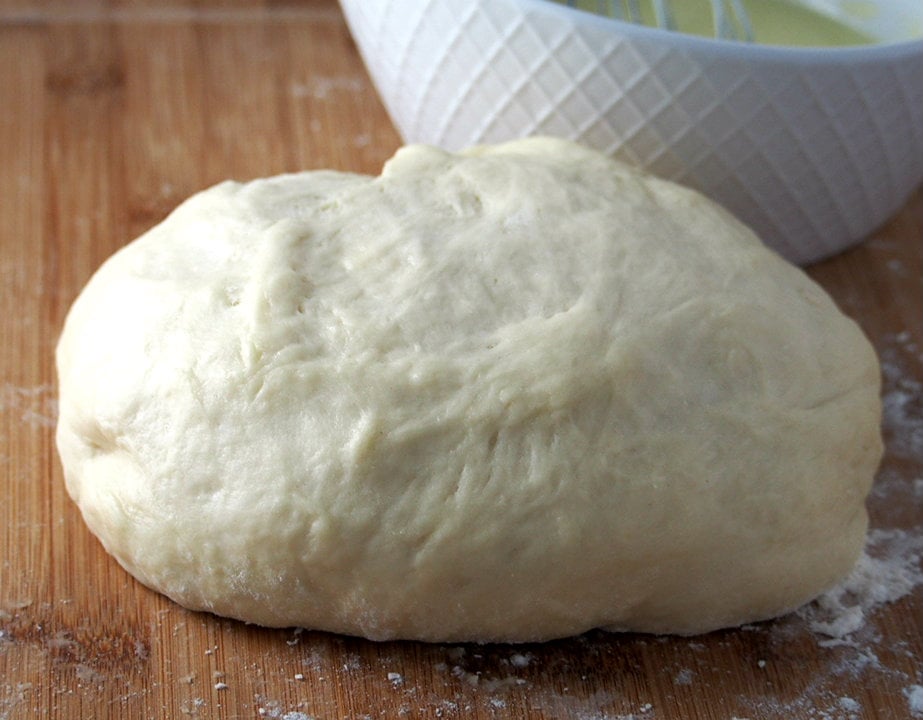
Shape the dough into a ball, place it in a bowl and cover it with plastic wrap. Let the dough rise for an hour until doubled in size.
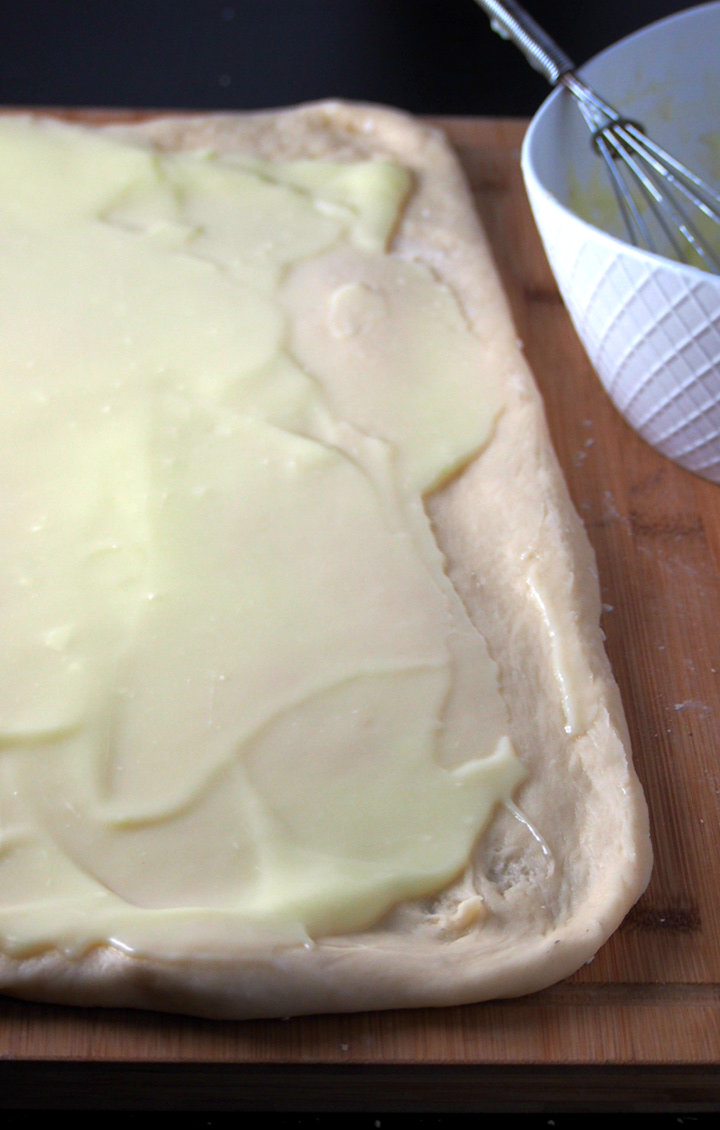
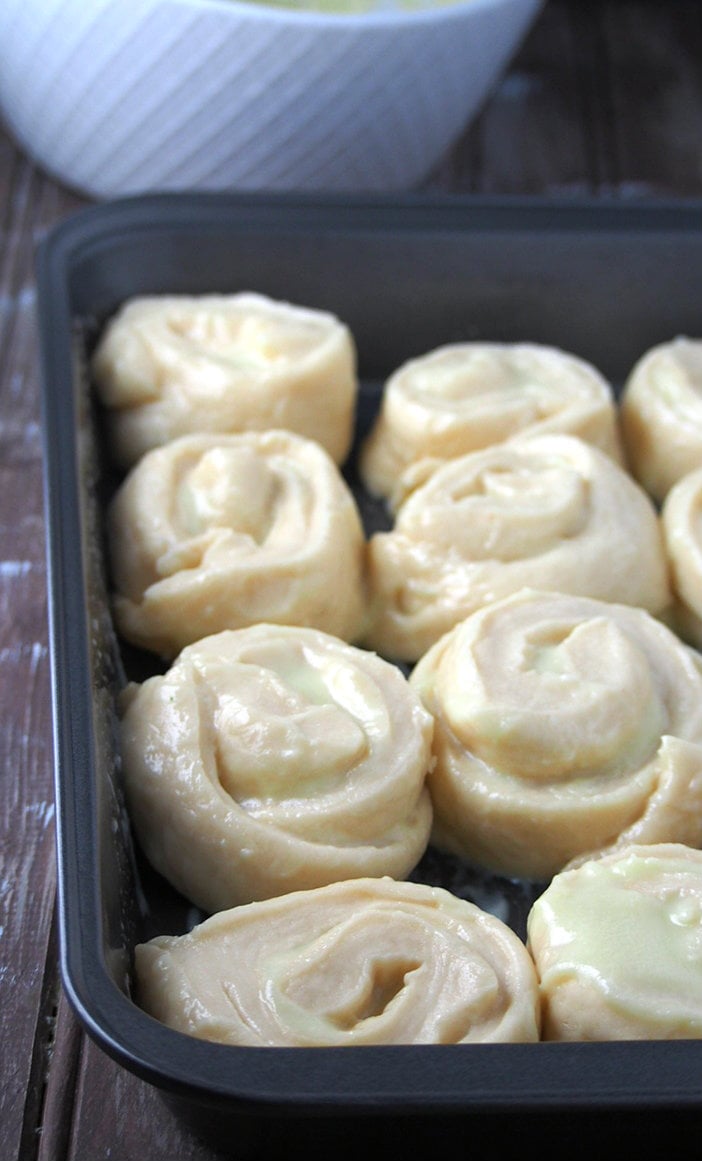
Gently punch the risen dough and roll it into a 12×16 inch rectangle using a rolling pin. Spread the condensed milk filling across the dough. Starting on the long side of the rectangle, roll the dough into a tight log.
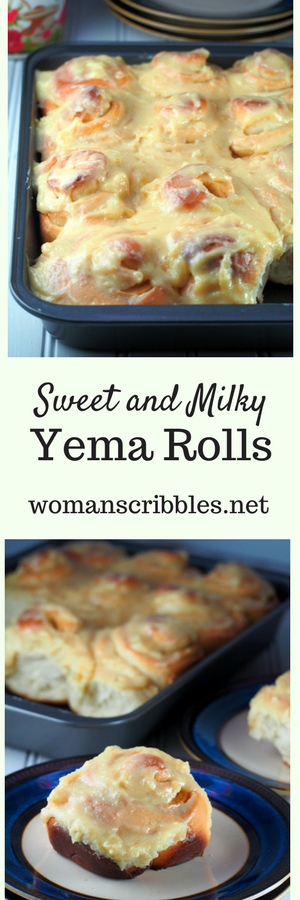
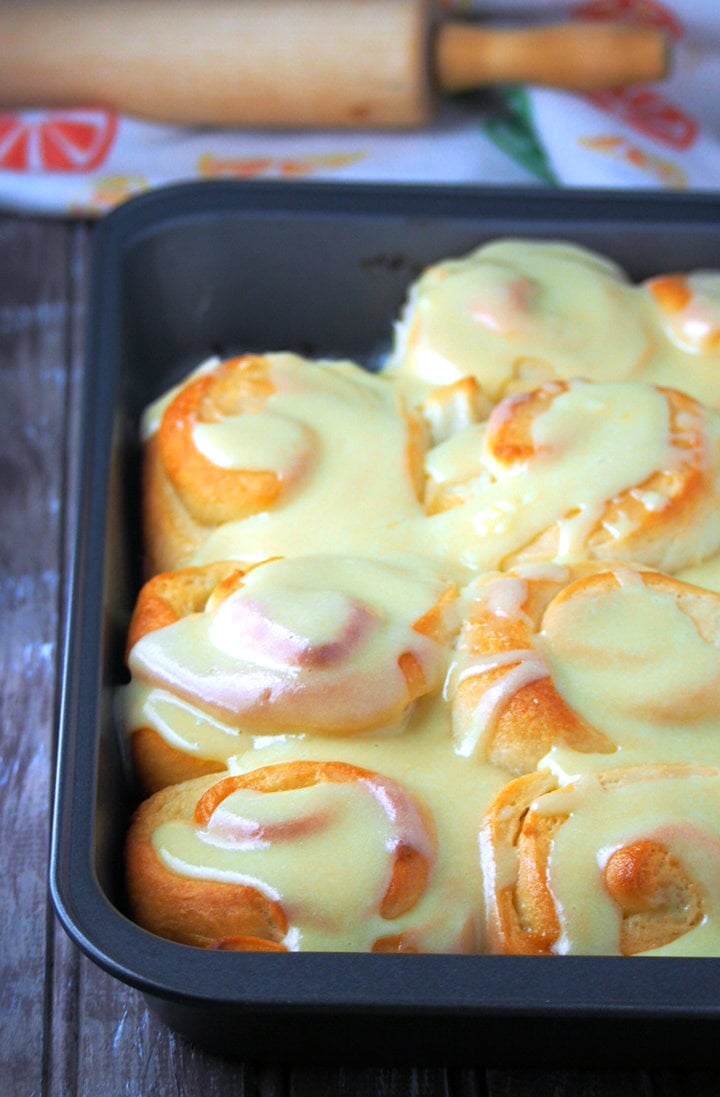
Using a sharp knife, cut the log into 12 portions that are about 1 and 1/2 inches in thickness. Arrange them in a greased 9×13 baking sheet. This can get a bit messy because the filling is slippery. Just re-form the rolls if they become wobbly and place each on the baking pan. They will bake just fine even if you think that the filling is oozing out.
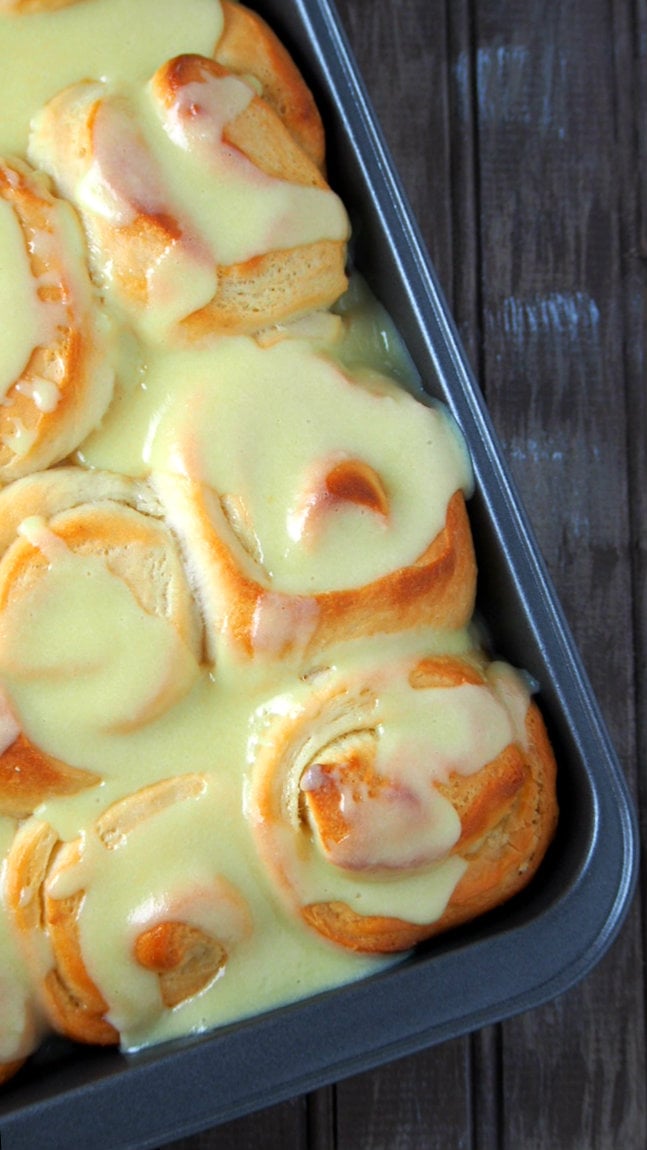
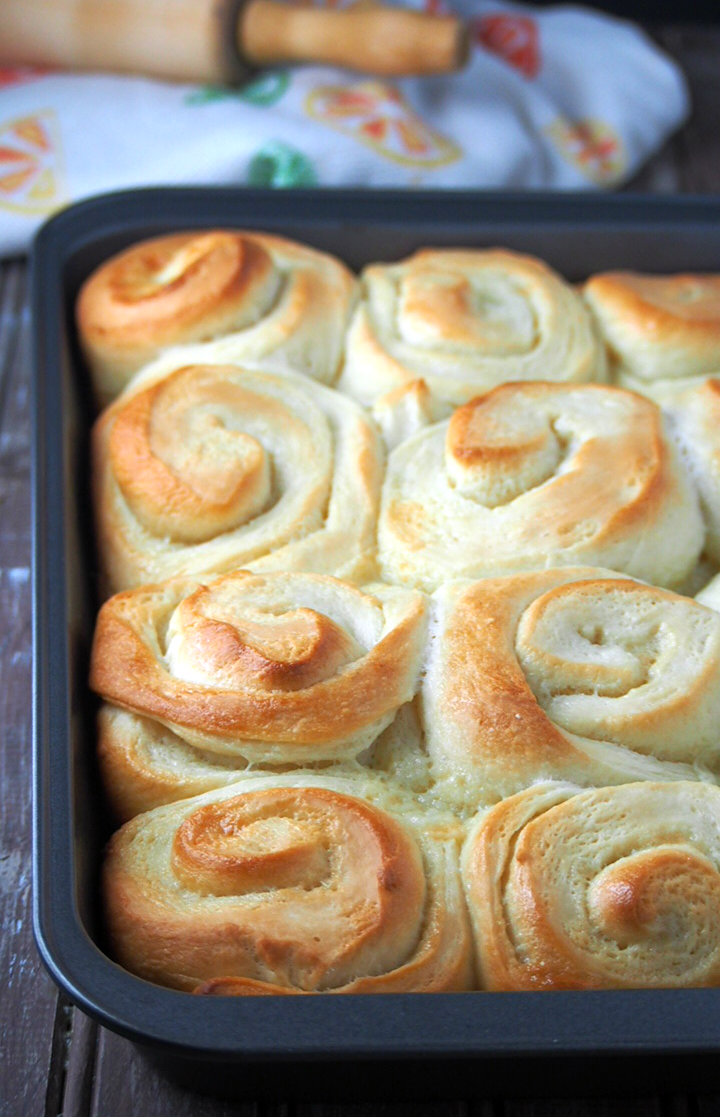
Let the rolls rise for about half an hour until they are puffy. Bake them at 350 F for 20-25 minutes. The rolls should be golden.
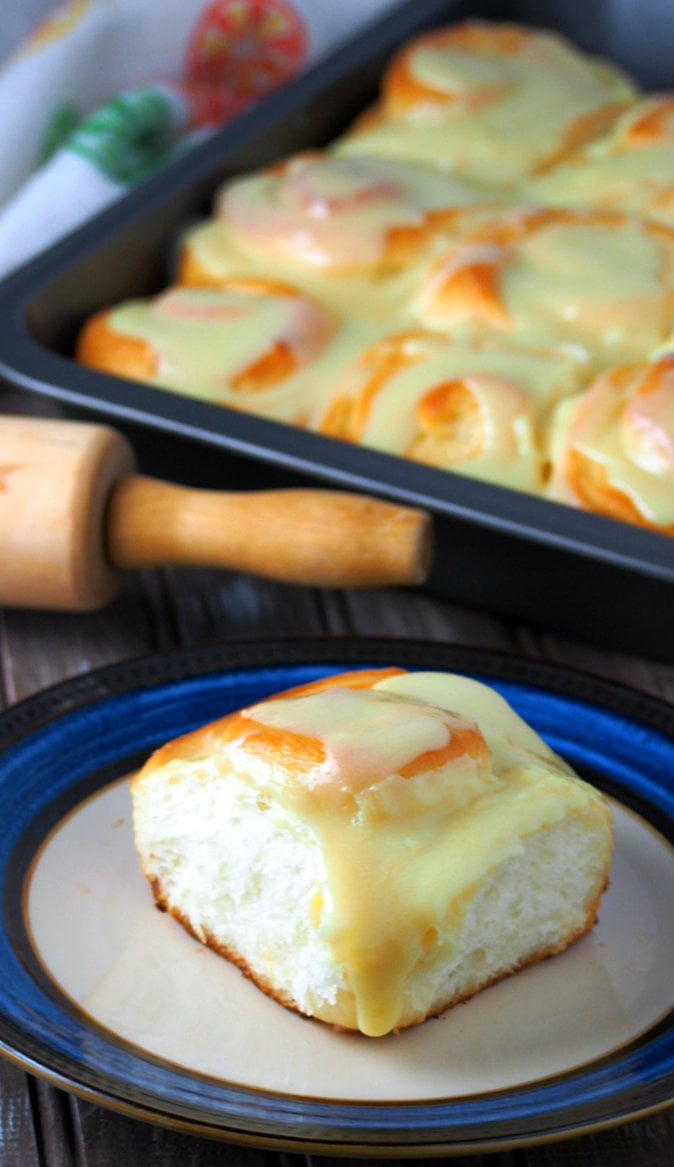
Let the rolls cool slightly, then pour or spread the yema glaze over the rolls. To make the yema glaze, stir condensed milk, milk, egg yolks and salt in a medium saucepan. Cook them over medium heat until it is smooth, thick but still pourable. Turn off heat and stir in vanilla.

These yema rolls can be kept in a closed container at room temperature for a day or two. If you still have leftovers, store them in the fridge and re-heat them in the microwave for 15-20 seconds.
These rolls are a great snack/dessert that are lip-smacking and delightfully sweet. If you love yema or condensed milk, you really shouldn’t miss making these.
If you spot a can of condensed milk in your pantry, you know what to do 🙂
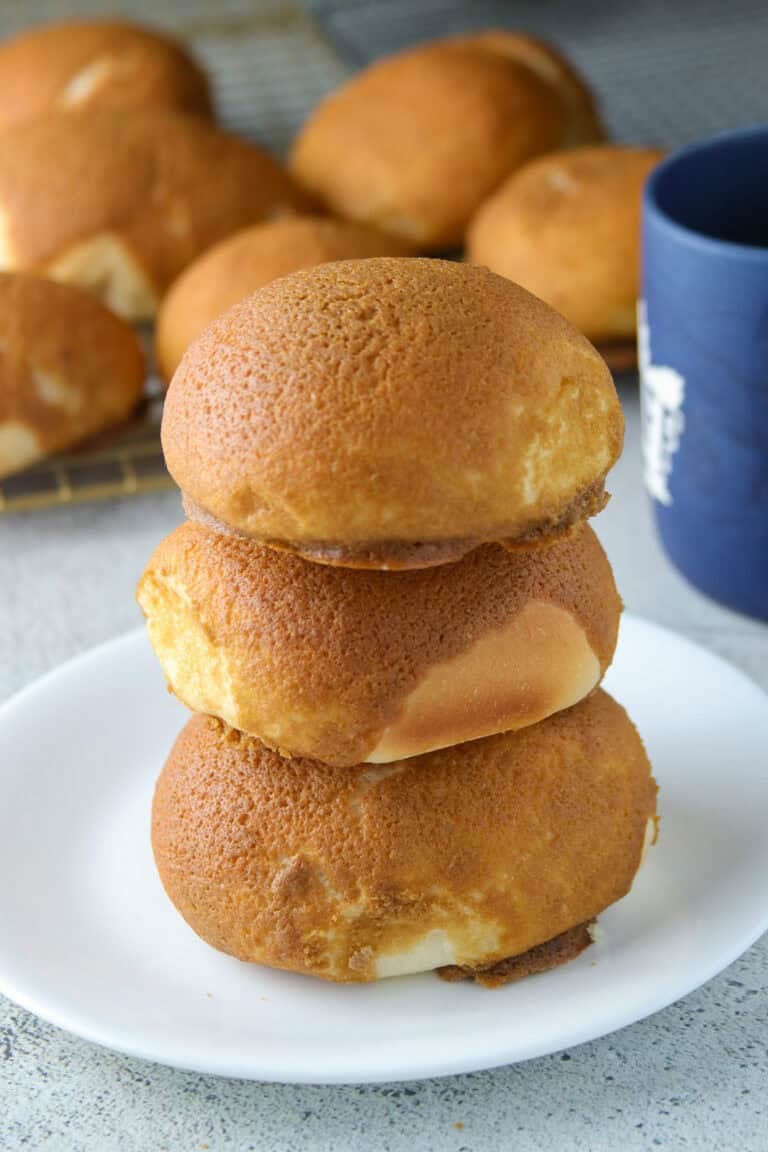
More Delicious Baked Goods
- Japanese Condensed Milk Bread
- Milk bread
- Sweet Cheese Rolls
- Condensed Milk Cheesecake
- Japanese Milk Buns
- Chocolate Croissant
- Cream Cheese Croissant
Yema Rolls
Ingredients
For the Dough
- 2 and 1/4 tsp active dry yeast
- 1 cup warm milk (110 F)
- 1/2 cup sugar (100 grams)
- 1/3 cup softened butter (75 grams)
- 1 tsp salt
- 2 large eggs
- 4 cups all purpose flour
For the Filling
- 1/2 stick very soft unsalted butter
- 4 tbsp condensed milk
For the Yema Glaze
- 2/3 cup condensed milk
- 1/4 cup milk
- 2 large egg yolks
- 1/4 tsp salt
- 1/2 tsp vanilla
Instructions
- In a large mixing bowl, sprinkle yeast over warm milk. Stir and let sit for five minutes.
- Add the sugar, butter, salt and eggs to the bowl. Stir well with a wooden spoon until incorporated. Add the flour one cup at a time and stir after each addition. Keep stirring the mixture until it gathers into a soft, sticky dough in the center of the bowl.
- Turn the dough over on a floured board. Knead the dough for 7-10 minutes, or until the dough is smooth, elastic and a bit tacky. Dust your hand and the board with flour as needed to prevent too much sticking while you knead.
- Gather the dough into a ball and place in a greased bowl. Cover with a towel and let rise for an hour. Gently deflate the dough and roll into a rectangle that is 16 x 12 inches in size. Spread the filling across the dough surface.
- Roll the long side of the dough, tucking it tightly as you go until you have one long log. Pinch the edges and cut the dough into 12 portions that are about an inch and a half in thickness. Lay the rolled portions on a 9 x 13 greased baking sheet. (It can get a bit messy here due to the filling. Just reinforce the shape of the rolls as you place them on the pan) Let rise for 30 minutes.
- Preheat oven to 350 F. Bake the rolls for 20-25 minutes or until light brown. Let the rolls cool slightly. Pour or spread the yema icing on top.
Make the Filling
- Stir together the softened butter and condensed milk until the mixture is smooth.
Make the Yema Icing
- In a medium saucepan over medium heat, stir together condensed milk, milk, egg yolks, and salt. Cook the mixture while stirring constantly until it is smooth. Once the mixture becomes thick but still pourable, turn off heat and stir in the vanilla.
Notes
Nutrition
Post contains affiliate links. Please see disclosure page to learn more.


I cant wait to make this yema rolls this weekend for friends and family. I love yema growing up.
It is a family fave too!
Absolutely delicious!!! Will likely double the frosting next time. Thank you form sharing!
Hi Judy! I sm so glad you enjoyed this! Thank you.
OMG, these buns came out perfect. So beautiful in appearance and so tasty: I used the bread machine set on the dough cycle to mix the dough and it did the perfect job. I used a double boiler to cook the glaze but will try the microwave the next time I make these. Thank you so much for this recipe.
Thank you for your tips and feedback, Mary!
Yummy! These are amazing! I used a different dough recipe (milk bread using heavy cream) but used the filling and frosting from your recipe. One tip I discovered is to do an overnight proof and then while the dough is still cold, spread the filling. It helped the filling be not so runny since the dough was chilly. I did have to rise the rolls for an extra 25 mins since the dough was cold.
I am so happy to know that, Judy! Thanks for your tips too!
Can you use a stand mixer to mix the dough?
Hello, Susan! Yes, you can use a stand mixer to mix and knead the dough 🙂 Just knead until the dough is smooth and elastic using a dough hook.
Is the condensed milk, sweetened condensed milk, such as Eagle Brand, or is it like Pet or Carnation condensed milk?
Hello Fran, I used Eagle brand, and any brand similar 🙂 Good luck.
Pet and Carnation are evaporated milk and may be used as-is or reconstituted by adding equal amount of water. Condensed milk is a very thick, rich combination of sugar and milk. The two products are NOT interchangeable.
Great recipe, hit with loved ones will be making to serve with Our Thanksgiving meal! HAPPY THANKSGIVING
Yey! Thank you so much! I am so happy that you love it! Happy Thanksgiving to you!
Hi Sanna
Today is a perfect day to be Thanking you! Its Thanksgiving weekend here in Canada.
Thank you for sharing this wonderful yema frosting recipe, for me it is perfect! Just the right sweetness to top my vanilla cupcakes.
Thank you again and More power to your blog
Joy
Hi Joy,
Happy Thanksgiving! I am from Winnipeg, Manitoba 🙂 I am glad that you like this yema frosting 🙂 I have never tried them on cupcakes but you give me a delicious idea 🙂