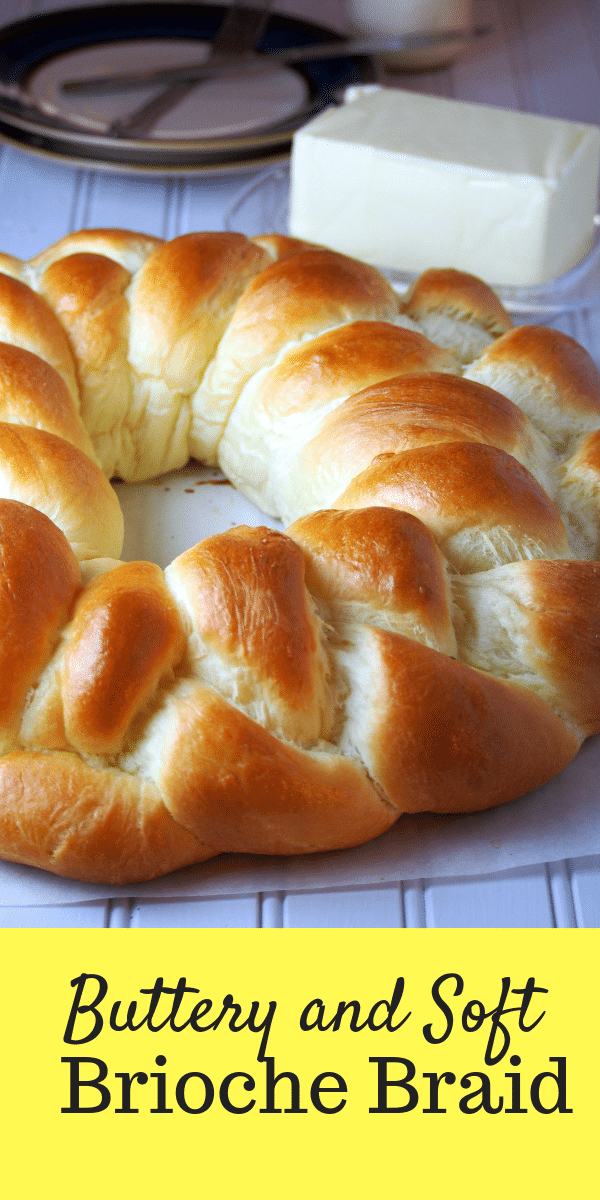
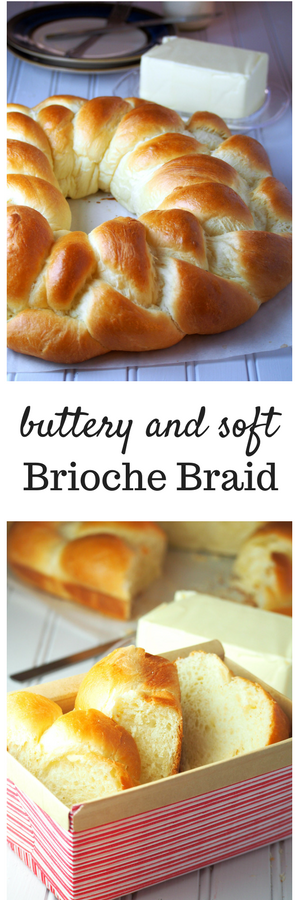
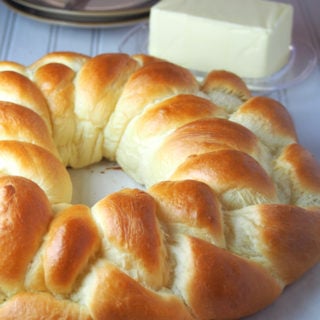
Top with your choice of glaze, or simply pat butter on the surface, Brioche is always a nice baked pastry to have at home. This braided brioche recipe produces light and fine crumbs that is also soft and buttery. When you wake up to this sitting in your counter, this beautiful pastry makes all the waiting involved in making it all worth it.

(photo tutorial follows below)
Last week was a laid back kind of week as we were tending to my daughter who underwent some work with her teeth and was recovering. With a sofa bed laid out in the living room, everything was kept nice, calm and homey as we cared for our little girl.
I realized that even though life around here gets messy, even though my days are filled with heaping sink of dirty dishes, toys scattered around the floor, and even though I had to sneak to the kitchen to bake while little arms are clinging to my legs, motherhood is still my favorite thing.
It is my favorite part, and it is what I want to do. There is nothing more fulfilling than tucking girls under a blanket, or dressing them in their pajamas. They are like nice little dolls I had when I was a girl but this time those little dolls love me back.
One of the nice little joys I had at home and perfect during those calm, laid back days was this pretty braided brioche. To wake up to this sight is so rewarding for me. I just pat butter on it or some light cream cheese and my day is made.
Pastries are my favorite thing. They make me happy. So a slice of this brioche plus an intimate, calm afternoon spent at home, I am one happy girl.
To make brioche may seem complicated. Well, I would say it is complicated because of the waiting time involved. But method wise, making brioche is not as hard as you think because in this recipe, the mixer does the hard work. I made this brioche several times already and my Oster mixer is ever so reliable without giving up on me.
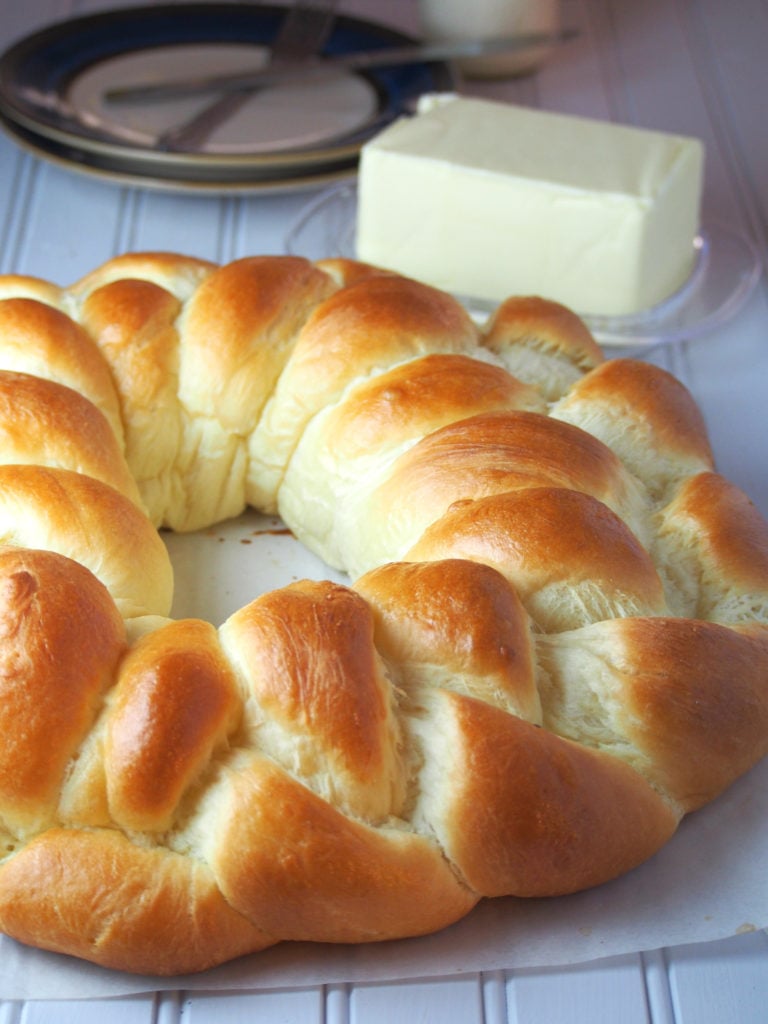
This is the same recipe I used for my ensaymada , but this time I want it with no glaze or toppings at all. And this plain braided brioche is so pretty too that my heart leaps every time I see it in the kitchen counter.
My hope is that you try this recipe despite the scary length of the instructions. There is really nothing complicated with it and most time is just actually spent waiting for the dough to rise, which means there is really no hard work involved. But I assure you, after all the long wait, the rewards are all worth it in the end.
Aside from this brioche braid, you can make lots of delicious things with this brioche dough. Check out and try the following recipes:
- Chocolate Brioche
- Cream Cheese Brioche
- Ensaymada
- Ube Ensaymada
Brioche: The Method
The Sponge
In the bowl of your stand mixer, add the 2 and 1/4 teaspoons yeast, 1/3 cup warm milk ( 110 F), 1 egg and 1 cup of flour. Use a rubber spatula to combine them.
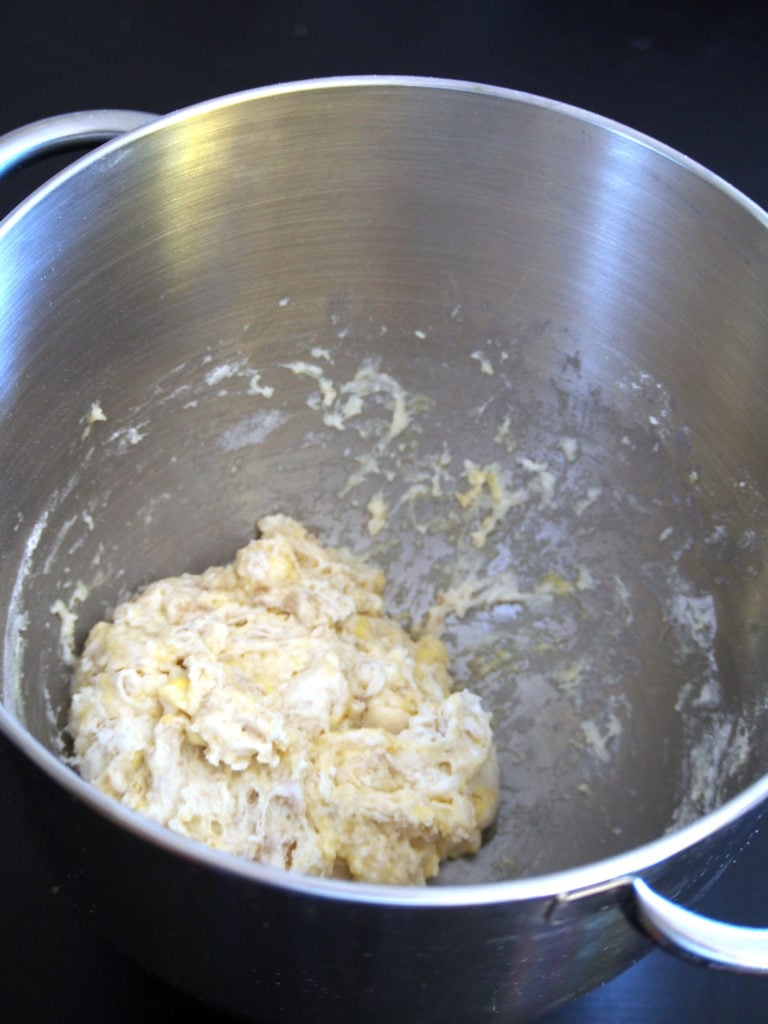
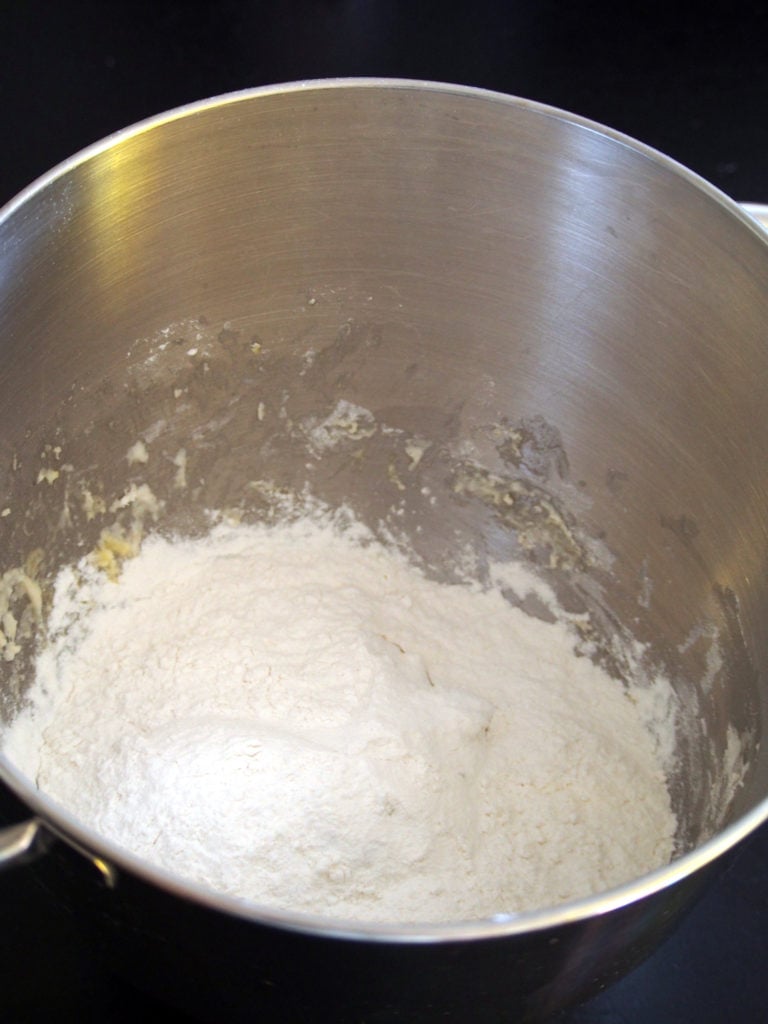
Once combined, add another cup of flour and sprinkle it on top of the yeast mixture to cover ( Do not stir) . Let this stand untouched for 40 minutes.
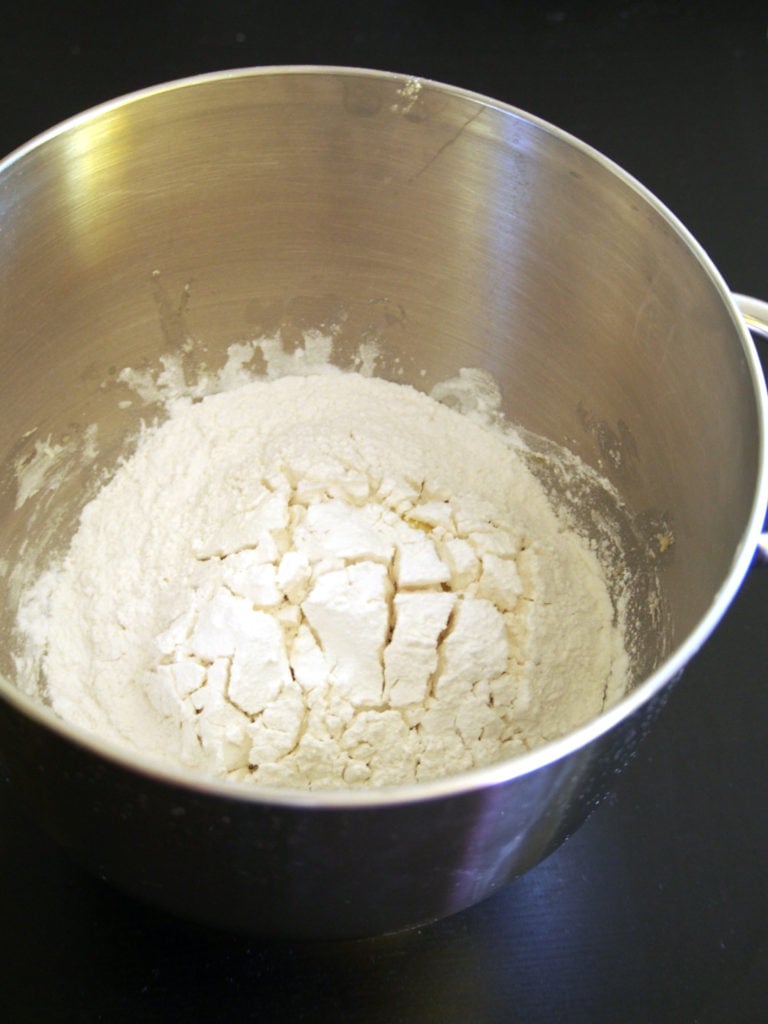
After that time, the flour should develop some cracks on the surface. This a sign that things are moving along.
The Dough
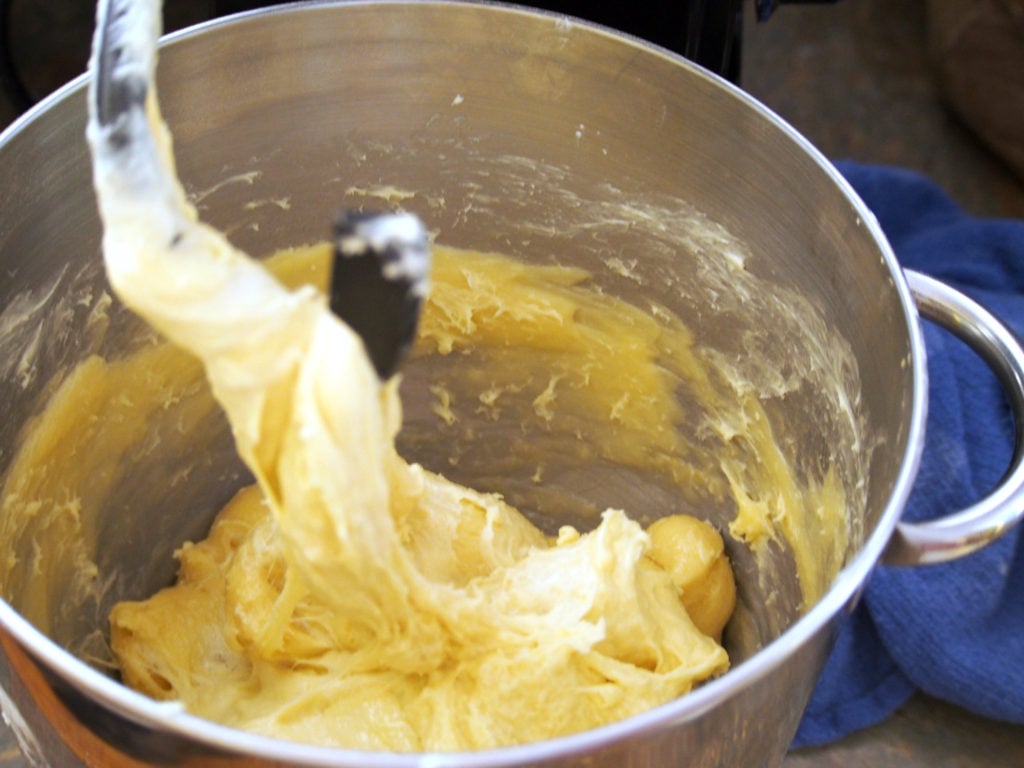
Now to this mixture, add 4 lightly beaten eggs, 1/3 cup sugar, 1 teaspoon salt and 1 cup all purpose flour. Attach the dough hook to your mixer and beat the mixture on low speed just until combined, about a minute or so. Add another half cup of flour and beat the mixture on medium speed for about 15 minutes. Stop the mixer to scrape the sides and bottom of bowl if needed.
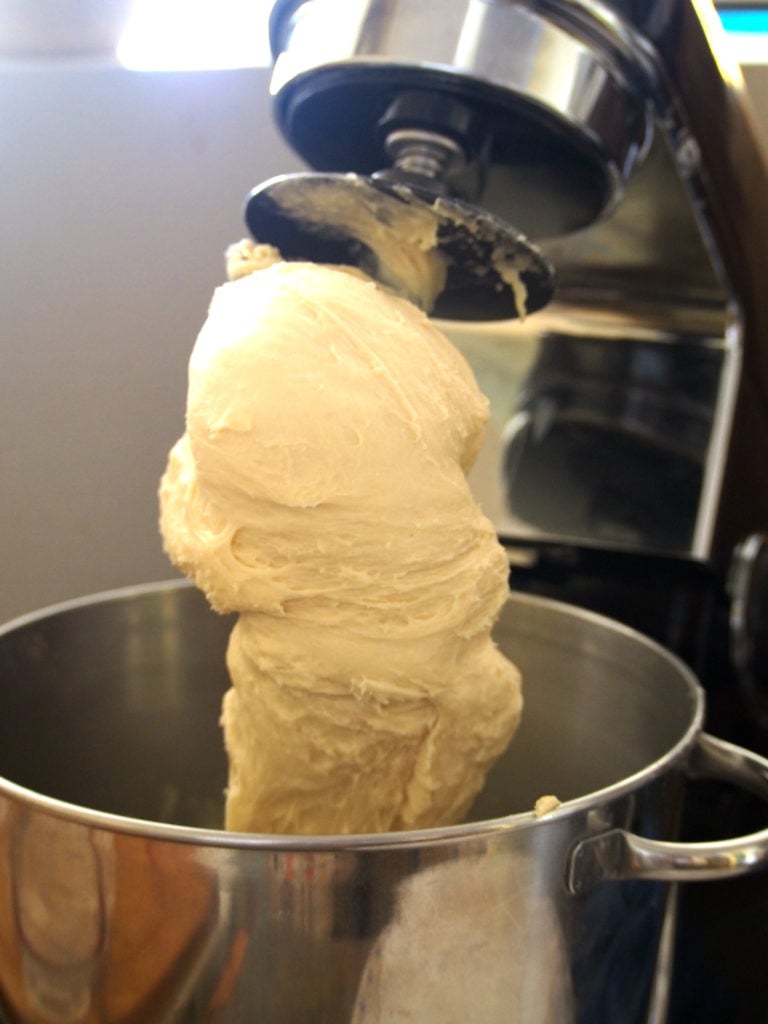
After 15 minutes, the dough is ready when you see it gathering itself into the center of the bowl, and attaching itself into the dough hook. As the mixing progresses, and this is an interesting part, you will see the dough slapping the sides of the bowl. It is like the dough is throwing itself , almost violently, into the sides of the bowl but still clinging to the dough hook. You can hear the slapping sounds the dough makes against the bowl. Be watchful too, the mixer might move from its place as the dough is trying to slap the bowl.
(If after the first ten minutes, there is no sign of gathering together and no indication of slapping action about to occur, add about 3 tablespoons of flour into the bowl and continue beating until you hear the slapping sounds. Keep beating for a full 15-20 minutes.)
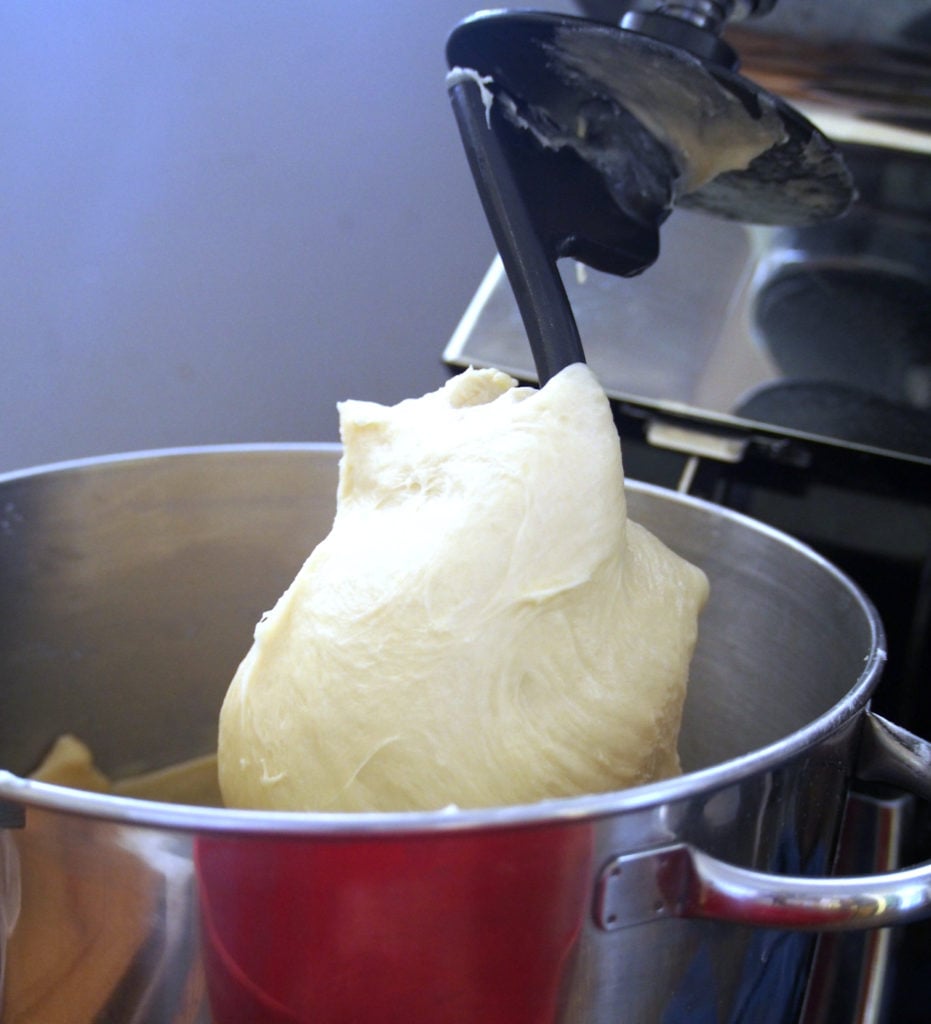
This is the dough gathered after the slapping action.
You are now ready to add the butter. Bit by bit, drop the softened butter into the bowl, letting them mix well after each addition. Now at this stage, the dough which has gathered beautifully earlier, will start to fall apart again.
Just continue beating and you will see the dough gather again, and make the slapping sounds once more. This should take about five minutes. At this stage, you will have a shiny, sticky and smooth dough.
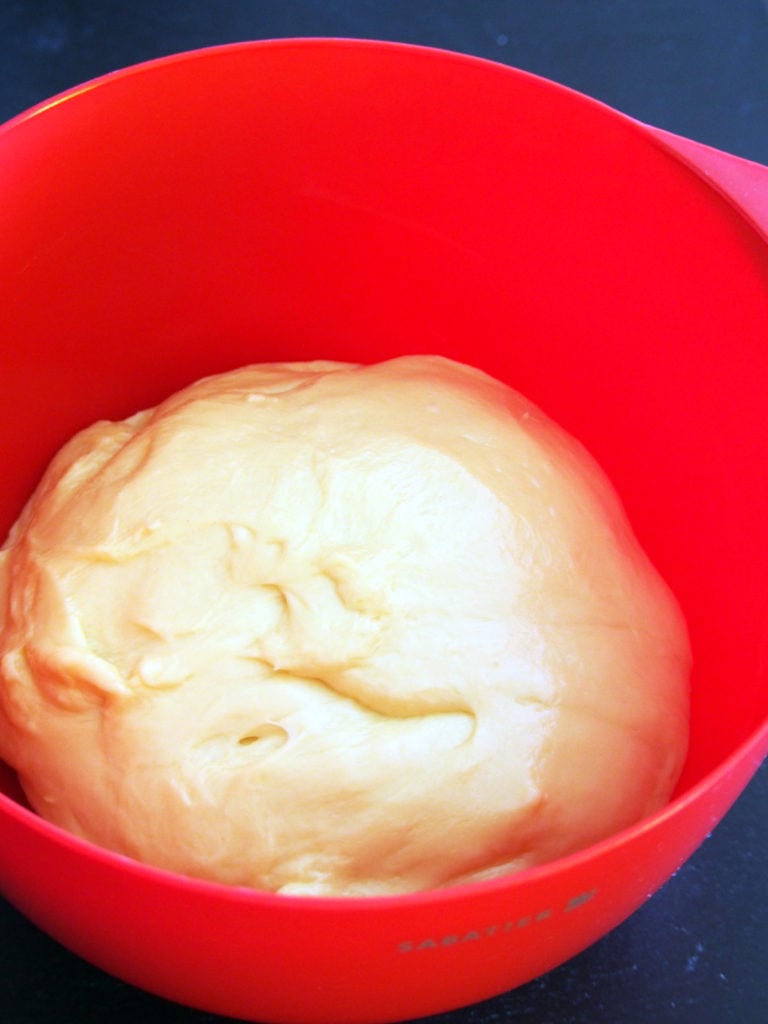
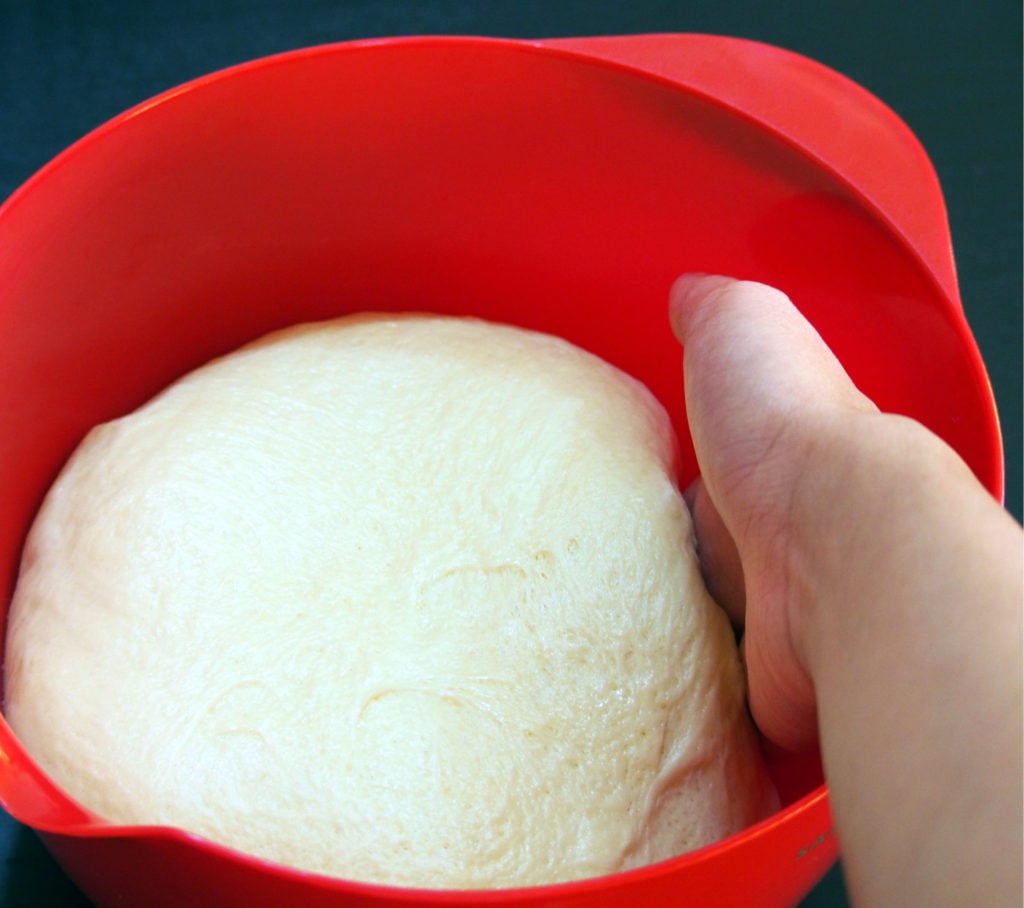
Place the dough in a large greased bowl, cover it with plastic wrap and let stand in room temperature until doubled in size.
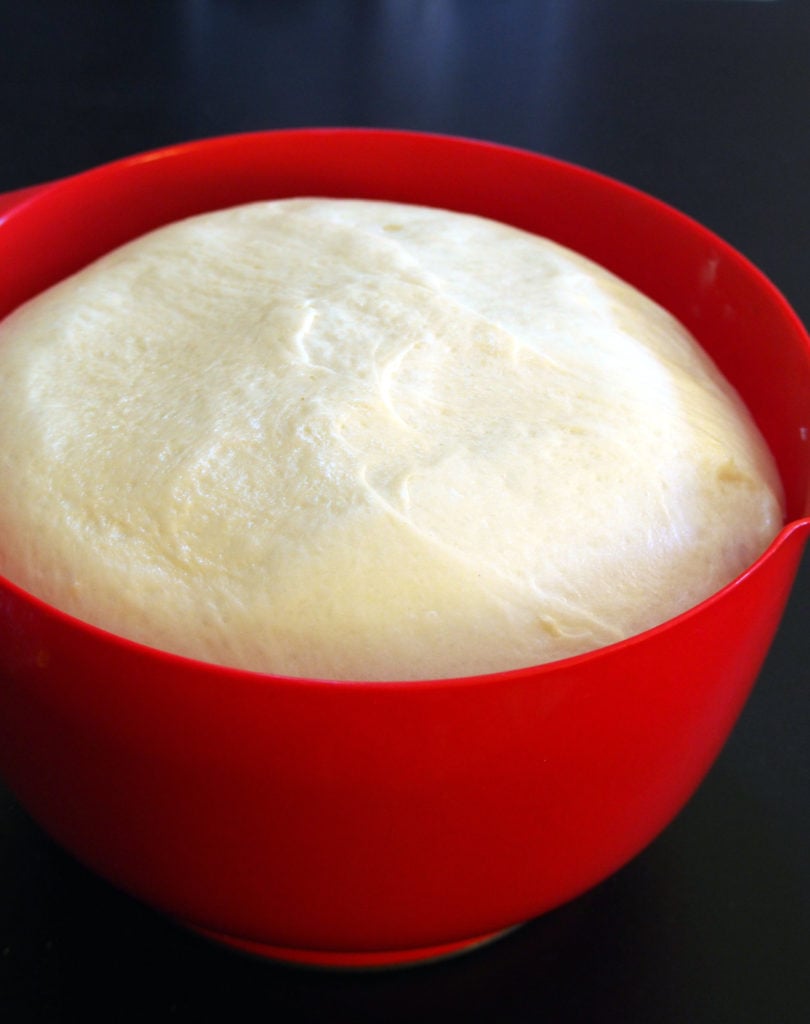
This is the first rise and it will take about 2 hours. Look at that. Such a beautiful sight to me.
After that, You are going to quickly handle and deflate the dough before the long chilling : Gently lift the risen dough from the bowl, section by section and let it fall back to the bowl. The dough should shrink in size again.
And again, cover the dough in the bowl with plastic wrap and refrigerate for 6 hours or overnight.
After the long chill, divide the dough into three equal sections. I used a scale and each portion should weigh about 315-350 grams. Otherwise, just portion them equally as best as you can.
On a floured board, roll each portion into a long log. If necessary, refrigerate the other two portions as you work with one. You want to keep the dough nice and cold to prevent it from becoming sticky. If at any point you feel the dough becomes warm and sticky, chill it in the fridge for at least ten minutes.
Using your palms, and your hands to squeeze and elongate the dough, continue to roll until it is 80 cm long. Repeat with the other two portions.

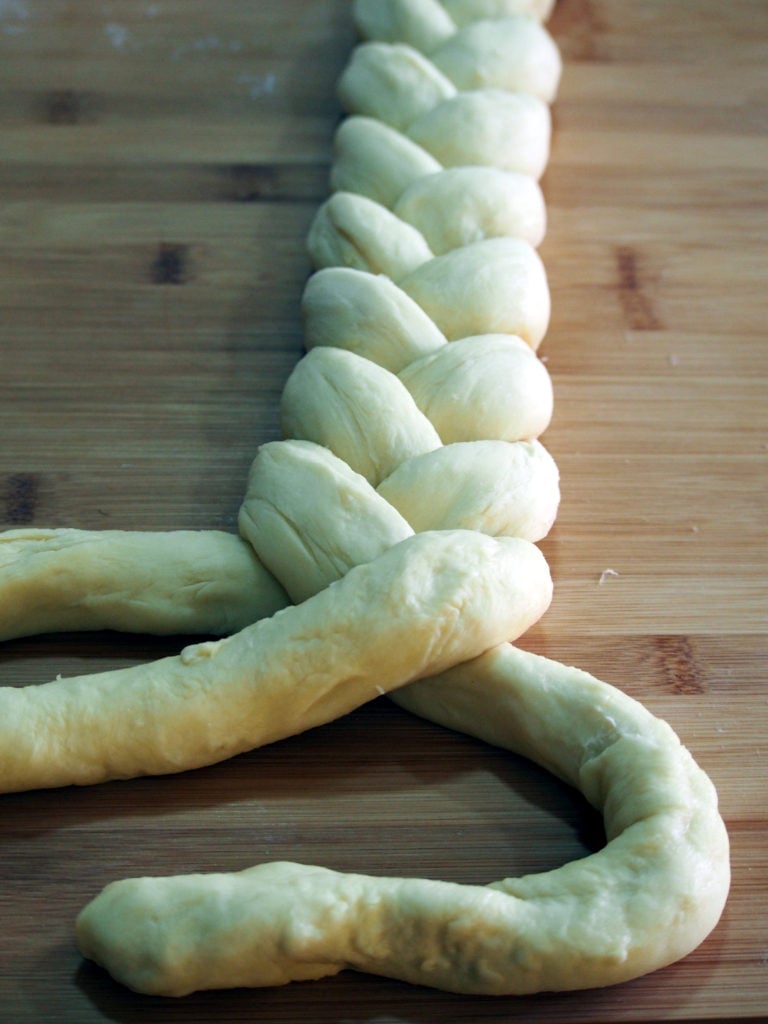
And now the fun part, braid the three portions like you would braid hair. Space the knots equally as you go.
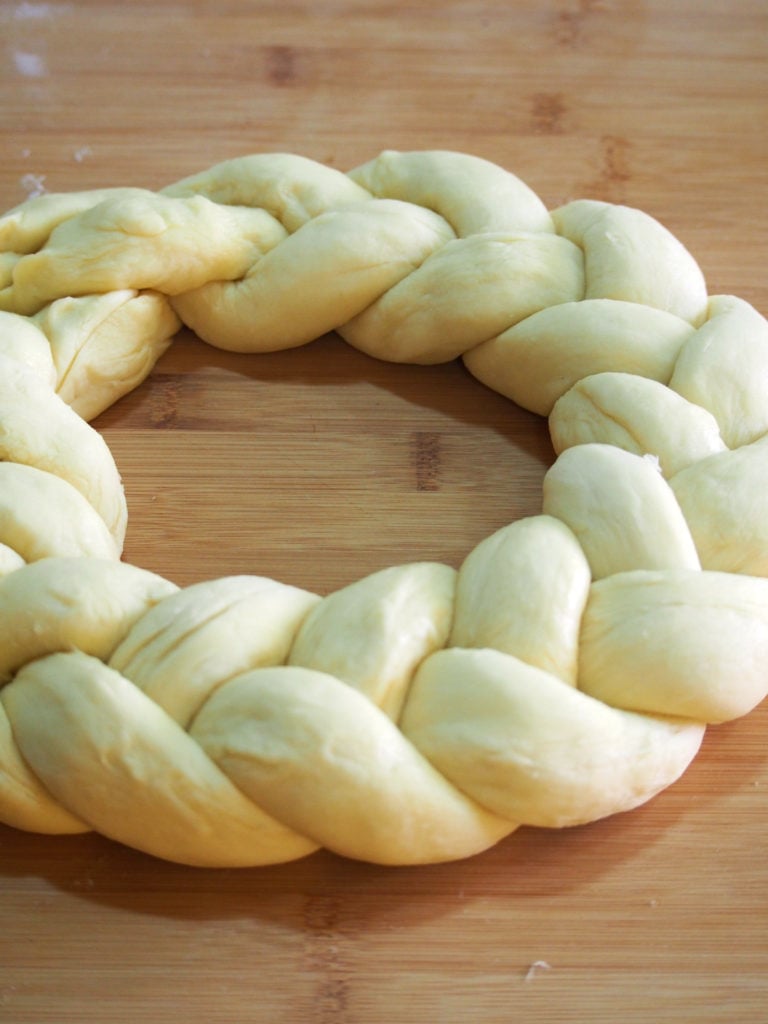
As you reach the end, form a circle by connecting the two ends together and pinch them to seal. Our brioche braid has come together now.
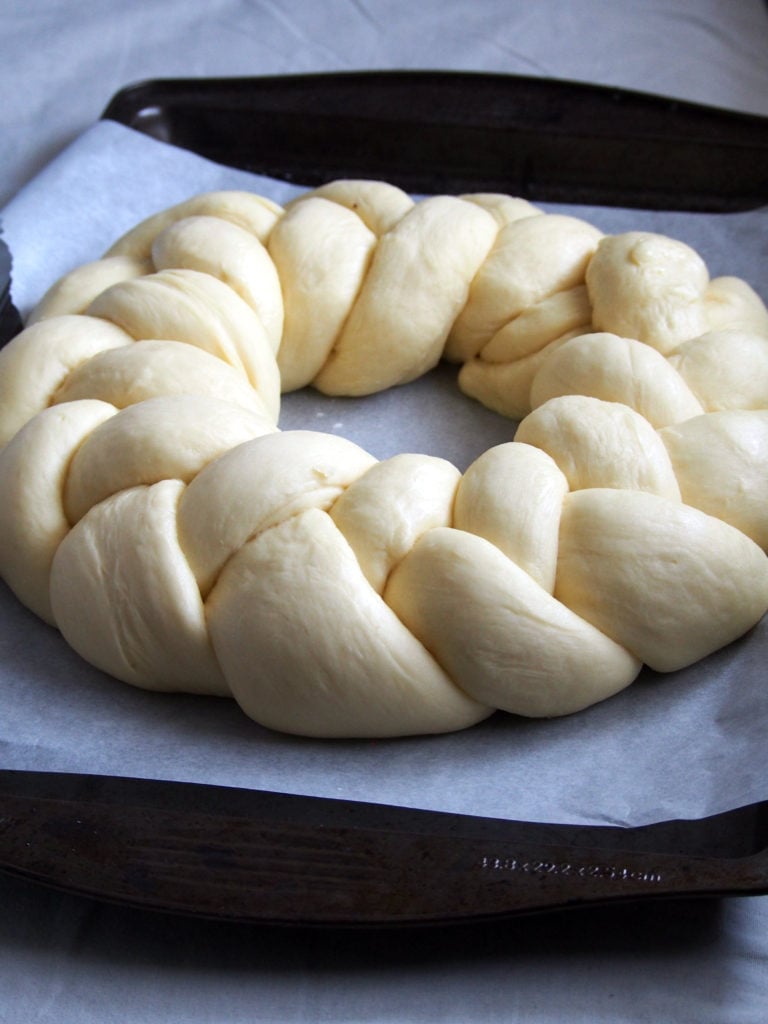
For the final rise, and you are almost at the finish line, Cover the dough loosely with plastic wrap and leave for about two hours at room temperature. The dough should once again double in size.
After rising, Preheat oven to 350 F. Beat one egg with one tablespoon of milk. Gently brush the surface of the brioche with this egg wash, being careful not to let the liquid drip down the sides.
Bake the braid at 350 F for about 20 minutes. The surface should be lightly golden and a temperature should register 200 F. Do not over bake.
I highly recommend using a thermometer, especially if you are just beginning to bake bread/ brioche. I always rely on the thermometer to check for doneness because its the best way to make sure you don’t over bake or under bake.
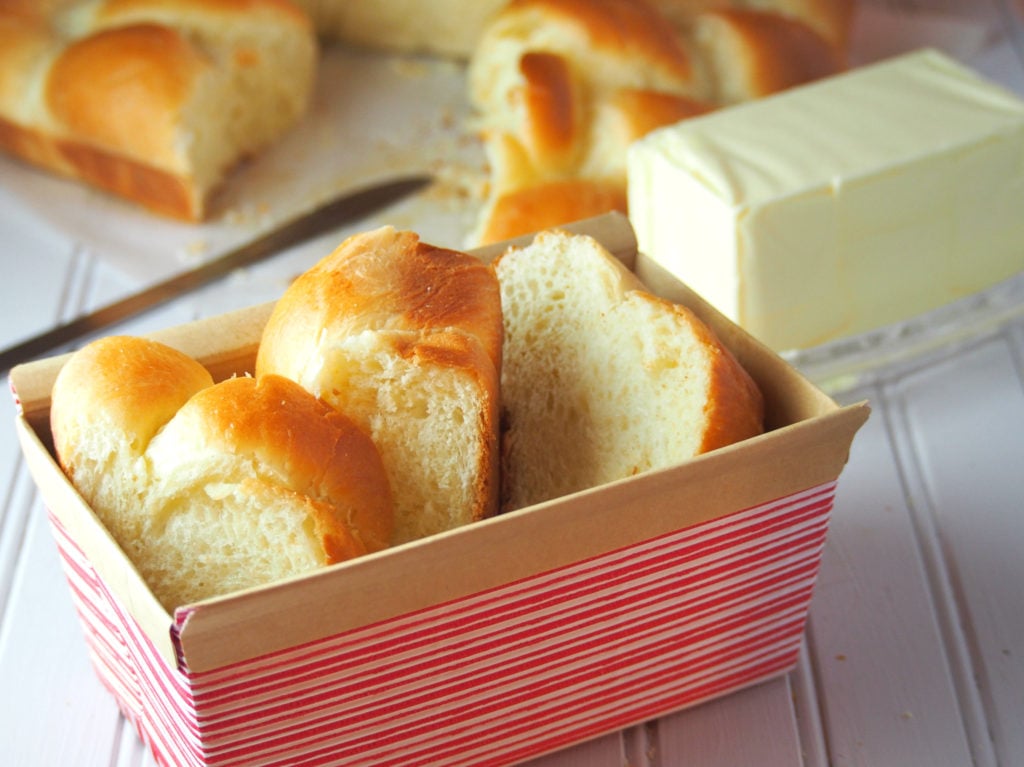
And now you have a lovely brioche braid lovingly made by you! Isn’t that a nice achievement?
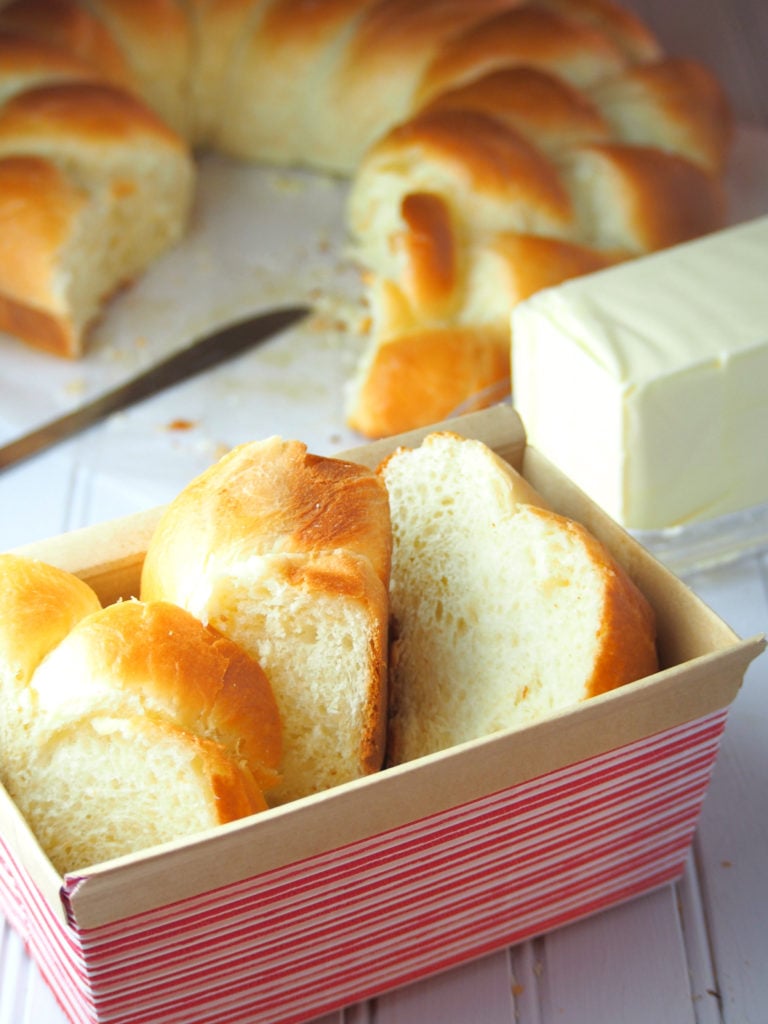
Now go and taste your creation and watch the soft delicate crumbs stretch out into long thin strands as you pull.
Just wonderful. Go ahead and bake and see you for our next recipe.
Braided Brioche
Ingredients
FIRST PART: THE SPONGE
- 1/3 cup warm milk ( 110 F)
- 2 and 1/4 tsp active dry yeast (1 packet)
- 1 large egg
- 2 cups all purpose flour
SECOND PART: THE DOUGH
- 1/3 cups sugar
- 4 large eggs lightly beaten
- 1 and 1/2 c all purpose flour
- 1 tsp salt
- 1 and 1/2 sticks unsalted butter at room temperature
FOR THE EGG WASH
- 1 large egg
- 1 tbsp milk
Instructions
MAKE THE SPONGE
- In the bowl of heavy duty mixer, Add the yeast, milk, egg and 1 cup all purpose flour. Mix with a rubber spatula just until combined. Sprinkle the remaining 1 cup of flour over the top as if to cover mixture. Let this stand for about 40-45 minutes. There will be cracks on the flour surface at this point.
MAKE THE DOUGH
- Add the sugar, salt, eggs and 1 cup of flour to the bowl with the yeast mixture. Using a dough hook, run the heavy duty mixer on low speed for about a minute , until the mixture is just about incorporated. Add the remaining half cup of flour and run the mixer in medium speed. Continue to beat, scraping the bowl as needed, for about 15-20 minutes. You will know when the dough is ready if it is coming together in the center of the bowl, and also attaching itself into the dough hook. You should see the dough slapping the sides of the bowl, like it is almost violently throwing itself to the sides white it still clinging and rotating with the dough hook. You should also hear the slapping sounds. ( If you don't see the slapping action after ten minutes into the mixing , sprinkle about 2 -3 tbsp of flour to the bowl. Continue to beat until you reach the slapping stage , giving the dough a total of about 15-20 minutes in the mixer ).
- Now add the butter bit by bit. Make sure that the butter is in in room temperature, but not warm or oily. It should be pretty soft and malleable. It helps to enclose the butter inside a wax paper, press it down using your thumb or beat it with a rolling pin to give it a malleable consistency. When you add the butter, the dough will fall apart again for a moment. Continue to beat until you hear the slapping sounds again. This should take about 5 minutes or so. The dough is now , once again, clinging together in the center and in the dough hook with the slapping sound. Dough is sticky but shiny at this point.
FIRST RISE
- Place the ball of dough into a greased bowl and cover with a plastic wrap. Let stand in room temperature until the size is doubled, about 2 hours.
SECOND RISE
- After the dough has doubled in size, simply lift it in sections until you have gone around the entire circle of dough, lifting and then letting it fall back to the bowl ( like deflating it but very gently. Do not punch the dough down.) Cover the bowl again with a plastic wrap and chill in the refrigerator for 6 hours or overnight. The dough will double in size again
ASSEMBLE THE BRAID AND BAKE
- After the long chill, You need to divide the dough into three equal portions. Working with the dough still cold from the fridge, Use a scale or divide it as best as you can to have three equal parts. Using a weighing scale, each portion should weigh around 315-350 grams. On a floured surface, roll each portion of dough into a log using your palms and by pressing it and squeezing it to elongate. Continue to roll it until it reaches 80 cm. If the temperature in your kitchen is warm, work with the dough one portion at a time and refrigerate the other two portions. Similarly, if you feel your dough becomes warm and sticky to work with, chill in the fridge for at least ten minutes before continuing to roll it into a long log.
- Now that you have three long logs, braid the dough as if you are a braiding hair. Neatly and equally space the knots as you go. Once the entire dough is done, form a circle by connecting the two ends of the braid and press the ends together to seal. Set this dough on a parchment paper and on a big baking sheet. Cover loosely with plastic wrap. Let this rise at room temperature for about 2 hours until the size is doubled.
- Preheat oven to 350 F. Beat one egg with 1 tbsp of milk to make the egg wash. Using a pastry brush, gently brush the surface of the brioche dough with the egg wash. Give it a good amount of the mixture but be careful not to let the liquid drip. Bake on the preheated oven for about 20 minutes or until the top surface of the brioche is lightly golden and its temperature is 200 F. Glaze the brioche with your choice of toppings or leave it plain. Store them tightly wrapped in room temperature.
Notes
Nutrition
This post contains affiliate links.
Do you want to improve your food photography? Check out my Food Photography Resources.


I baked it for 22 minutes on convection and unfortunately it was raw in the middle, though it looked perfect on the outside. Didn’t know it was raw until I cut it to serve to a whole group of people! Please use a thermometer to check inside temp, but I would count on it taking longer than 20 minutes to bake!
Thanks for your feedback, Jaime!
HI there! I’m looking to make a cinnamon swirl brioche. Do you know if this would work well with a filling in it before baking?
Hi Jillian! Yes that will be totally work well with this dough 🙂 That sounds delicious!
So I made this last night and am having it with an orange compound butter Ii made…and it is absolutely worth it! The texture is soft and tender but sturdy enough to stand up to whatever goes on top of it. You really need to proof it overnight in the fridge to get that deep fermentation; anything less and it won’t taste right. And the result is visually stunning. Thank you for sharing!
Hello Dan! I am so happy that this turned out great for you! This is one of my favorites. I am dreaming about that orange compound butter! Sounds so good 🙂
Wow! Absolutely delicious!! This is a wonderful recipe and will replace my older one.
Yay! Thank you so much!
It seems like I can chill the dough longer than the 6 hours? Hoping to prepare it the day before and then shape and bake the next day. If I do that, do I need to let the dough come to room temp before shaping? Or does it just take longer to proof once shapes? Also, if I were to freeze the dough, what are the steps to take after I take it out? Do I thaw in the fridge or on the counter? Thank you! This looks delicious!
Hi Lisa! Thank you for your interest in this Brioche braid. It is definitely worth the work.
Okay to answer your questions:
1. Yes, you can chill the dough overnight. Once you are ready to shape it, you don’t need to let it come to room temperature. Just let it sit in the counter for about 3-5 minutes and then go ahead and shape the dough.
2. Chilling it overnight will not drastically affect the proofing time. Two hours or so will be sufficient.
3.If you will freeze the dough, thaw it in the fridge the night before you intend to shape and bake. Say, take it out of the freezer tonight and let it thaw in the fridge if you want to shape and bake tomorrow morning.
Hope I answered your questions!Let me know if you have more. Good luck!
Thank you for the reply! One final question – I know bread is best out of the oven, but how long does it keep for? I’d love to make it to bring to my D in college but know I won’t have time to do it the morning of. Your photos and descriptions are great! Thank you for taking the time to answer my questions.
Hi Lisa! This bread will be soft for a good 3-4 days if you store in a tightly covered container. Past that, a brief microwaving does the trick and the bread will be soft still. This is my favorite brioche and it is so versatile too! Enjoy it and happy baking!
I wanted to come back and say that the bread was DELICIOUS! I think next time I have to move my rack up a little because the bottom browned before the bread was finished. It lasted several days, as you said it would, which is great because it makes such a big loaf. Thanks for sharing the recipe and the photos – it was very helpful! I’m going to make it again for Christmas.
Thank you Lisa! I m really glad that you liked it. This is my favorite too! Making it for Christmas is a brilliant idea. Thank you so much for your feedback. I really appreciate that a lot!
Hi,
What a beautiful recipe just like the brioche. How beautifully narrated the method! Thanx for the great recipe. I will make it soon.
Thanks a lot, Shabna! You will love this!
I didn’t make mine in a ring. Made a braided loaf. And it took 45 minutes to bake! This bread is not for the faint of heart! It takes ALL FREAKIN’ DAY! Won’t be doing this one again any time soon.
Hi,
I just wanted to know if you can use bread flour, if so will it change the flavor? Also, can you use instant yeast?
Hello Tiffaney! You can use bread flour. The texture will be altered to some extent but it will work with the recipe. I have not tried using instant yeast though so I cannot guarantee the results. If you would still like to use it, just substitute directly and follow the recipe as is. Just be sure to look for the cracking of the flour in the proofing stage, as the time may vary.
Could you make hot cross buns with this recipe?
Hi Chris! Yes you can definitely use the dough recipe to make hot cross buns.
Can you freeze this dough and what’s the longest it can stay in the fridge.
Hello, Enola! Yes, you can freeze it after the long chill for up to three weeks. Wrap it well. It also can stay in the fridge for up to two days.
I have this in my fridge right now 🙂 I was hoping to shape it, then freeze and bake it Easter day. Do you think that would work? Would I shape and freeze immediately or shape,proof for 2 hours then freeze? TIA
Hello Joy! Though I have not done freezing them shaped ( I only freeze the dough after the long chill, before the shaping), I would recommend that you freeze the shaped dough, then on the day of baking, let it proof until it is doubled. Probably more than 2 hours:) Keep me posted:)
This sounds delicious! I want to try it as a loaf. Do you think it would be ok to bake in a bread pan? And do you think it would use 2 pans? Thanks for sharing!
Hello Cass,
Yes, you can bake it in loaf pans. If you have 9×5 inch loaf pan, you will need 2 of those. Good luck and keep me posted!
Hello Cass,
Yes, you can bake it in loaf pans. If you have 9×5 inch loaf pan, you will need 2 of those. Good luck and keep me posted!
Hi their
Can you tell me what 1 1/2 sticks of butter is in grams. In Australia we use grams thanks
Hello Liz! 1 and 1/2 sticks of butter is 170.11 grams. Thank you and I hope you enjoy this brioche recipe 🙂
just finished reading your recipe now i have to make one to see if i can achieve this it is going to be the first thing i bake in my life
Hi Robert! I am glad you are going to try it out! Enjoy this recipe and let me know how it goes!
how much by weight 1 and 1/2 sticks unsalted butter please? can lhave the recipe in frensh language if it’possible?
thanks for all
Hello Kenza, 1 and 1/2 sticks of unsalted butter is equal to 270 grams. 🙂 Sorry I can’t translate this to French, though. Enjoy!
Hi!
Thank you for this recipe! I am trying Brioche for this first time so I am very excited!
I just wanted to be sure of how much butter to use. Since i am in South Asia, I’m not entirely sure if region alters types of measuring units. So when i google 1 1/2 sticks of butter, i am getting 170grams. If you could please let me know of how many grams of softened unsalted butter or unsalted even butter i will need.
Hello Miryll! I am sorry for the late reply. 170 grams of butter is right. I do hope you enjoy this. It is one of my favorites!
Good Morning! I don’t have a standing mixer. Is it possible to do this by hand? The butter after kneading is the part that seems difficult by hand. Any advice?
Hi Alison! You can definitely do it by hand. You just have to get ready for the arm work out. It is totally doable though. Just take note of the characteristics of the dough so you can tell if you have kneaded enough. Good Luck! To incorporate the butter, Just add the butter bit by bit and knead it into the dough by folding and pressing the dough against itself until it is very smooth and only slightly tacky.
Yes. It may not come together and it may, seem like it’s too wet of a fought, but if you continue to knead, it will come together beautifully.
You don’t have to add any flour
Hi,I need to know what is a c. It means a cup maybe? Sorry for my English and greetings from germany.
Hi Eli! Yes it is a cup. Thanks so much for dropping by and I hope you enjoy the recipe!