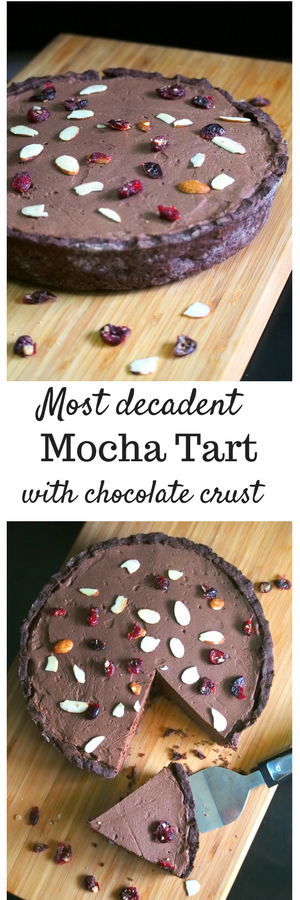
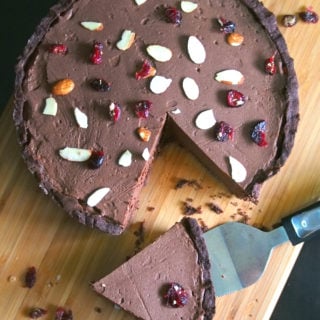
Mocha Tart with Chocolate Crust
Rich, decadent and creamy, this mocha tart with chocolate crust is a perfect finale to your holiday dinner! The luscious mocha filling is encased in a crisp chocolatey crust and can be topped with nuts, raisins or shredded coconut, if you desire.

Okay, I may not always be a fan of ultra rich, super duper decadent desserts, but I have to agree that sometimes, you just gotta have a recipe for one.
And this mocha tart right here is a perfect example.

It is oozing rich with chocolate and has a hint of coffee for its flavor. Needless to say, it is one rich, one grand, one super special chocolate dessert!
The crust for this mocha tart is not your ordinary pie crust. It is a chocolate crust which is a kind of a cross between a cookie and a flaky pie crust. If you ask me, this is my favorite part! When you bite to it, it has that soft crunch and it crumbles like you are eating a chocolate cookie.
The filling is made of chocolate, egg yolks, butter, cream and coffee powder. With that being said, I bet you now realize just why I call this mocha tart one super duper rich dessert. Cream, butter. right?
Meringue is folded into the filling mixture giving the mocha tart a light textured but decadent and luscious mocha filling.

I have to be honest that I am not the person who can eat more than one big slice of this in one sitting, but after a nice, heavy holiday meal or even for just a snack on its own, a moderate slice of this is truly, truly perfect!
This tart can stay fresh in the fridge for up to three days, or it can be frozen for up to three months. It is a good dessert to have on hand. Just like in our house, we never know when cravings suddenly come upon us. I can just easily cut a slice out, share it with my daughter, and wrap the rest again and store it in the freezer.
Mocha Tart: Making the Chocolate Crust
I am loving making pie crusts lately. Just this past weekend I made another batch of chicken empanada, and I loved every moment of making the crust. I just enjoy putting together the flour, salt and butter, smashing them quickly and gently with my fingers then rolling it to form one, thin sheet of dough. If there is one part that I least love, it is how fast the dough starts to warm up and soften while on the contrary, you need to keep it cold while working. Anyways, overall, it is still a fun process for me.
With this chocolate tart, you have to dump the flour, salt and cocoa powder in a clean and dry surface. You gently mix them with your finger tips to combine, then scatter the cold, cubed butter pieces on top.
And then the fun part, you start to smash the butter with your fingers ( or with a pastry blender, if you prefer), and incorporate the butter pieces into the dry ingredients. With the hand method, You actually do a combination of pressing the butter into the flour with your fingers, smashing them with your hands and pressing them against the work surface until the butter and flour somewhat form lumps.
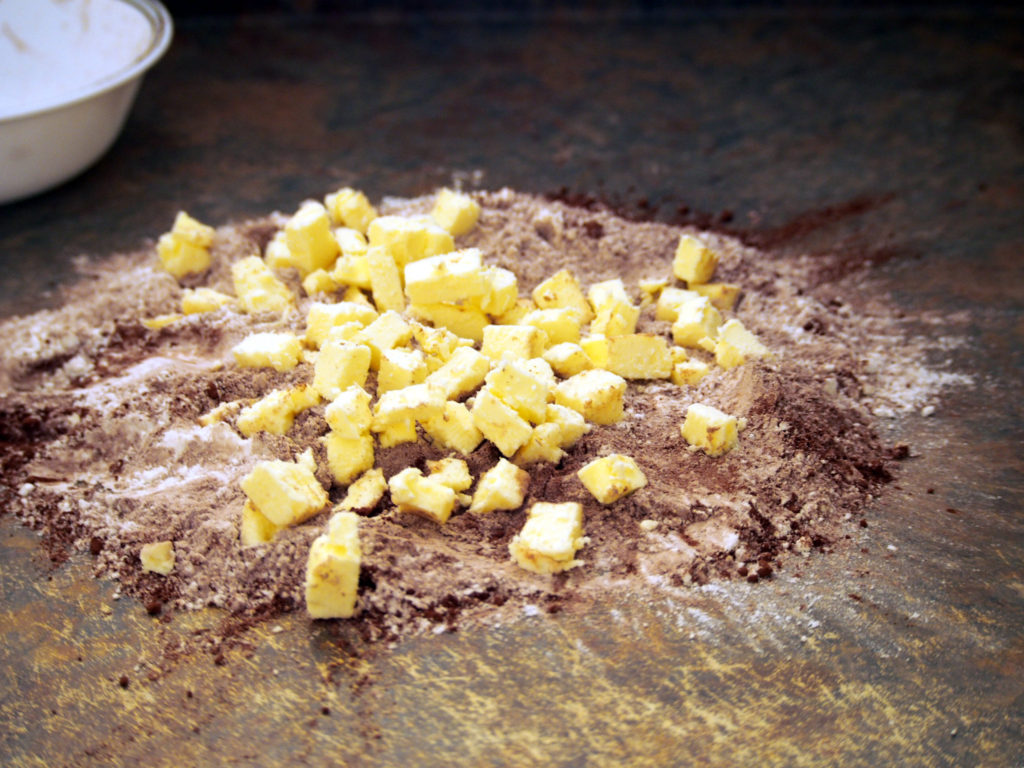
Once you achieved the lumpy, coarse stage, gather them together to form a heap and then make a well in the center. In that well, add in the egg yolk and the cold water.
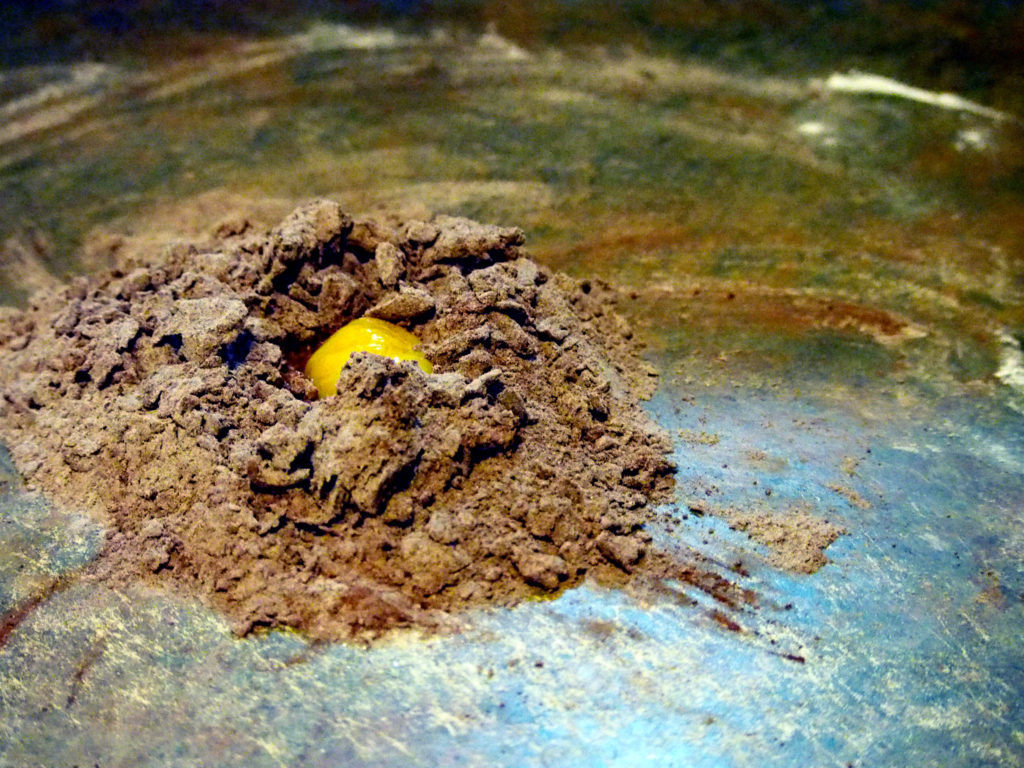
Now with your fingers again, incorporate the ingredients together by pressing and smashing until the dough is almost coming together when you form it with your hands.
This dough will not have a clay-like consistency which is pliable and smooth. Rather, it is crumbly and you have to really press it together to form it as one. If its too crumbly and dry that it does not even form when pressed together, add a little amount of water to help you. Once formed, wrap it on plastic and let it rest on the fridge for at least half an hour.
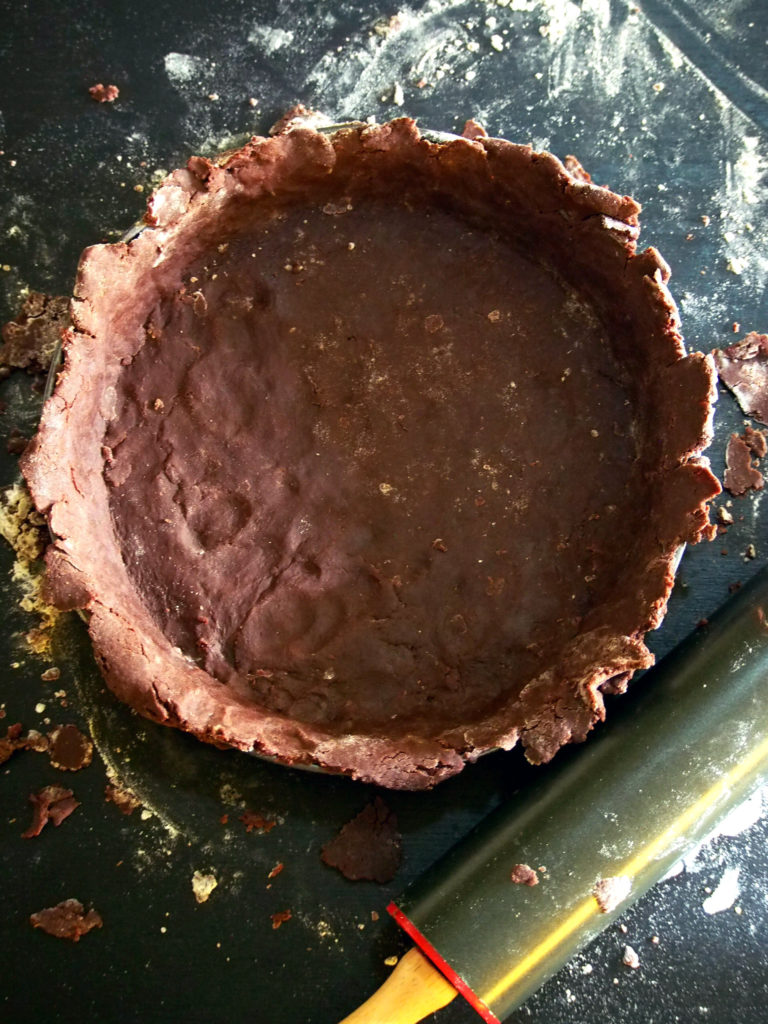
For the rolling part, it is important to note that this dough breaks a lot. I mean, don’t be disheartened if it does not always come in one piece. It will break several times, during rolling and especially while lifting it to fit in the tart pan. The first time I made this I could not even lift it without breaking apart! I was ready to throw it and start over again but please don’t. That is completely normal and totally a character of this crust. Once it breaks, just patch it up. Maybe use some scrap to mend it and keep going.
To fit it into the pan, I hung the dough into the rolling pin as an aide to lift it over the pan. Gently lower and center it onto the pan. Fit the edges by gently pressing it inside. Again, it might break. Just form it together again by pressing it with your fingers, use scraps of the crust to mend where it is broken, you know, just like your playing with it. Just be sure to press it in the same thickness as the rest of the crust. It is okay if you keep mending and patching.
I think it is important to say and always remember this: that baking is not really as seamless and glamorous a process like what it may seem when you look at the finished photos of baked goods on Instagram or Facebook, most often it involves all the mess, all the patching , all the dirty work and like in this one, all the improvisation to make a beautiful end product.
With that being said, I really, really hope that you give this crust a try. The key is to not aim for perfection when it comes to the rolling part, and you will be greatly rewarded with a delicious chocolatey pie crust in the end.
With the filling, the process is easy. You just need to know how to whisk the egg whites to stiff peaks and the rest is breezy.
Here is the recipe. I hope you guys enjoy it!
Need more pies and tarts? Also, try:
Mocha Tart with Chocolate Crust
Ingredients
FOR THE CHOCOLATE CRUST
- 1 c and 1/4 all purpose flour
- 1/4 c sugar
- 1/4 c unsweetened cocoa
- 1/4 tsp. salt
- 1 stick cold unsalted butter, cut into small cubes
- 1 tbsp. ice water
- 1 large egg yolk
FOR THE MOCHA FILLING
- 3 tsp. instant coffee powder
- 5 tbsp. boiling water
- 3/4 c heavy cream
- 8 oz or 2 sticks of butter softened
- 5 large egg yolks
- 10 oz bittersweet chocolate chopped
- 5 large egg whites
- 1/2 tsp. cream of tartar
Instructions
FOR THE CHOCOLATE CRUST
- Dump flour, cocoa, sugar and salt in a clean and dry surface. Using your finger tips or a fork, whisk them gently to combine. Scatter the cold, cubed butter on top of the dry ingredients.
- Incorporate the butter into the powders by pressing the butter with your finger tips, smashing them into the flour with your hands and pressing them against the surface until the butter and flour turn lumpy and coarse. ( You can also use a pastry blender, if you prefer). Gather them into a heap and make a well in the center. Add in the egg yolk and cold water into the well and by smashing, pressing method, incorporate the ingredients together until you can form them into a ball when pressed. This crust will be crumbly. If necessary add a tiny amount of water if it is too dry that you can't form it into a shape.
- Gather the dough and wrap in plastic wrap. Refrigerate for at least half an hour. After resting, generously flour a work surface. Pat the dough to flatten it slightly and using a rolling pin, roll it out to a thickness of about 1/4 inch. If dough breaks, simply press it again to patch it up. Lift the dough with the help of a rolling pin and gently center it into a 9-inch pie or tart pan. If dough falls apart, mend them together, using scraps of the crust if necessary. Gently press the dough to fit into the edges of the pan. Cut the excess dough on the pan edges, then make the edges neat by pressing them with your fingertips. Refrigerate the pan to let it rest after the rolling and shaping. Preheat oven to 350 F.
- Bake the crust for about 17-20 minutes until it looks dry and firm when touched. Let cool and set aside.
FOR THE MOCHA FILLING
- Dissolve the coffee powder in the boiling water. In a medium saucepan, combine the egg yolks, cream, butter and the coffee mixture and over medium heat, stir them constantly until the temperature reaches 160 F. It is important to stir continuously or the eggs will curdle. Turn off heat and quickly add the chopped chocolate and stir until melted. Let this mixture cool.
- In a stand mixer or using a hand mixer , whisk the egg whites until frothy, add in the cream of tartar. Continue to run the mixer until egg whites form stiff, shiny peaks. Fold egg whites into the egg yolk mixture until well incorporated. Spoon or pour the filling into the cooled chocolate crust. Refrigerate mocha tart for at least 2 hours to firm up. Serve with your desired garnish.
Notes