
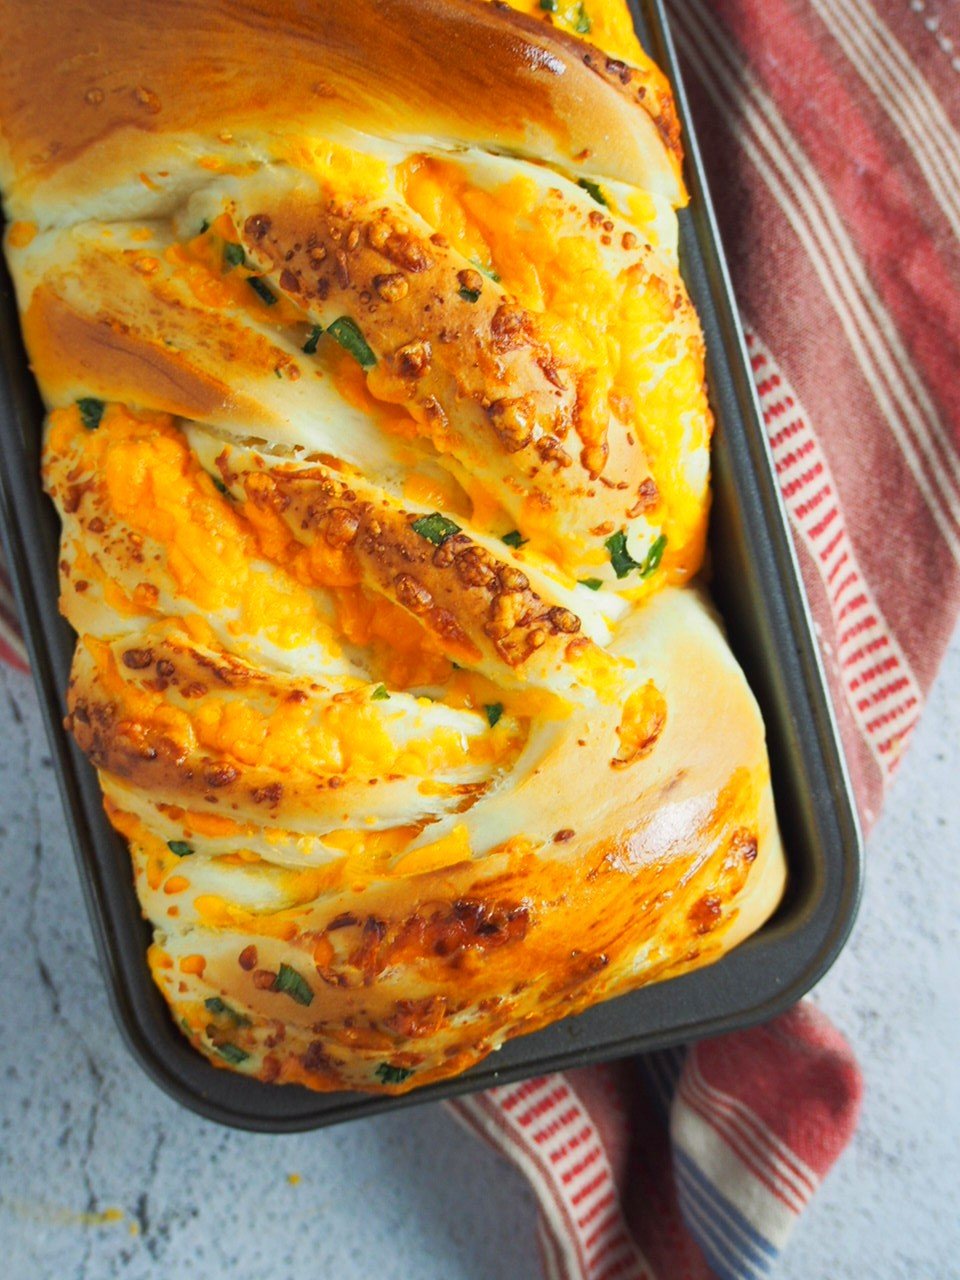
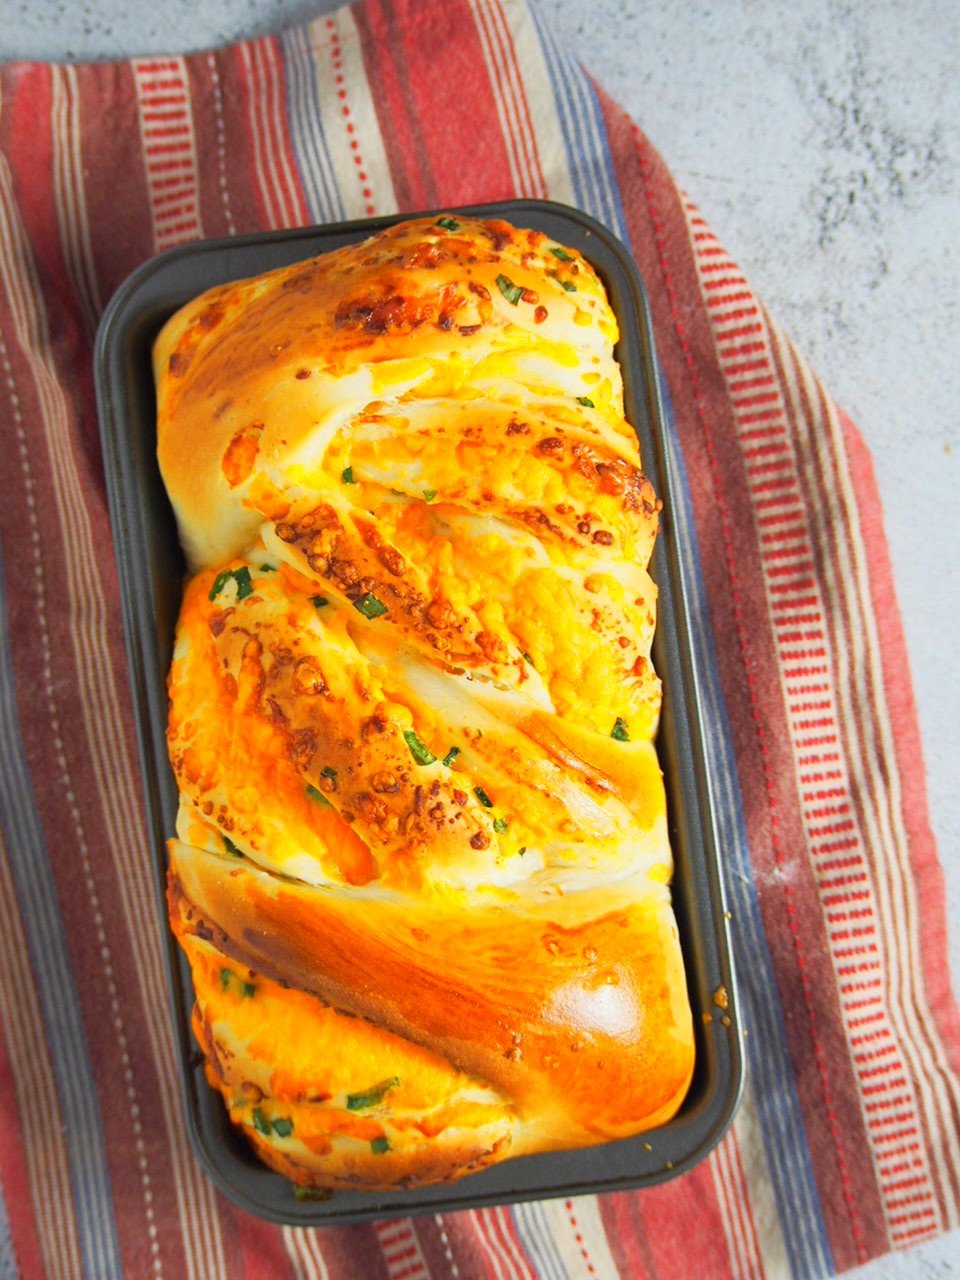
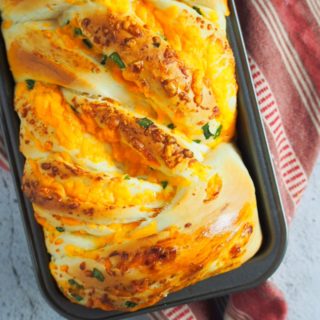
Cheese Loaf Bread
Cheddar and parmesan cheeses with bits of scallions, this savory cheese loaf bread will have you wanting slices after slices. It is ultimately cheesy! If you want a herb bread version, try Garlic Herb Bread. Also check out Cheddar Cheese Buns- slightly similar but in buns form.
(This recipe is originally posted on August 2019, and updated on October 31, 2022 to address the raw middle dough issue)
I originally intended to make a different bread than the Cheese Loaf Bread that you are looking at now. I was planning on making a keso loaf which I saw on an Asian supermarket. It looked like a regular a sandwich loaf, maybe with bits of cheese in the dough, but definitely no cheese on top.
When I started to develop the recipe I thought, why make a sandwich loaf with bits of non-visible cheese when I can actually make a braided loaf that is filled with loads of cheese?
Parmesan and cheddar cheese plus some scallions mixed in proved to be a winner-combo in a braided loaf. Once baked, the cheeses crisp up beautifully on top. The garlic powder gives the bread a tasty savory edge.

And the bread of course! The dough recipe is from Sally’s Baking Addiction and it is fantastic. It requires one rise only (great for yeast beginners) and yields a soft bread that is versatile for anything that you want to make.
It turns into this delicious cheese loaf. The flavor, the texture and the looks of it make my heart swell with joy.
How to Make Cheese Loaf Bread?
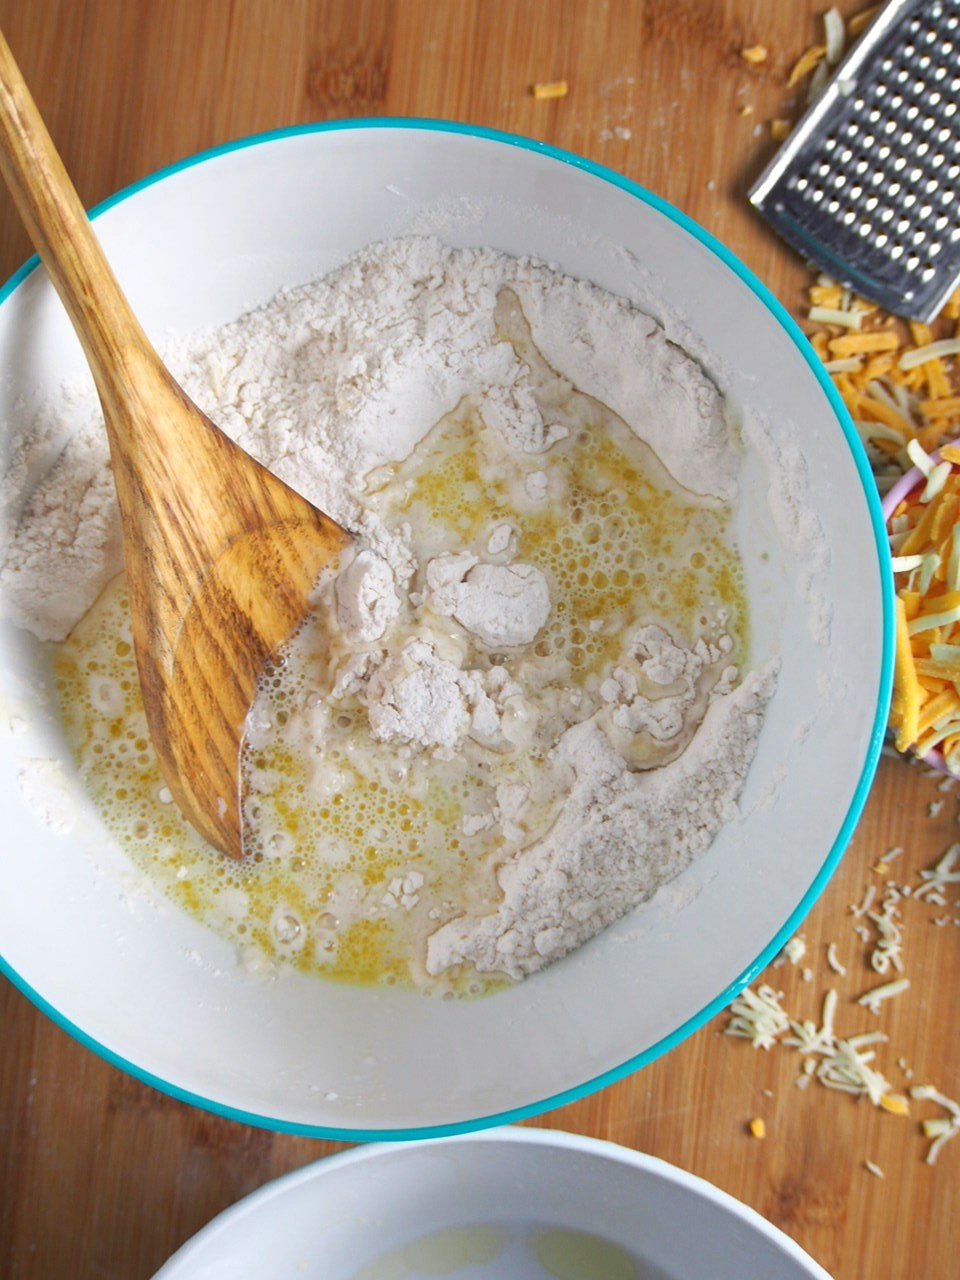
In a large mixing bowl, combine 2 and 1/4 cup all-purpose flour, sugar, salt and active dry yeast. Whisk well.
In a microwave-safe bowl, microwave butter, milk and water until the butter melts. The temperature of the mixture should be between 110-115 F. Reheat in the microwave to achieve that temperature if needed.
Add the butter mixture to the dry ingredients in the mixing bowl. Stir it using a wooden spoon until incorporated. Add the egg and stir.
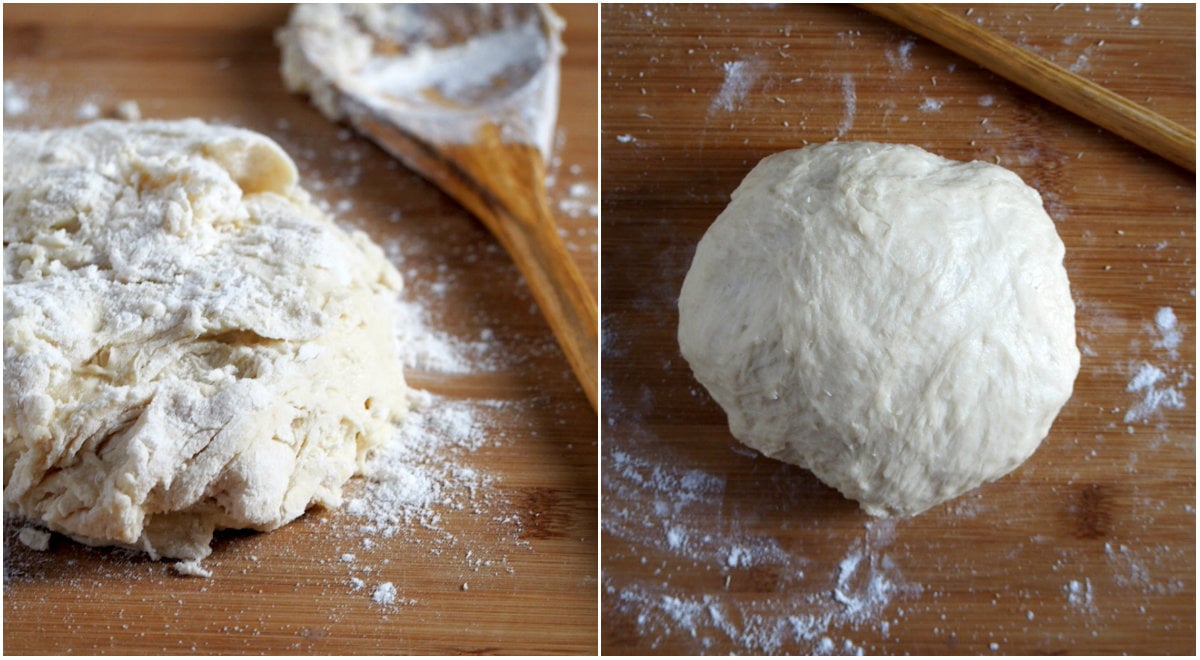
Add some of the reserved flour gradually while stirring until the mixture turns into a soft dough that gathers in the center of the bowl. After that, stop adding the flour. You may not need all of it.

Turn the dough onto a floured board and knead it until it is smooth and elastic. If you would like to test, pull out a piece of dough and stretch it out using your fingers. You should be able to form a translucent film in the center. Let the dough rest for ten minutes in a bowl, covered.
Are you a yeast beginner? Check out my How to Knead Bread Dough with Video post.

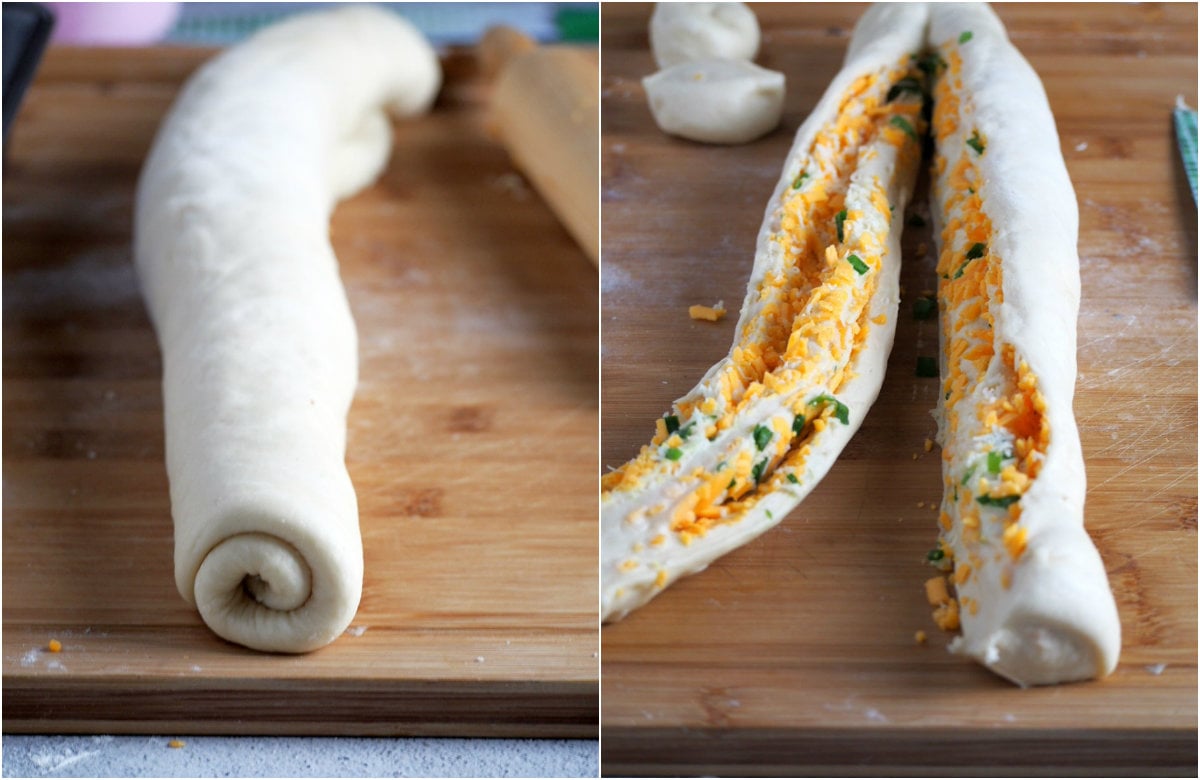
Starting on the long edge, roll the dough into a tight log. Using a sharp knife, slice the log in half vertically, starting about an inch below the upper edge, leaving the top edge uncut. Gently rotate the divided logs so that the cut side is facing up.
Begin braiding the dough by placing one side over the other, repeating the braiding pattern until you reach the end of the log. Gently lift the braided dough and place it inside a greased 9×5 inch loaf pan.
To let the dough rise, loosely cover it with a clean kitchen towel and allow it to rise for 1 ½ to 2 hours or until it doubles in bulk.

Bake time! Position a rack one level below the middle position in the oven. Preheat oven to 350 F. Once the oven reaches 350 F, place the loaf pan on the prepared rack.
Bake the loaf for 43-46 minutes or until the top is deeply golden. Loosely cover the loaf with foil at the 25-minute mark. Serve this warm and enjoy every cheesy slice!
More Recipes to Love:
- Cheese Scones with Scallions
- Garlic Herb Bread
- Sweet Cheese Bread
- Tuna Buns
- Braided Hotdog Buns
- White Chocolate Almond Buns
- Hawaiian Rolls
- Double Chocolate Mini Buns
- Chocolate Chip Bread
- Blueberry Cinnamon Rolls with Lemon Cream Cheese Glaze
Cheese Loaf Bread
Ingredients
- 2 and 1/4 cup all-purpose flour plus 1/4 cup reserved
- 3 tbsp sugar
- 1 tsp salt
- 2 and 1/4 tsp active dry yeast
- 3 tbsp butter or 43 grams
- 1/2 cup water
- 1/4 cup milk
- 1 large egg
For the Filling
- 4 stalks scallions/ green onion chopped
- 1 cup cheddar cheese grated/shredded
- 1/2 cup parmesan cheese grated
- 1 tsp garlic powder
Instructions
- In a large mixing bowl, combine 2 and 1/4 cup all-purpose flour, sugar, salt and active dry yeast. Whisk well.
- In a microwave-safe bowl, microwave butter, milk and water until the butter melts. The temperature of the mixture should be between 110-115 F. Re-heat in the microwave when necessary.
- Add the butter mixture to the dry ingredients in the mixing bowl. Stir the mixture using a wooden spoon until incorporated. Add the egg and stir. Add some of the reserved flour gradually while stirring until the mixture turns into a soft dough that gathers in the center of the bowl. You may not need all the flour.
- Turn the dough onto a floured board and knead for 6-12 minutes, until it is smooth and elastic. Let the dough rest for ten minutes in a bowl, covered.
- Roll the dough using a rolling pin into a 14×10 inch rectangle. Sprinkle garlic powder all over the dough. Sprinkle the cheeses and the scallions. Starting on the long edge, roll the dough into a tight log. Using a sharp knife, slice the log in half vertically, starting about an inch below the upper edge, leaving the top edge uncut. Gently rotate the divided logs so that the cut side is facing up.
- Begin braiding the dough by placing one side over the other, repeating the braiding pattern until you reach the end of the log. Gently lift the braided dough and place it inside a greased 9×5 inch loaf pan.
- Let the shaped dough rise for 1 ½ hours, covered with a clean towel. The braided dough should be soft and puffy.
- Position a rack one level lower than the middle position in the oven. Preheat oven to 350 F. Once the oven reaches 350 F, place the loaf pan in the prepared rack. Bake the loaf for 43-46 minutes, lossely covering the loaf with foil at the 25 minute mark. The top is nicely golden and a thermometer inserted at the center of teh loaf should read 200 F. Let the loaf cool on a wire rack completely.
Video
Notes
- Store leftovers in a tightly covered container at room temperature for up to 3 days.
- To serve, re-heat for a few seconds n the microwave. Dough recipe from Sally’s Baking Addiction.


I have a question on all your yeast rd breads and treats, even if your recipe’s do not say to proof your yeast like this one for instance, shouldn’t that be the case. I am new to yeast because I hate working with it. I love to bake but hate working with yeast and am trying to teach myself how to knead and make pie crusts. Those three things are to me the hardest.. yeast, kneading and pie crust. But, in any recipe shouldn’t yeast always be proofed?
Any tips on pie crust
Any tips on kneading
Hi Doriselda. That is a great question. In almost all of my recipes here, I proof the yeast. It’s a matter of habit but technically, experts say that the yeasts do not need proofing, unless you suspect that it is old. In that case, it saves you time by letting you know ahead, that your bread will not rise, and you need a new bottle of yeast.
However, in my experience, I love proving yeast because the resulting dough is easier to handle and the first rise results in a puffier dough. Although the end result of bread will be the same, the manner in which they rise is different. In the end, it all comes down to what you prefer. The result will be not much different.
This particular recipe is aimed to be a beginner-friendly, so the proving is skipped, and there is only one rise.
As with kneading, the aim is to make the dough noticeable smoother and stretchier. My surefire way to know is by using a windowpane test.
https://www.womanscribbles.net/how-to-knead-bread-dough/
When making pie crust, the initial aim to make a coarse mixture ( almost like sand with little bits of butter here and there), with the flour, sugar, salt and butter. Once you achieve this texture, you will add a bit liquid (really just enough to make the dough cling togetehr when pressed). We do not really knead pie crust, but as needed, we kind of knead it just to gather into a single mass.
It is important to chill the pie dough, then after rolling and shaping it into a pie shell, we need to chill it as well. Pie crusts need to stay cold ( not warm atleast) so that the butter does not soften before baking.
And lastly, the best teacher is just to practice. I guess for me nothing beats personal failures and mistakes 🙂
I hope I helped you somehow.:) Happy baking
Hi Sanna. I came across your recipe from looking thru Google for cheese bread recipes. It looks very good and I have made bread before so I would feel comfortable making this loaf, like tomorrow. I was wondering if you think cheddar is the best cheese to use because of the sharpness and color. I really like hatch chili, or jalapeño jack cheeses and I don’t see any problem using one of them. Any thoughts on that? Thank you for sharing your instruction on the filling and braiding of the loaf. I will leave feedback on my success after I make my bread.
Hi Sandy! Jalapeno cheeses will work great here as well too. I do not see any problem with any hard cheeses, it should work fine! Good luck and keep me posted!
I made this bread three times everyone loved it the only problems was all the stuff falling out after I sliced it down the middle I had to pick up all the inners and throw back on top of bread but it just didn’t look as pretty s as tots, but so tastes good.
Hi Debra! I am glad you liked it. To avoid the filling from spilling out, press them against the dough firmly before rolling. With that said, a certain degree of mess happens to me as well, but I stuff it back in and it is still okay. So you are not alone 🙂
Is the dough suppose to rise after 10 minutes? Mines didn’t
Hi Georgette! No, it won’t rise. It is only a resting period. ❤️
I love love this recipe. But how do I get it to bake in the middle without burning the top of the bread thanks for your help!
Hi Ashley! You can use a slightly bigger loaf pan if you have it, or cover the top loosely with foil during the last 5-10 minutes of baking to avoid overbrowning. I hope that helps
I made this bread and everyone at work thought it was just the best ever. I did use the dough attachment on my mixer because of my arthritis and it came out fine. Thankyou
Hi there! I am so happy to know that! Thanks for your feedback.
I love this recipe, I have made it 3 times with absolutely no problems. delicious ❤️❤️❤️
Hi Tanya! Thank you so much! I really appreciate your feedback 🙂
Hi, I made your recipe but the dough was very loose and did not shape well, is the amount of flour right?
Hi Gerry! I am sorry you had trouble. IF the dough seems too loose, you can a bit more flour during the initial mixing.
This recipe has become a house favorite! Comes out perfect every time!
I love this recipe and have made it more then a few times! I have recently purchased a stand mixer with dough hook and was wondering it the times for kneading by hand would be the same for the mixer? Or if you would alter the recipe at all. Thank you.
Hi! You may need to add just a bit of flour as kneading in the mixer results in a more wet dough. Kneading time would be about the same, the dough should clean the sides of the bowl.
This bread taste so good! I didn’t have green onions or shredded cheese , so I cut up sliced marble cheese. I just used what I had on hand. It is easy to make and taste good. I will definitely make this one again and again.
Thanks for the recipe!
Hello Joanne,
I am so happy you loved it! Thanks a lot!
Great instruction but when rolling out the dough the size is more reasonably 10×20 to get a proper braid as seen in the video. Thanks for the recipe!
I am looking forward to making this bread tomorrow. My question is about freezing the bread. What are your recommendations?
Thank you,
Libby
Hi Libby! To freeze, wrap the bread in plastic film, then in foil. Freeze it for up to 3 weeks.
Hi Sanna ,
I made this bread twice and on both occasions it went flat towards the center and when I sliced there was raw dough. The ends have cooked fine , what have I missed or done wrong . I would like to send you pics if possible to see
Hi! I am sorry you had trouble! It’s hard to say, as the temperature of oven varies. I suggest that you cook it at 300 F for 5-10 minutes more.
If it’s cooking on the outside but not the inside, try turning down the temperature and cooking for longer.
This recipe was amazing. I read through the comments and made a few small changes. I switched the water and Milk amounts and the bread texture was perfect for the cheese. I also cooked for 25 minutes at 350 and then another 10 at 300. Then let it sit with the oven open for 15 just to make sure it cooked through. Last I added minced garlic with the cheese and pushed down. AMAZING recipe. Sharing and making again soon.
Thanks so much for your tips and feedback, Camille!
This was genuinely delicious! Easy to make, not too time-consuming, and the bread itself is so soft and so cheesy and delicious that even if it ends up not looking as great as the pictures here, it’s well worth it. For the record, I switched out the green onions for leeks, since that’s what I had on hand and it was excellent.