
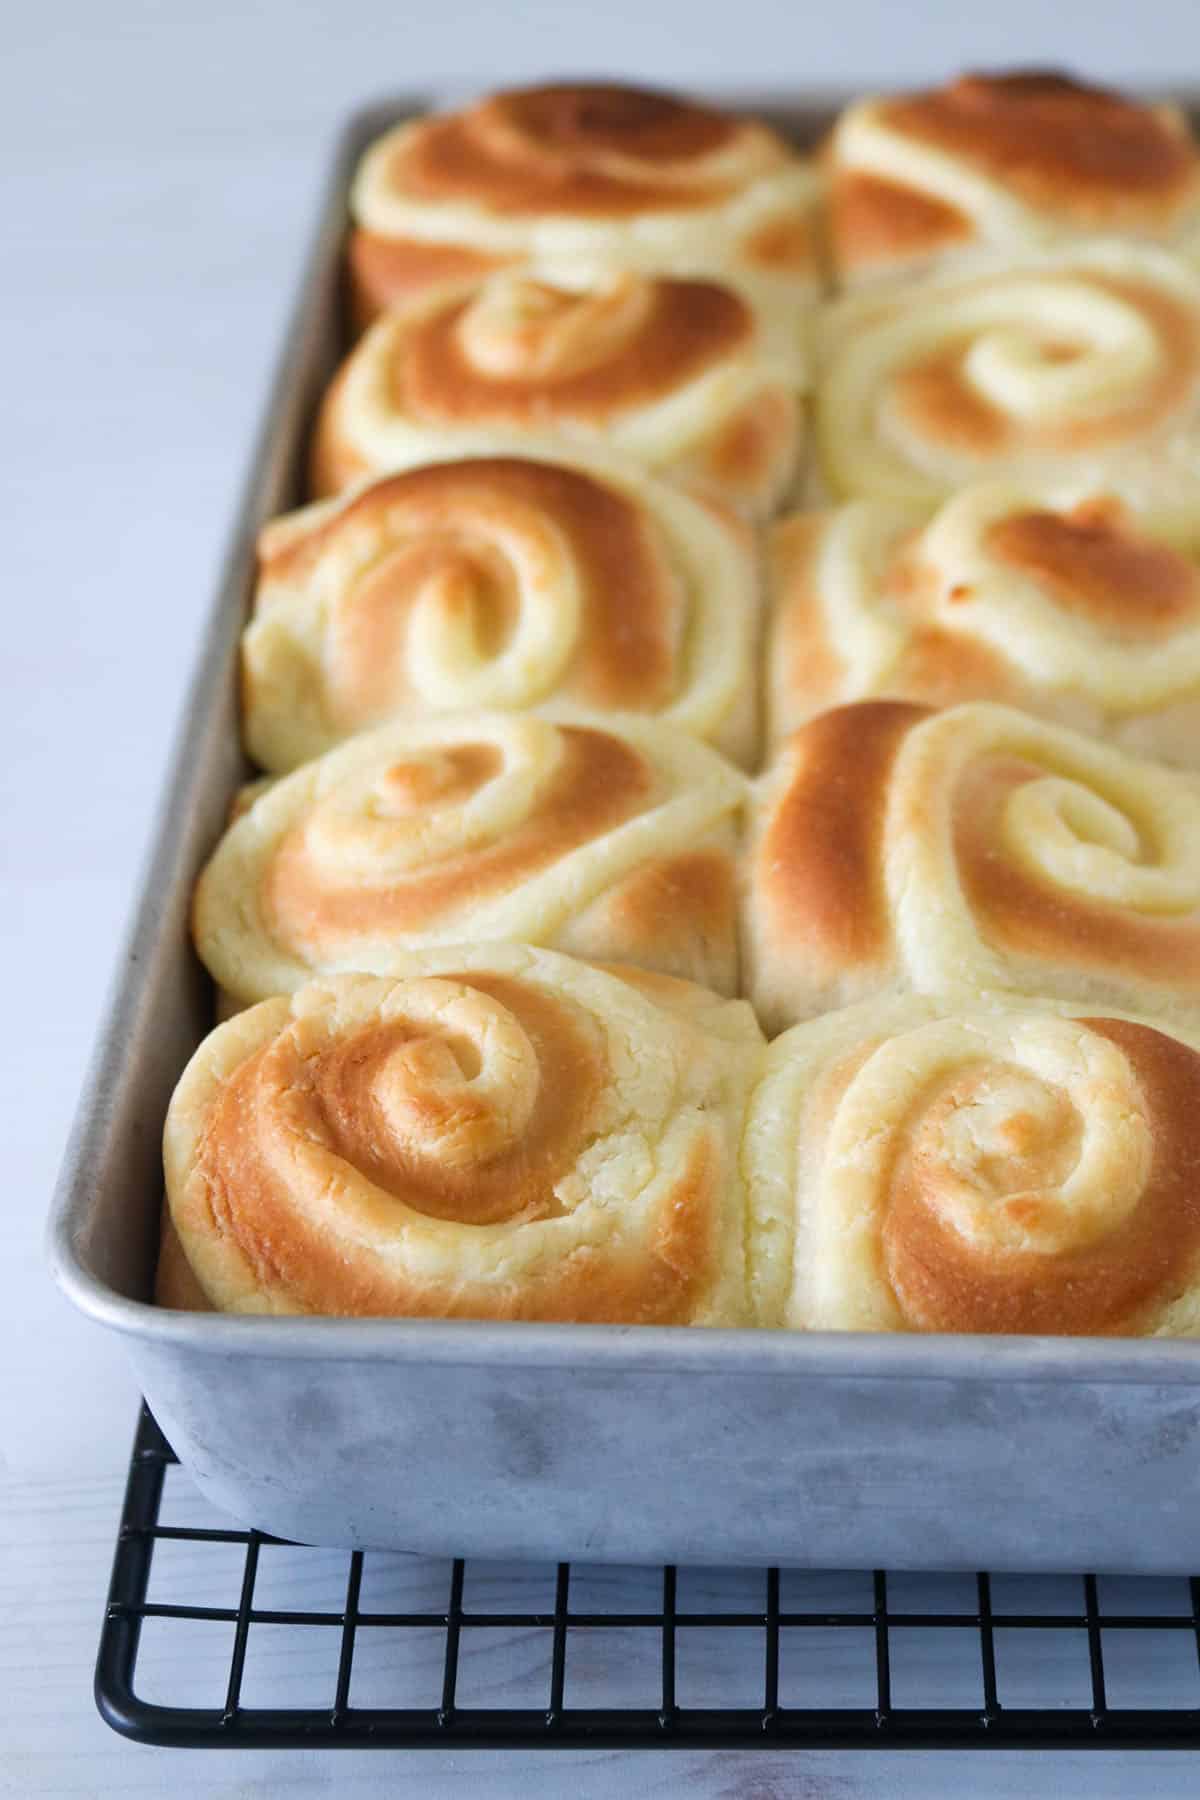
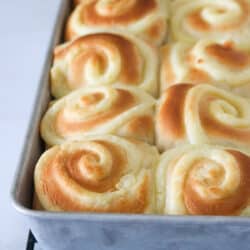
Custard Buns
Custard buns are soft milk bread filled with a creamy custard filling in the centers. They are delightful soft buns that make perfect snacks or breakfasts.
It may seem to you that I am slathering the blog with bread recipes lately, and I have no argument with that. From last week’s recipe, the Ube bread rolls, we now have these custard buns that filled our house once more with the wonderful aroma of fresh bread baking in the oven.
Custard Buns
These buns are soft and slightly sweet, and they are actually the same buns from the milk bread recipe that I posted weeks back.
I find the recipe so versatile and easy to make that I have been experimenting with incorporating delicious elements to it. This time, the addition of custard filling makes them even more special.
The custard filling blends beautifully with the bread each time you bite. It adds sweetness to the bread. I always grab one of this buns for a quick fill me up during the day, and of course, they are perfect with a mug of your hot drink for breakfast.
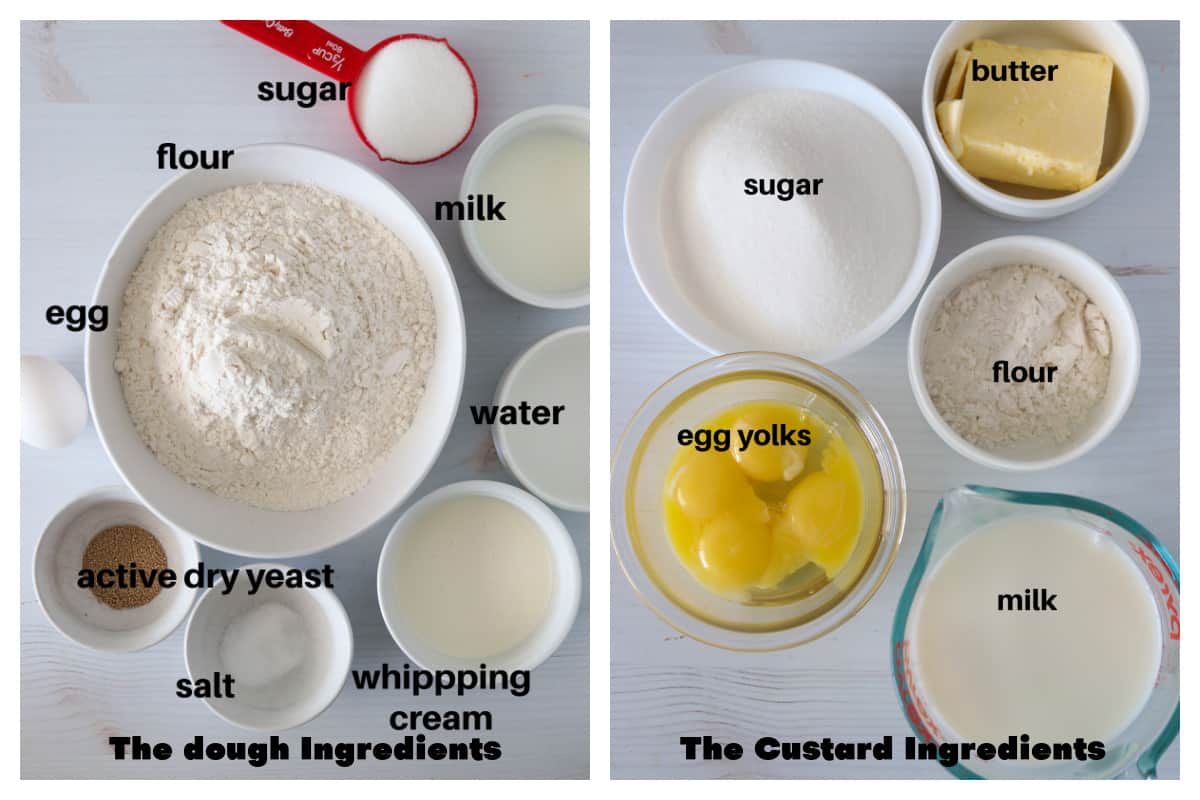
The Ingredients
Custard Buns: The Process
Proof the Yeast
In the bowl of a stand mixer, combine yeast, warm water and about 1 teaspoon of the sugar. Let this sit until foamy, about 5-7 minutes.
Make the Dough
- Add the milk, cream, the remaining sugar, egg and salt. Stir everything with a wooden spoon until incorporated. Attach the dough hook to the stand mixer.
- Add 3 cups of flour, one cup at a time to the bowl, beating at low speed after each addition. Then, add the remaining 1 cup of flour and beat, starting at low speed then speeding up gradually as the flour becomes incorporated.
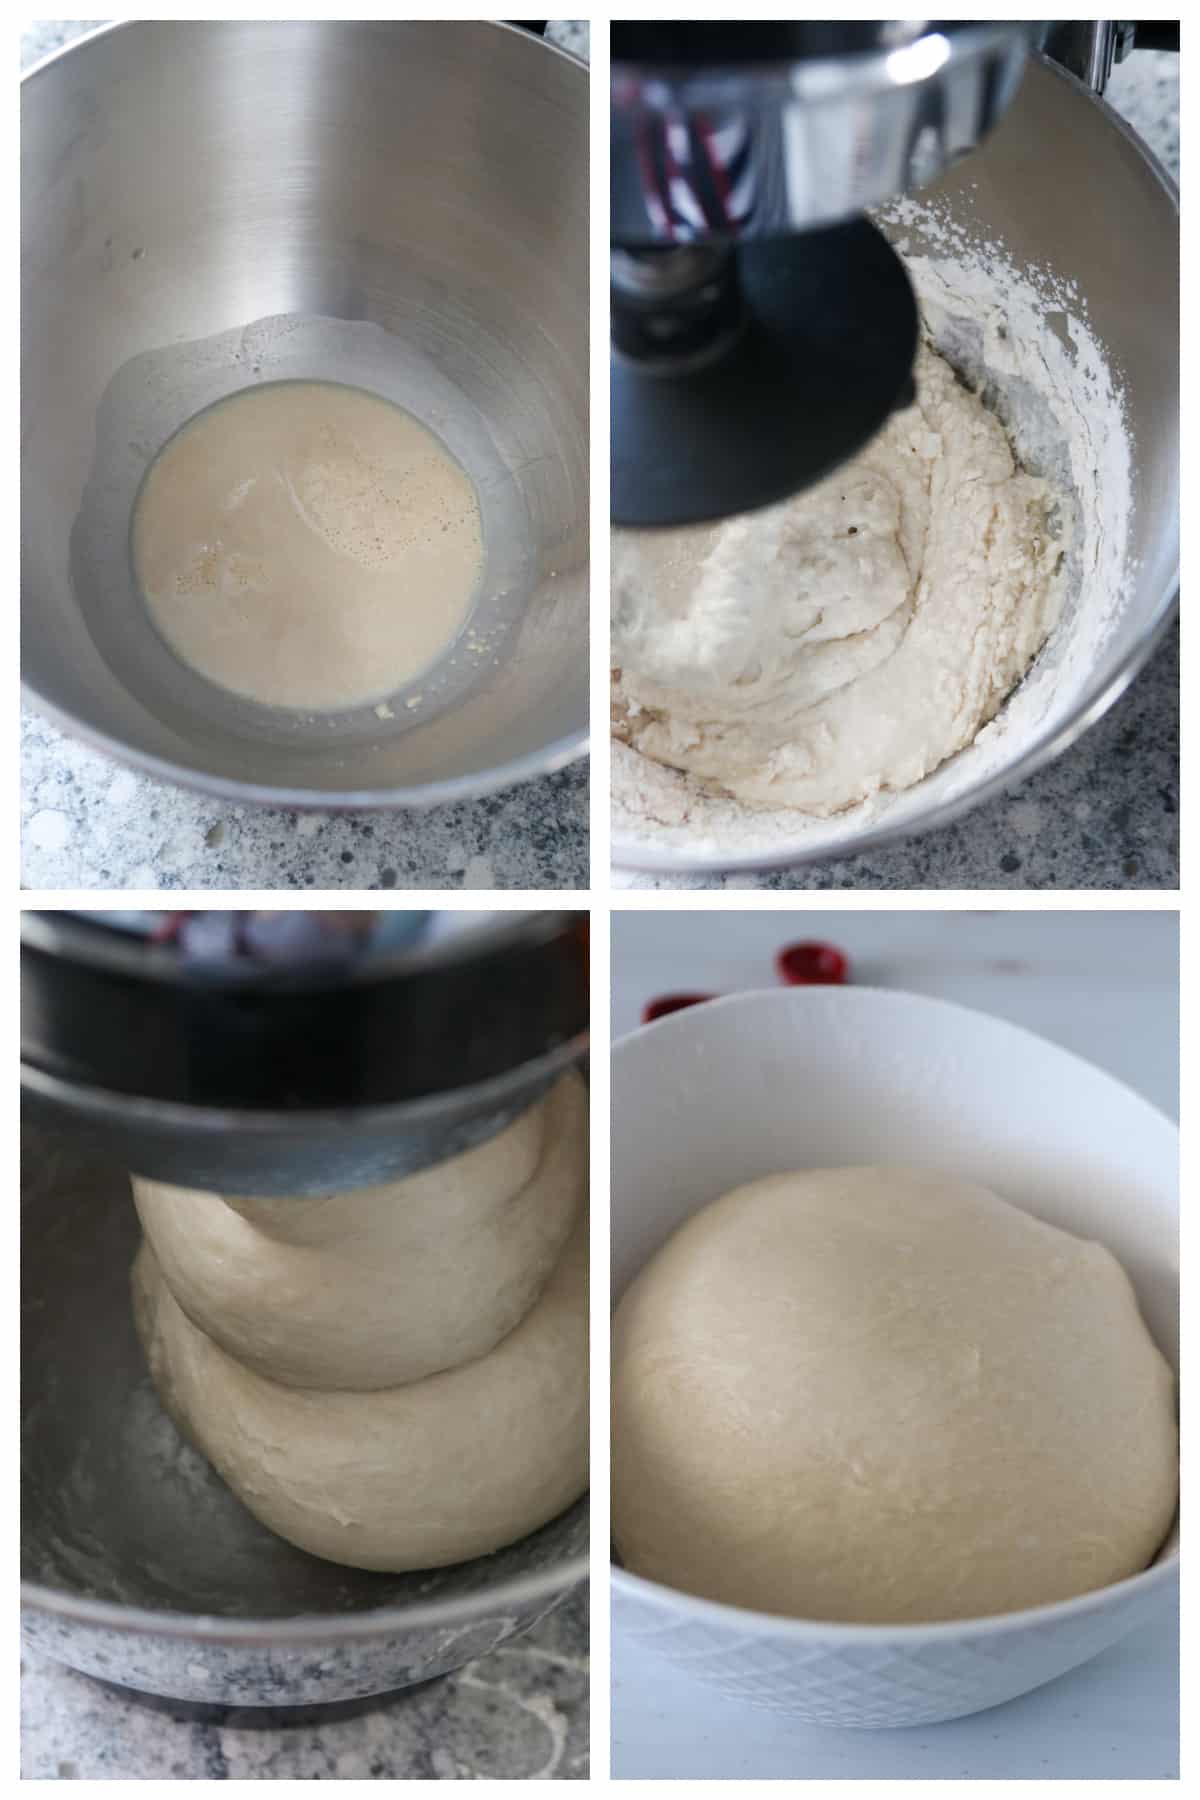
Kneading the Dough
- Knead the dough using the mixer for 5-8 minutes until it starts to gather in the center of the bowl. Increase the speed to high and continue to beat for 5-7 minutes more, gradually sprinkling about 3-5 tbsp. of flour to release the dough from the bottom of the bowl.
- The dough is ready when it starts to slap the sides of the bowl. It should now be smooth and elastic.
First Rise
- Shape the kneaded dough into a ball. Place it in a bowl and cover with a clean kitchen towel. Let this rise for 1 ½ hours, or until doubled in bulk.
- Meanwhile, make the custard filling.
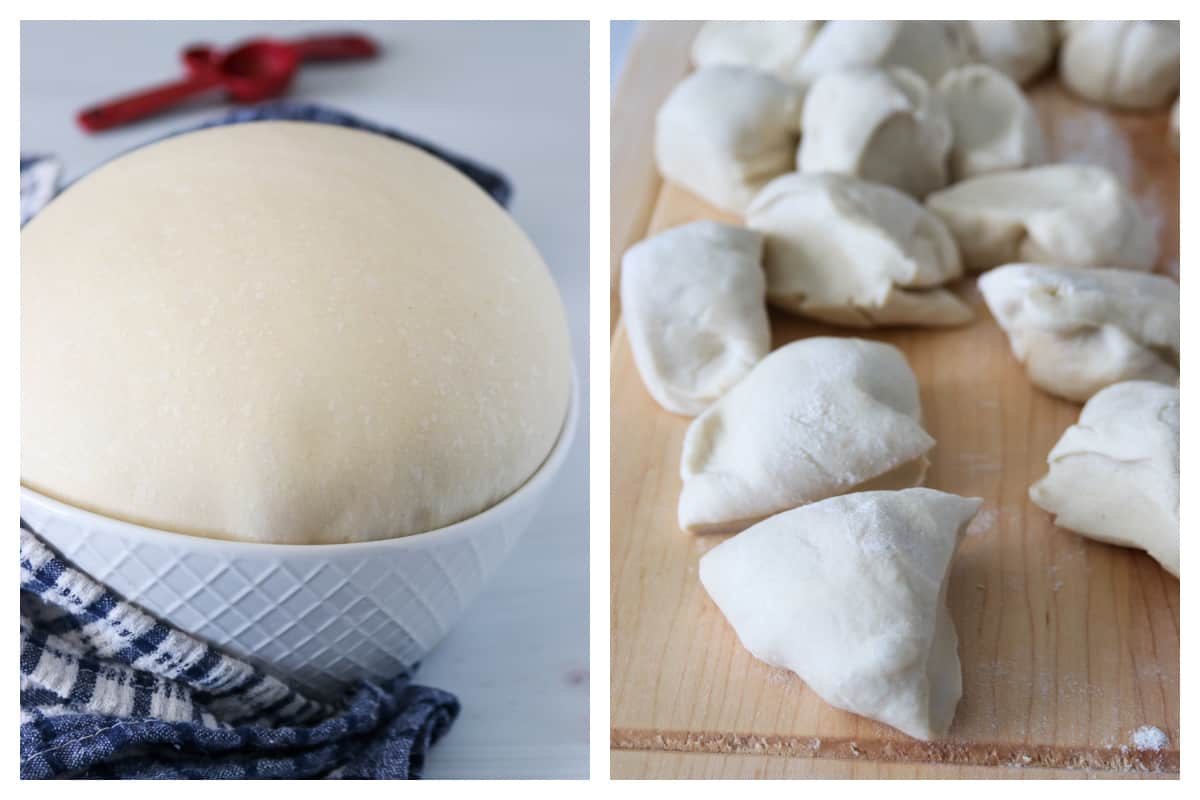
Shape and Fill the Dough
- Gently deflate the risen dough. Shape it into a log and cut it into 16 equal potions.
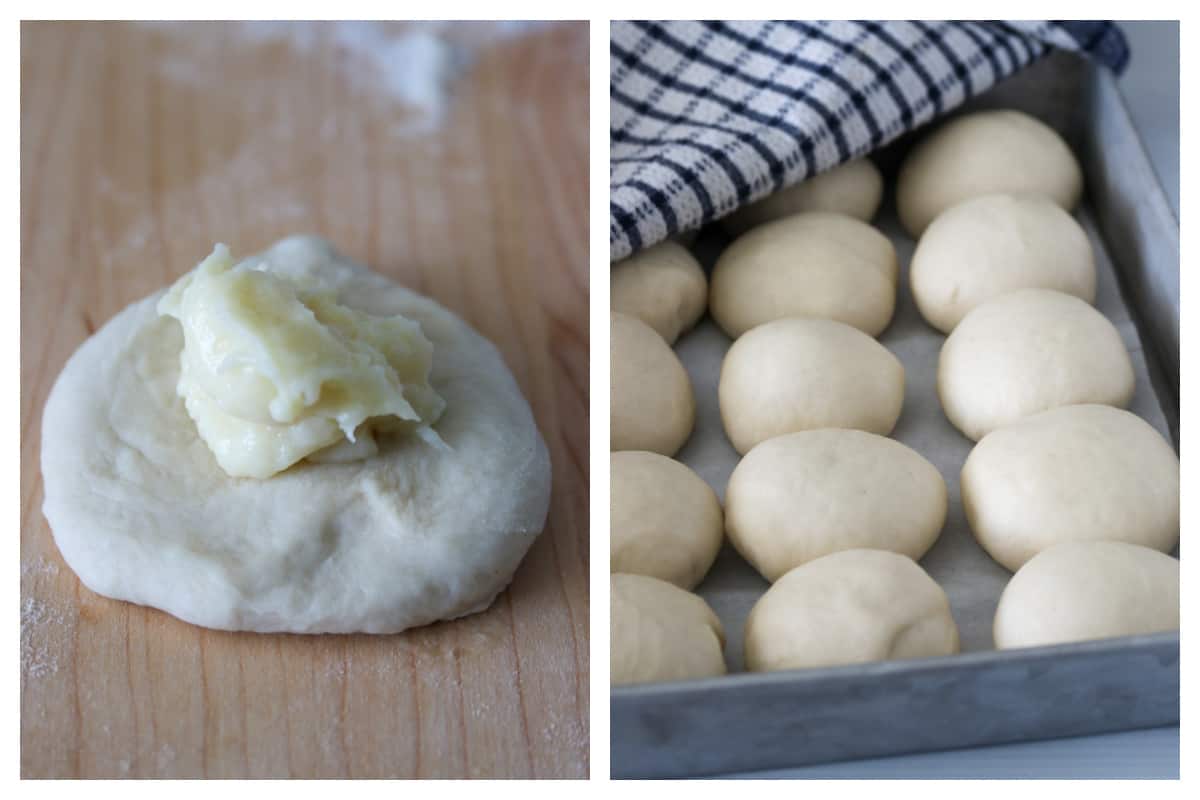
- To fill them, flatten a portion into a disc. Spoon about a tablespoon or two of the custard. Fold the edges of the dough towards the center to cover the filling.
- Twist the ends of the dough to seal it close. The shape will be a smooth ball. Arrange the portions on a 9x 13 inch baking pan that is lined with parchment paper. Make sure the buns are spaced evenly.
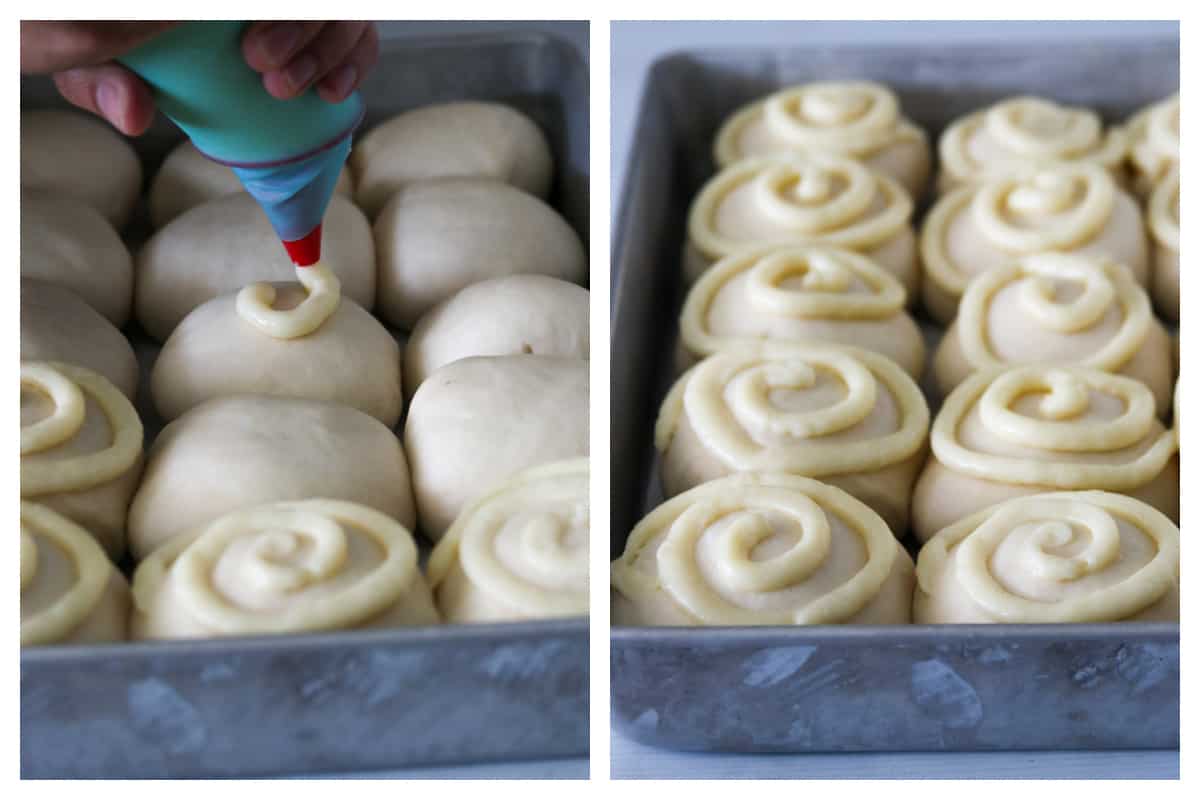
- Transfer the remaining custard on a piping bag with a piping tip.
Second Rise and Piping the Custard
- Cover the buns loosely with a towel once more. Let it rise for 40 minutes to 1 hour. The buns should now be touching each other.
- Preheat oven to 350F. Pipe some spiral on the surface of the buns.
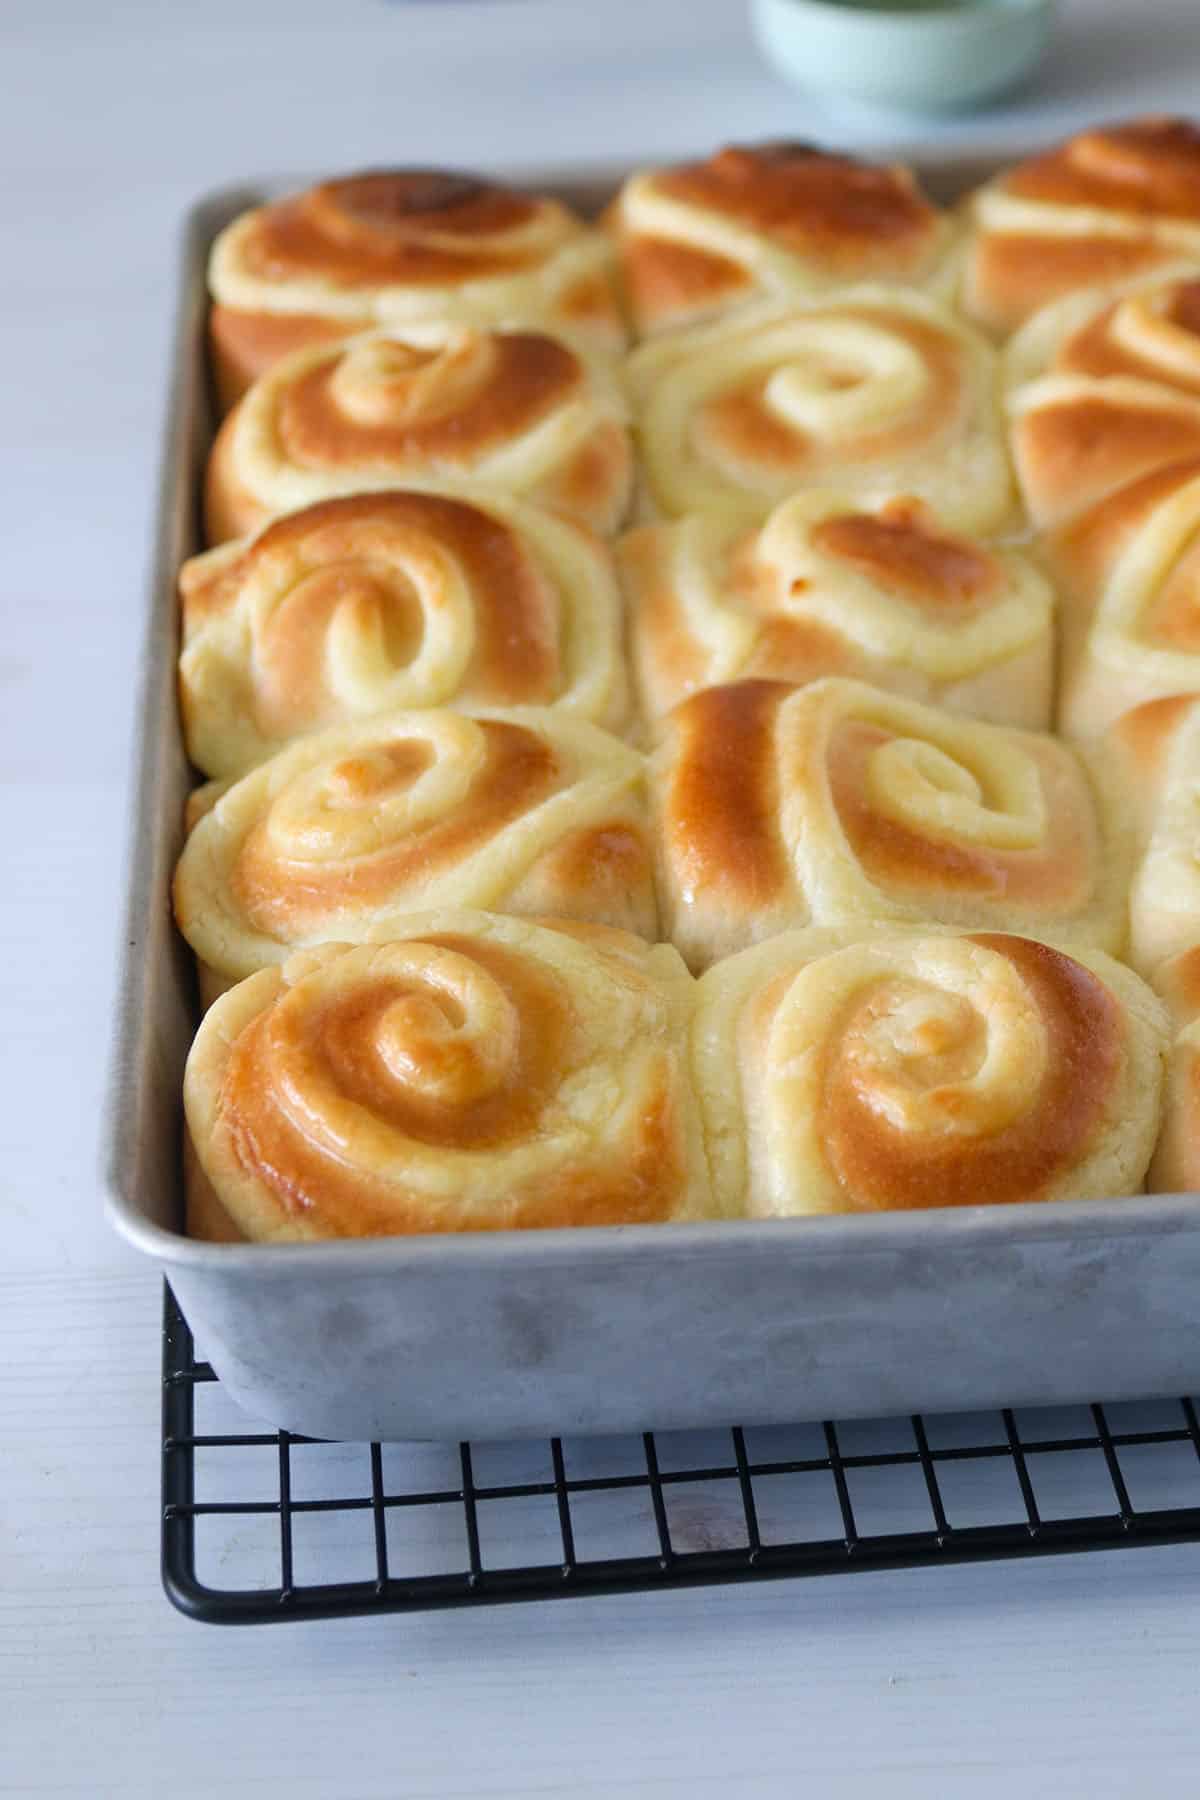
Bake
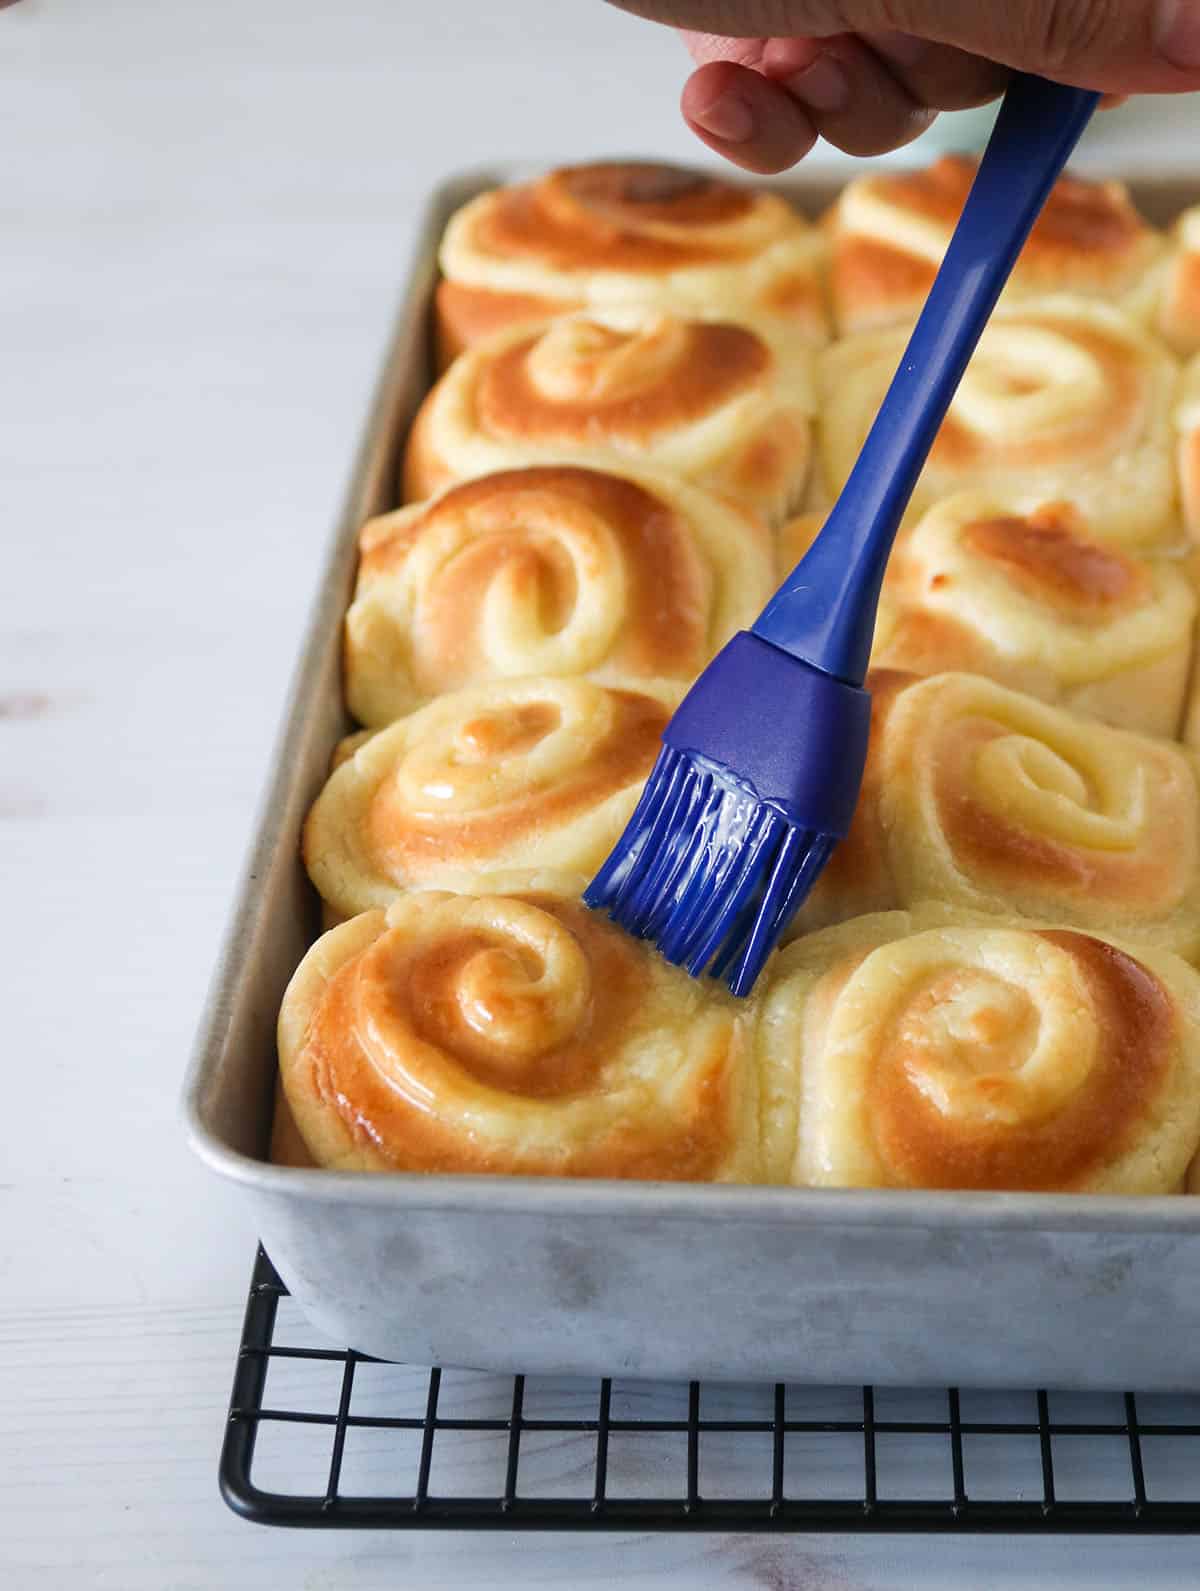
Bake the buns at 350 F for 25-30 minutes, or until lightly golden on top. Brush the tops with melted butter. Serve warm.
How to Make the Custard Filling?
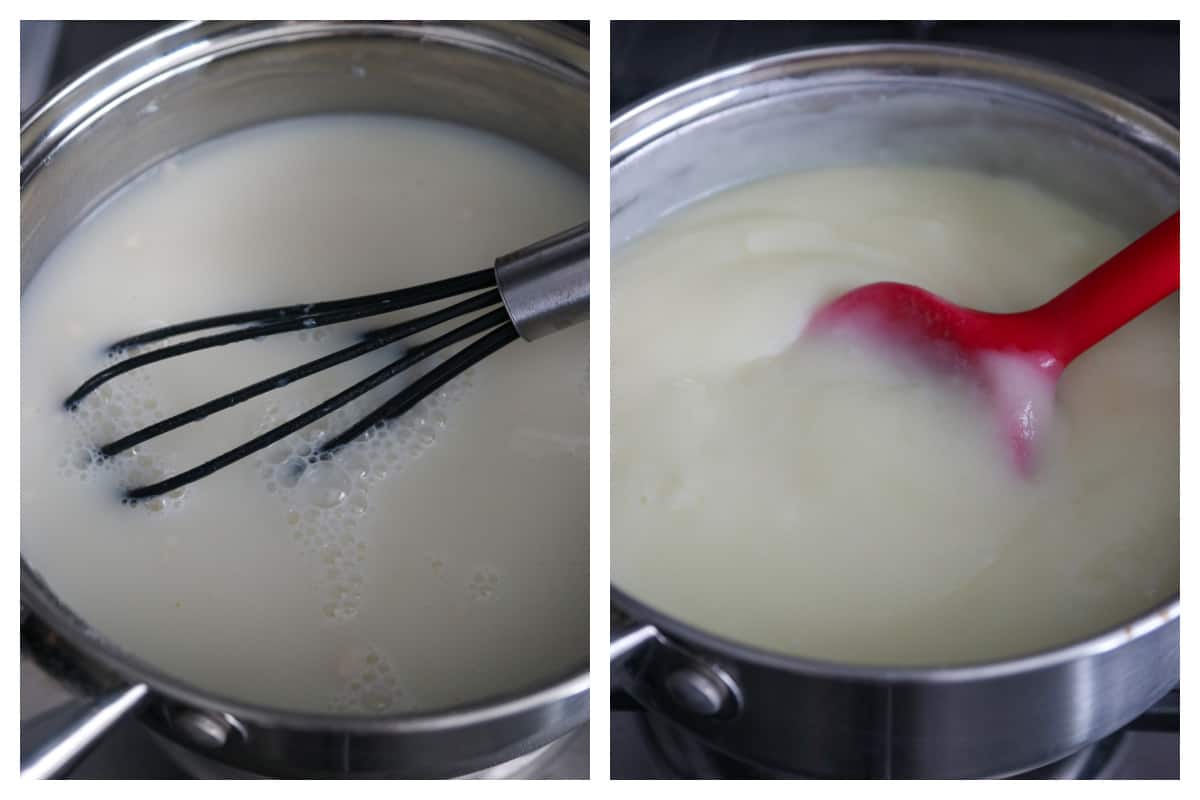
- Stir together milk, flour and sugar in a medium saucepan until no lumps remain. Cook this over medium heat, stirring constantly, until bubbles stars to emerge on the sides. Turn off heat.
- Scoop out about 1/4 cup of the heated milk and gradually pour it over the yolks in a steady stream while beating the yolks constantly. Pour this mixture back to the saucepan.
- Continue to cook the mixture in the saucepan over medium heat, stirring constantly. Once the mixture is thick like a paste. Turn off heat. Stir in butter and vanilla until incorporated. Allow the custard to cool completely.
Frequently Asked Questions
I do not recommend cutting this recipe in half. If this batch is too much for you, you can freeze one half of the dough after the first rise. In turn, you can cut the custard recipe in half.
Yes. You can freeze the dough after the first rise. Gentle deflate it and wrap it well in plastic film. Then in foil. Freeze for up to 2 weeks.
Thaw frozen dough in the fridge. Shape it as instructed in the recipe, then allow the assembled buns to do its second rise as usual.
Additional Notes
- The dough will start off as a sticky and shaggy mass. After about 8 minutes of kneading, the dough should still feel a little bit tacky but it is starting to gather in the center of the bowl.
- Gradually increased the speed to high and knead for 5-7 minutes more. Sprinkling some flour gradually will help the dough to be released form the bottom of the bowl.
- You are literally watch out for that slapping sounds the dough will make against the bowl. This is a sign that your dough is ready.
- Use a light colored pan to bake the buns. Darker pans can make the bottom of the buns brown too quickly.
I hope you enjoy these as much as I did. And if you think you still don’t have enough bread in your life, or if you enjoy baking bread, stay tuned for I have more bread lined up here in the blog for the coming weeks.
More Bread Recipes
- 20 Everyday Bread Recipes
- Whole Wheat Potato Dinner Rolls
- Milk Bread
- Pandesal
- How to Make Ensaymada
- Brioche Braid
- Yema Rolls
Custard Buns
Ingredients
FOR THE MILK BREAD
- 1 tbsp active dry yeast
- ¼ cup warm water 105-115 F
- 2/3 cup whipping cream
- 2/3 cup warm milk
- 1 large egg
- 1/3 cup sugar
- 1 and 1/2 tsp salt
- 4 cups all-purpose flour plus up to 5 tbsp extra
FOR THE CUSTARD FILLING
- 4 egg yolks lightly beaten
- 1/3 cup all-purpose flour
- ½ cup sugar
- 1 ¼ cup milk
- 6 tbsp butter
- 1 tsp vanilla extract
For Brushing on the Baked Buns
- 2 tbsp melted butter
Instructions
MAKE THE MILK BREAD
- In the bowl of a stand mixer, combine warm water, yeast and about 1 tsp of the sugar. Let this sit for about 5 minutes, or until foamy.
- Add the warm milk, cream, the remaining sugar, egg, and salt. Stir this until the ingredients are incorporated. Attach the dough hook to the stand mixer.
- Add 3 cups of flour, one cup at a time, beating at low speed to incorporate the flour after each addition. Add the remaining cup of flour, and starting on slow speed, beat the mixture until the flour is moistened. Gradually increase the mixer speed, and beat for 5-8 minutes, until the dough starts to gather in the center of the bowl.
- Beat for 5-7 minutes more on high speed, until the dough starts to slap the sides of the mixer with actual slapping sounds. You can sprinkle up to 3-5 tbsp. of flour gradually to help the dough release from the bottom of the bowl. The dough should now be elastic and smooth.
- Shape the dough into a ball. Place it in a bowl and cover with a clean kitchen towel. Let this rise for 1 ½ hours, or until doubled in bulk. Meanwhile, make the custard filling.
- Gently deflate the dough. Shape it into a log and cut unto 16 equal portions. Flatten each portion into a flat circle using your palms. Spoon about 1-2 tablespoon of custard in the center. Fold the edges of the dough over the filling. Twist the seams to seal, shaping the dough into a smooth ball.
- Transfer the remaining custard into a piping bag fitted with a straight piping tip. Arrange the filled dough into a light 9x13 inch baking pan that is lined with parchment paper, spacing them evenly. Cover the dough with a clean towel and let it rise for 40 minutes to 1 hour, or until the buns are now touching and are puffy.
- Preheat the oven to 350 F. Pipe the remaining custard on the surface of the risen buns, drawing a spiral design (see photos in the post). Bake the custard buns at 350 F for 25-30 minutes, it until the tops are lightly golden. Brush with melted butter. Enjoy warm.
CUSTARD FILLING
- In a medium saucepan, stir together flour, sugar and milk until lump-free. Cook this over medium heat, sitting constantly, until it begins to bubble on the sides. Turn off heat.
- Scoop out about 1/4 cup of the heated milk mixture. Pour this in a steady stream over the egg yolks while beating the yolks constantly. Pour back the yolk-milk mixture to the sauce pan. Turn the heat to medium and continue to cook the mixture, stirring constantly until it starts to thicken. Once the custard is thick like a paste, turn off heat, Stir in vanilla extract and butter. Allow this to cool completely.
Notes
- Watch the stand mixer during kneading at high speed as it may move and fall off the counter.
- Make sure to stir the custard constantly when the heat is on to prevent the mixture from sticking at the bottom.
- Thicken the custard to the point that it s not pourable anymore. It needs to to be thick enough to stay in place when filling the dough. Additionally, it is easier to pipe the custard if it has a thick consistency.
- Use a light colored pan to bake the buns. darker buns can brown the bottom of the bread too quickly.
- To store the baked buns, place them in a container with tight lid at room temperature for up to 3 days. Refrigerate for longer storage. If needed, reheat them in the microwave for 10-15 seconds.


Very delightful, I’m glad I had another baker and put 8 in each although I didn’t think it looked doubled in size airy, light and sweet, thank you
I am so happy you loved this, Danielle!
I am glad you liked this and thank you for the feedback! Oven quite vary, may be thats why we got different baking time. Thank you!
Lovely recipe and easy to follow. Half way through the cooking process I added flaked almonds on top and I highly recommend they added a lot to the treat and gave it a nice crunch. Only thing annoying is that the 2 hour proving wasn’t included on the time which was abit misleading and could be annoying for those wanting to make these in a rush.
Thank you, Emma! Your version sounds delicious! Sorry, the 2 hours proving time is stated as an extra time so it did not reflect on the total time 🙂
These came together well (I hand-kneaded) and quite tasty. However, am I the only one where timing was way way way off?? At 12 minutes at 375 they looked practically raw and internal temp was not hot enough. I cooked for an additional 15 minutes!! (Yes 27 minutes total at 375) and then broiled on low (very closely monitored) for 2 minutes to brown the tops.
I am glad you liked this and thank you for the feedback! Oven quite vary, may be thats why we got different baking time. Thank you!
I am so happy with how these turned out. I was really worried about the dough being too sticky, but because I was hand kneading, I knew it would take longer to come together than in the mixer. I used the exact measurements, and after about 10 minutes of kneading, the dough cafe together BEAUTIFULLY! I have never seen such a nice smooth dough before. The custard was fantastic! I ended up using salted butter and added just a little bit of vanilla to my liking, but without it, the custard reminds me of egg tart filling.
Quick question: I’m freezing half of my dough to make more buns next week. Do I use put the frozen dough in the fridge to thaw and then fill, and leave to rest again? Also: Can I freeze the custard to use next week or should I just whip up a new batch?
This was amazing. Thank you!
Hello! I am so glad you loved them! You are right on the frozen dough. Thaw it in the fridge, Assemble and let rise again at room temp. I am not so sure about freezing the custard though. I cannot guarantee that it will thaw well. Good luck!
Maybe she could can the filling?
Hello, I don’t have a mixer, can I still make this? I really miss the custard buns from my favorite bakery so I want to try making some!
Hello! Yes you can knead by hand. Just mix the dough ingredients with a wooden spoon, theb turn over on a board to knead until dough is smooth amd elastic.
Hi, I only have instant yeast, would it work with the recipe? I made your custard and it’s delicious.
Hello, Cindy! Yes instant yeast is fine to use in this recipe.
Such a lovely revipe!! Do you have an Instagram handle? Will bake these and tag you for sure!
Hello! Yes and tag me please. My handle is @sanna.womanscribbles Can’t wait to see your baked goods!