
Milk Bread
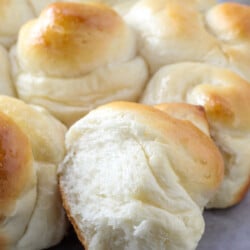
These Milk Bread or also sometimes called as Hokkaido Milk Bread or Japanese Milk Bread are soft and fluffy rolls that are mildly sweet, and are characterized by their super soft crumbs and melt in your mouth texture.
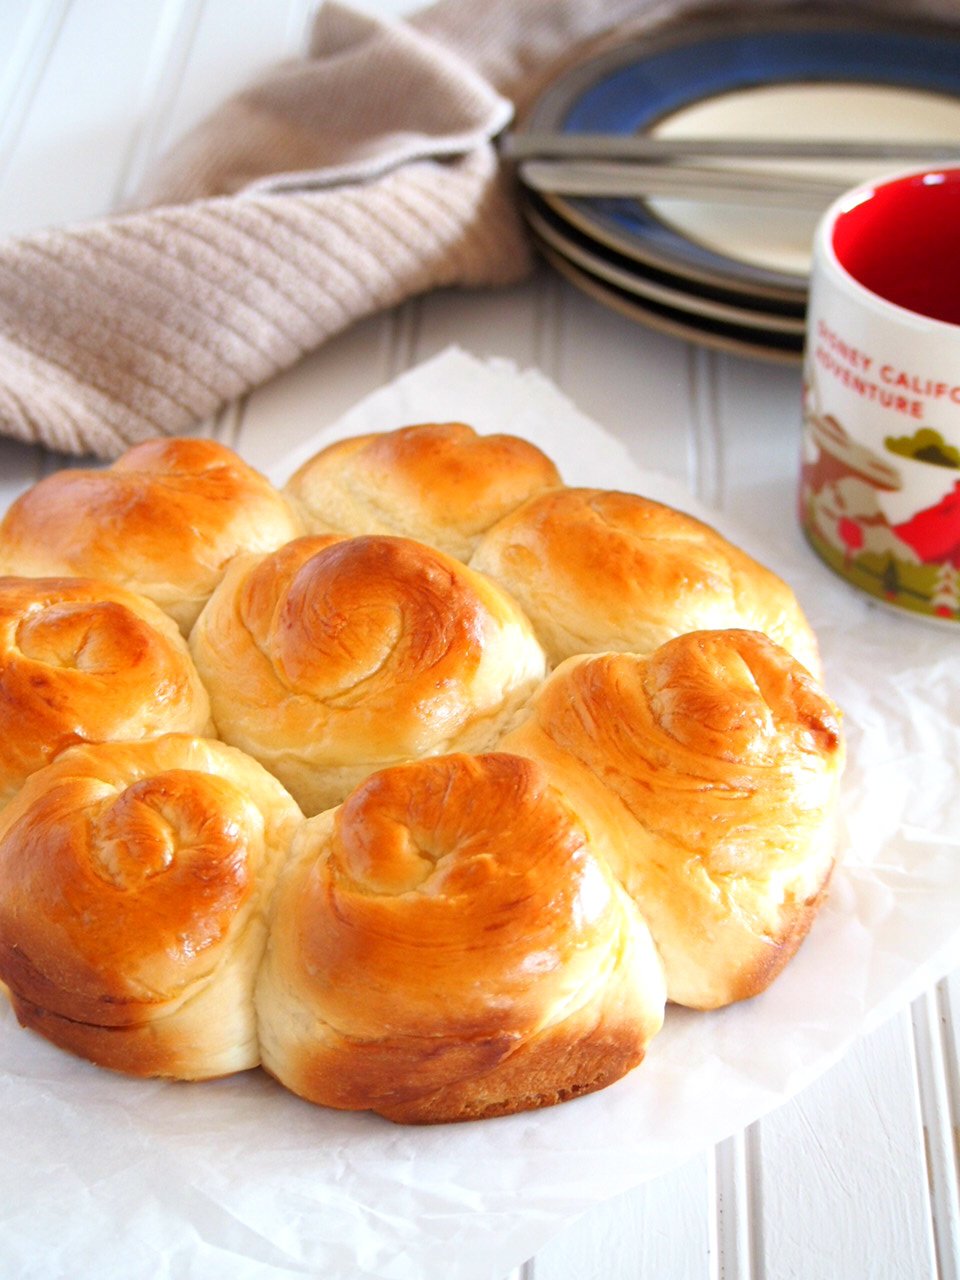
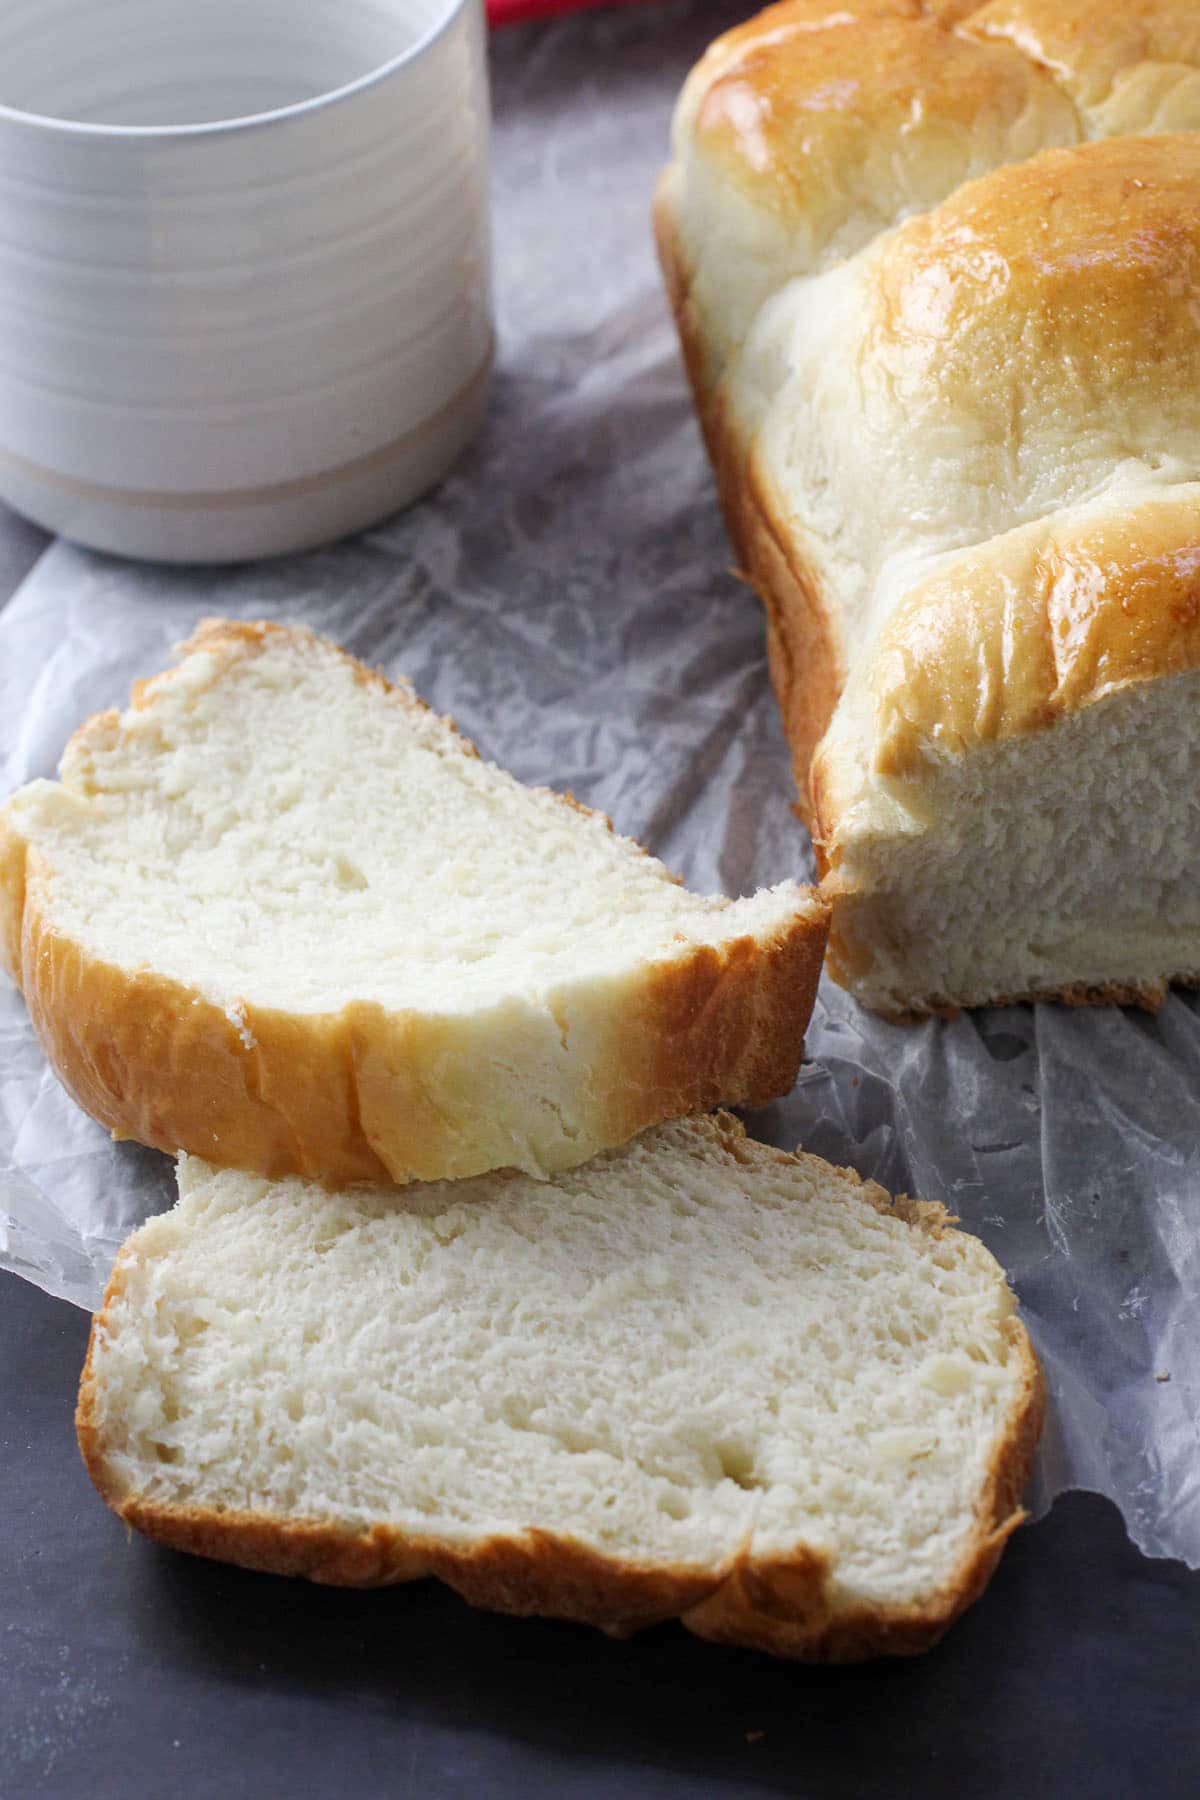
This milk bread had me at its deep golden top. My favorite part of enjoying them is spreading butter lavishly over a soft crust and feeling in my mouth the warm, soft bread being moistened by a smear of softened butter in every bite.
If you are curious as to what is so special about this milk bread, and what makes them different from a regular white bread, then it is this: Milk bread is incredibly soft, flavorful and rich.
Most traditional methods for making milk bread calls for a starter called a tangzhong. It is flour cooked together with water (and milk) to form a soft dough that is mixed with the rest of the ingredients. This recipe is a simpler but foolproof method of making milk bread and does not require the tangzhong.
If you would like to try the Tangzhong method, then check out Japanese Milk Buns.
Pointers for Making Milk Bread
- A stand mixer is employed here and it pretty much does all the job. Kneading using the dough hook takes about 12 minutes, and just like in the brioche recipe, my indication if the dough is ready is if the dough is gathered in the center of the bowl, and is slapping against the sides of the bowl (More about that in the process part later).
- The recipe is enough to make 2 sets of rolls in a round baking pan, and with 8 pieces of rolls in each. You can also make 2 loaves instead. Or like what I did, make one pan of rolls and one loaf.
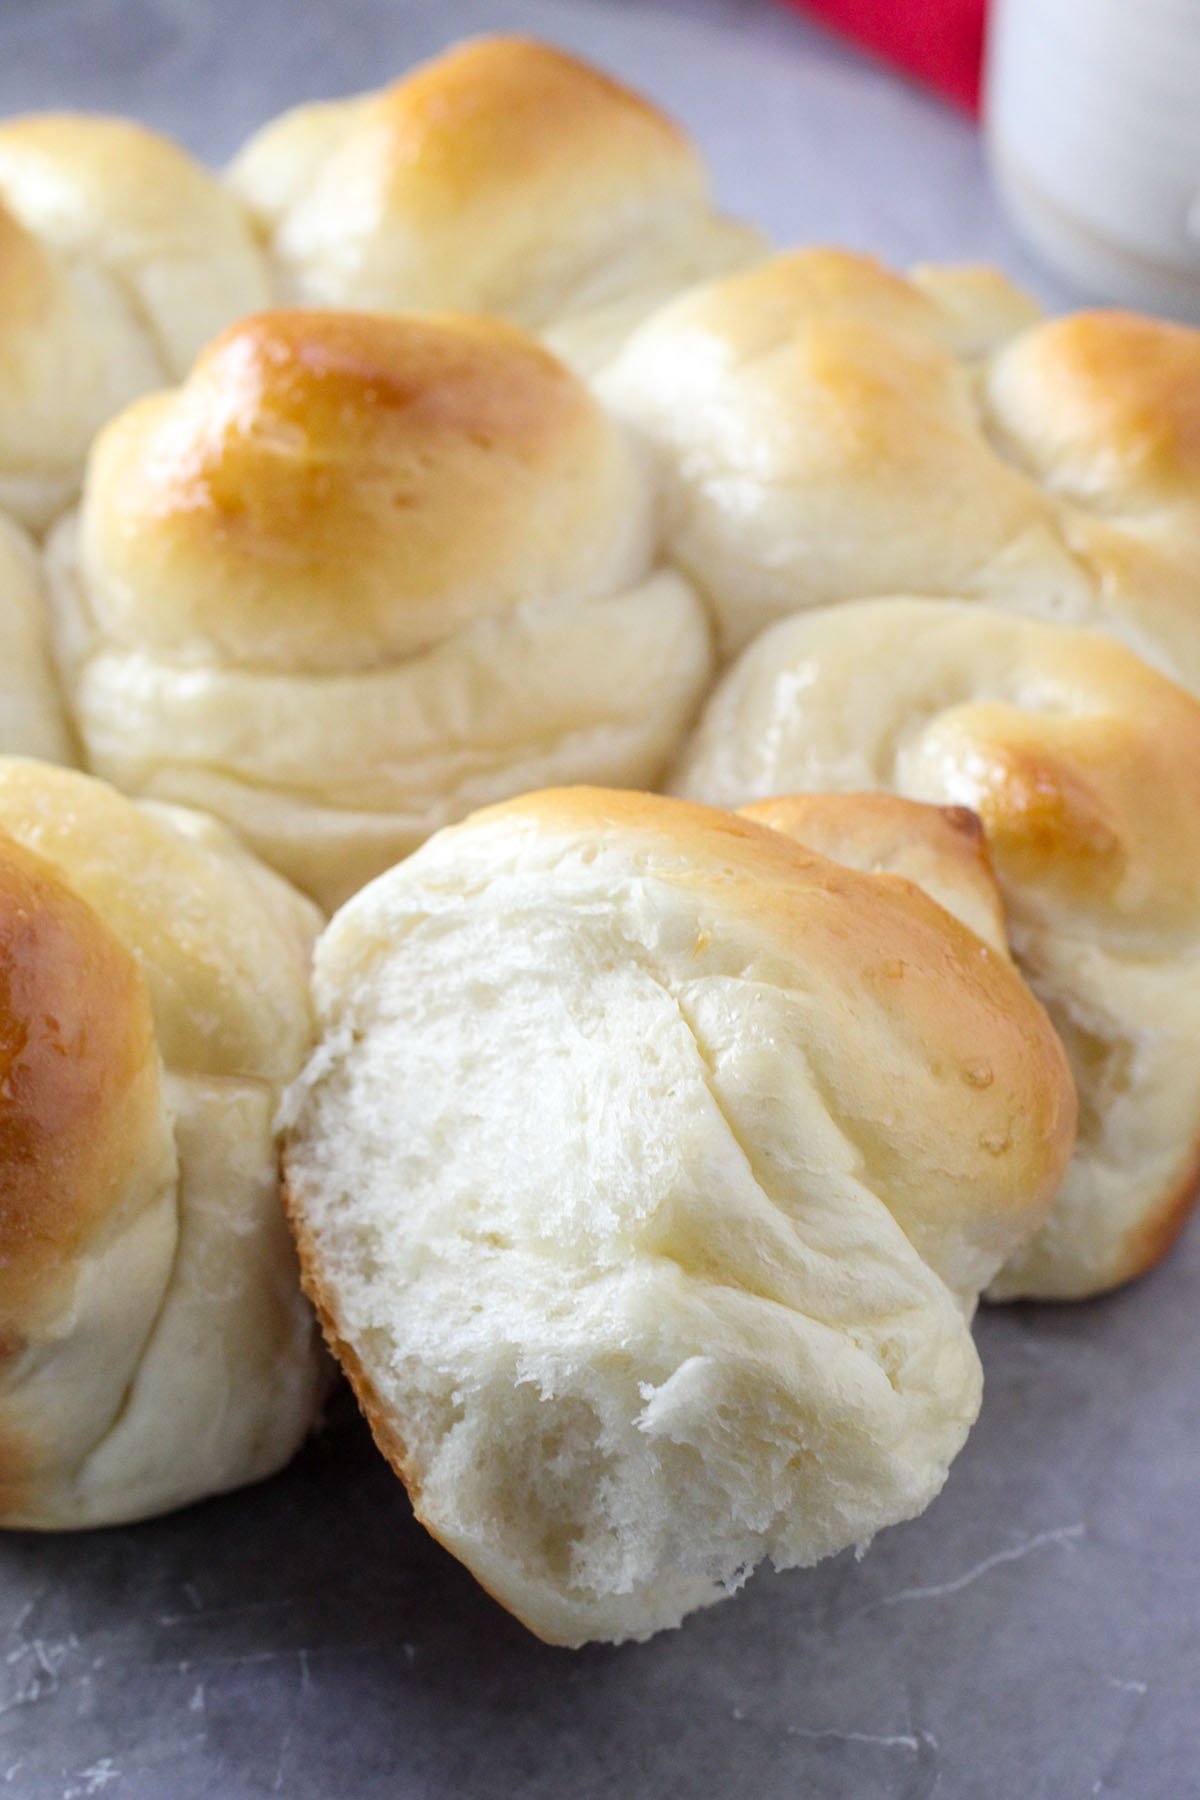
- They stay soft for days as long as they are stored in covered containers. You can also microwave them for 15-20 seconds, and they will still be as amazing as if they were just out of the oven.

Milk Bread: The Process
Making and Kneading the Dough
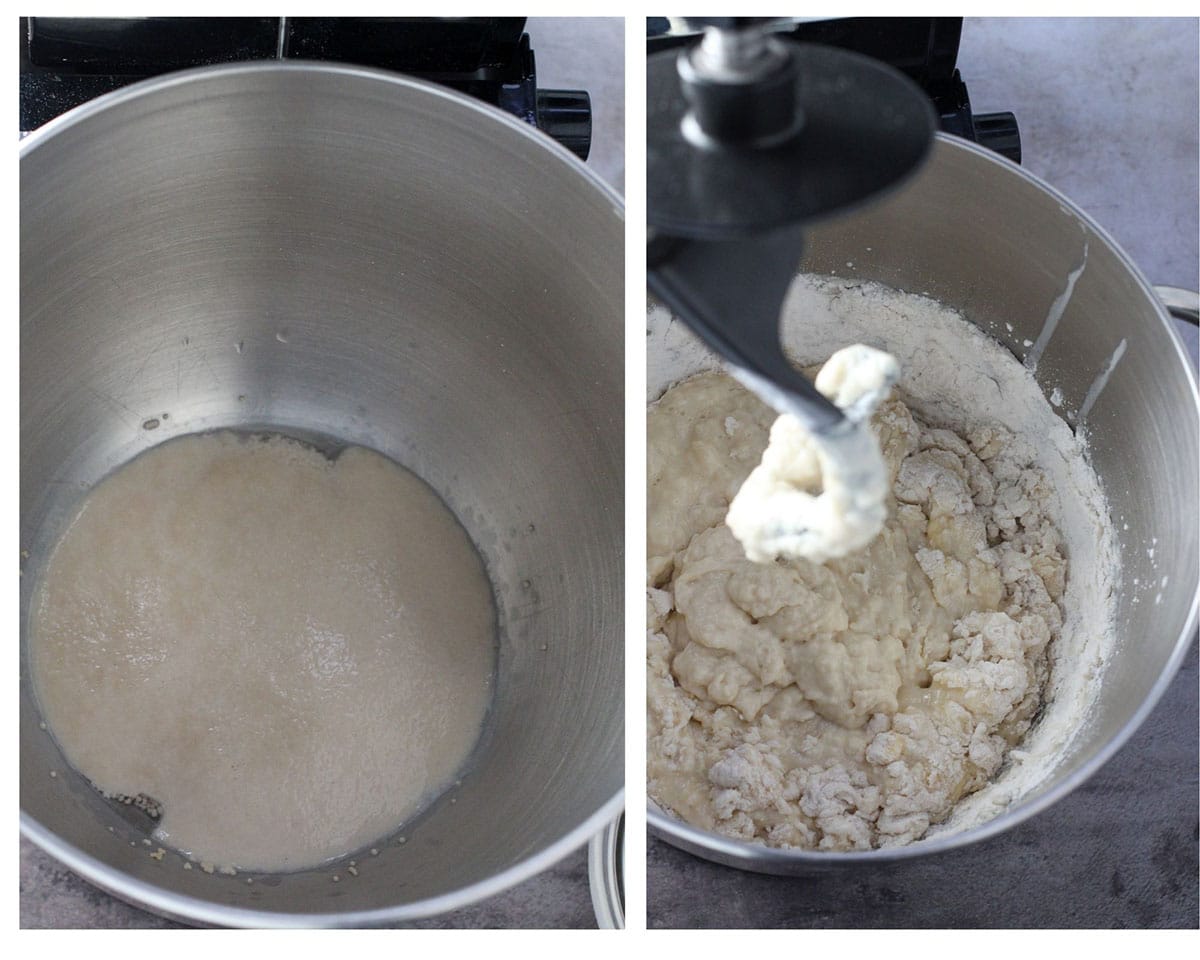
- In the bowl of a stand mixer, add the warm water. Sprinkle the yeast and about 1 tsp of the sugar. Let stand until foamy.
- Add the warm milk, warm heavy cream, the egg, the remaining sugar and salt. With the dough hook attached, run the mixer at low speed just to incorporate the ingredients.
- With the mixer still running, add 3 cups of flour, one cup at a time, and beat until the dough gathers into a shaggy mass. Add the remaining cup of flour and continue to beat until incorporated.
- Then slowly build up the speed to medium and mix the dough for about 8-12 minutes, scraping the sides and bottom of the bowl when necessary.
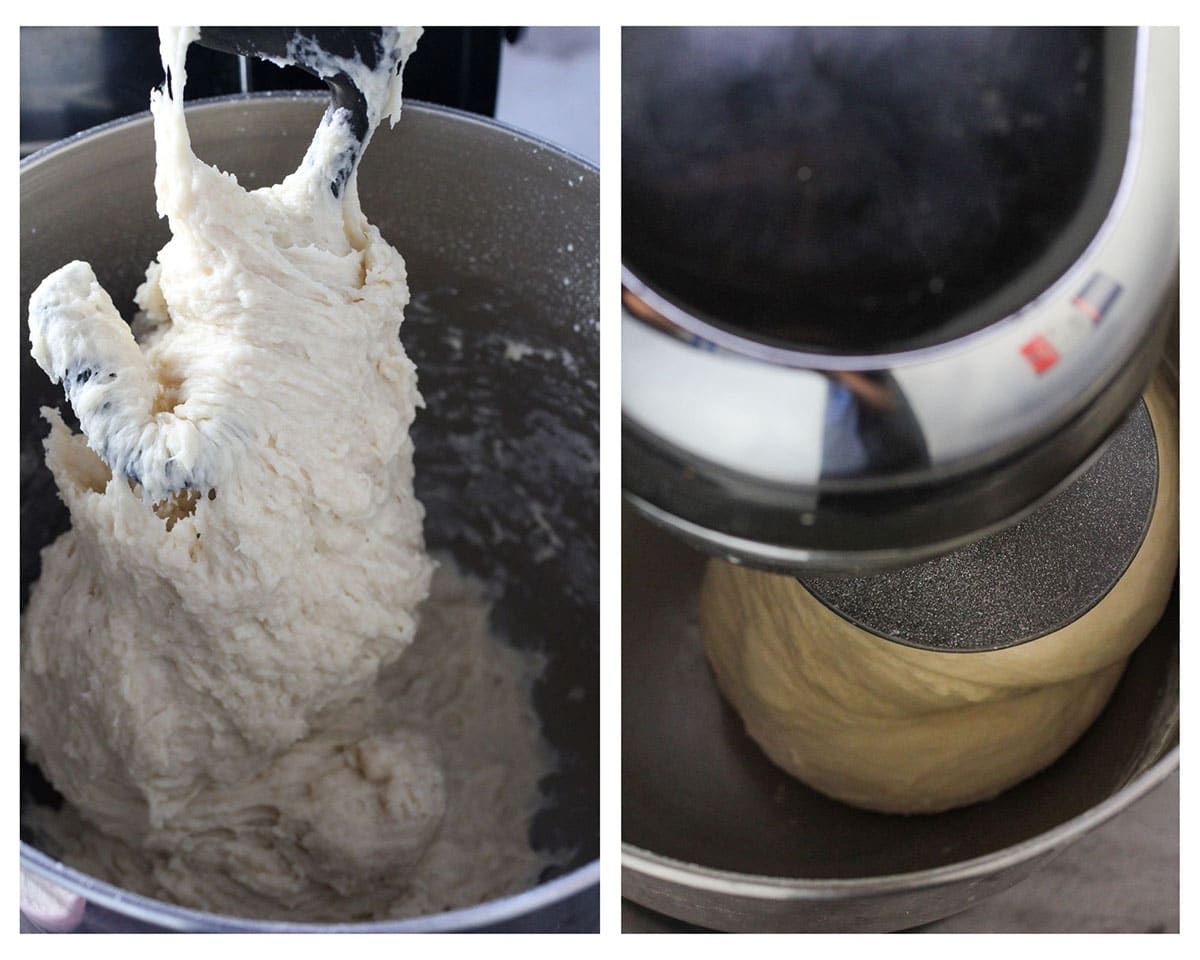
The dough will make the slapping sound during kneading.
- As the machine continues to run, you should see your dough starting to form in the center, and is clinging to the dough hook. A few minutes more and the dough is beginning to slap the sides of the bowl and making the slapping sound.
- You can sprinkle up to 3-5 tbsp of flour to help the dough release from the bottom of the bowl.
- Keep mixing until the dough is coming together in the center. You should hear the slapping sounds of the dough soon.
- Overall, the kneading should take like 8-12 minutes only. Longer than that, you might risk over kneading your dough. The dough is now ready for proofing.
- Its texture is still a little bit tacky when you poke it with your finger, but it has lost a lot of stickiness at this time.

The First Rise
Gather the dough into a ball. Sprinkle a little amount of flour into the sides and base of the bowl and place the dough for proofing. (Or set the ball of dough in another bowl, if you prefer.)
Cover the bowl with a kitchen towel and set this aside in a warm place for about 1 to 1 and 1/2 hours. The dough should double in size. After the first rise, divide the dough into two equal portions.
Shaping the Dough (3 ways)
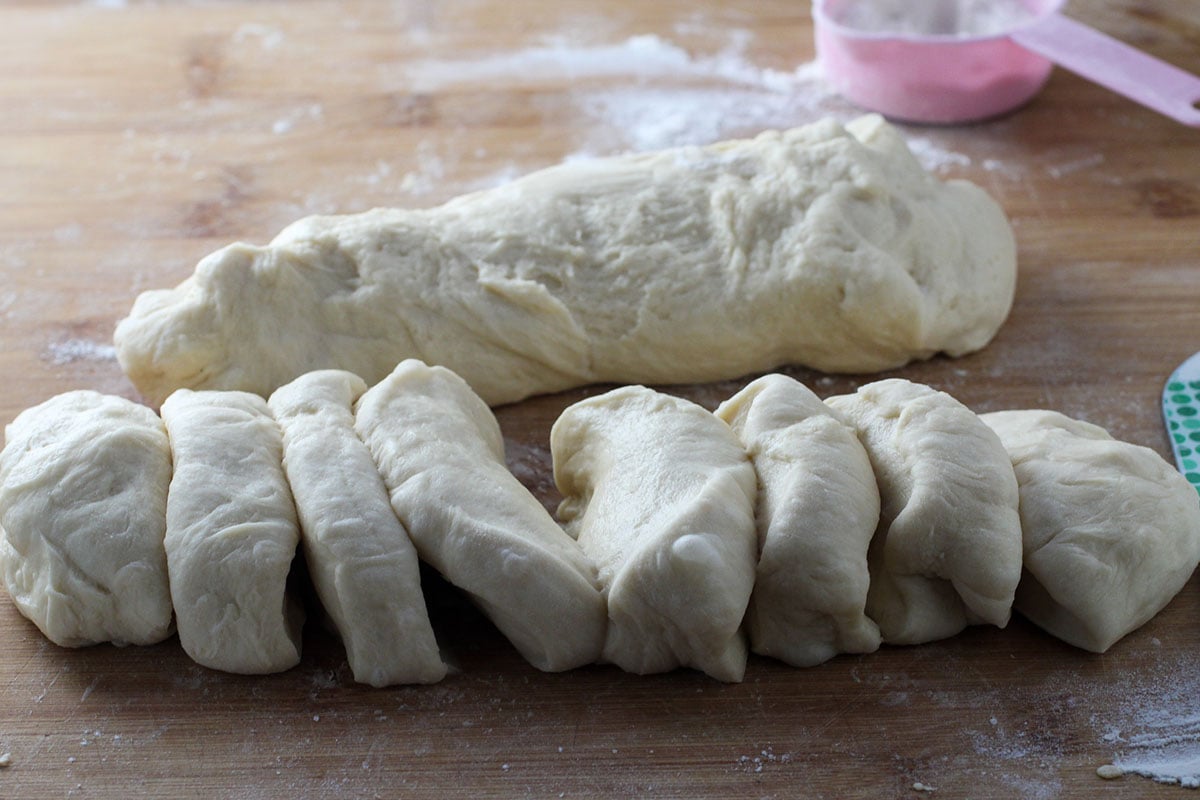
- 16 pieces of milk buns. Divide each portion into 8 equal portions, for a total of 16. Roll each portion into a log of about 8-10 inches long. Roll the log into a coil, tucking the ends under the roll. Place each roll in the pan, giving them about an inch of space in between. Each 9 inch round pan can hold 8 pieces of rolls each.
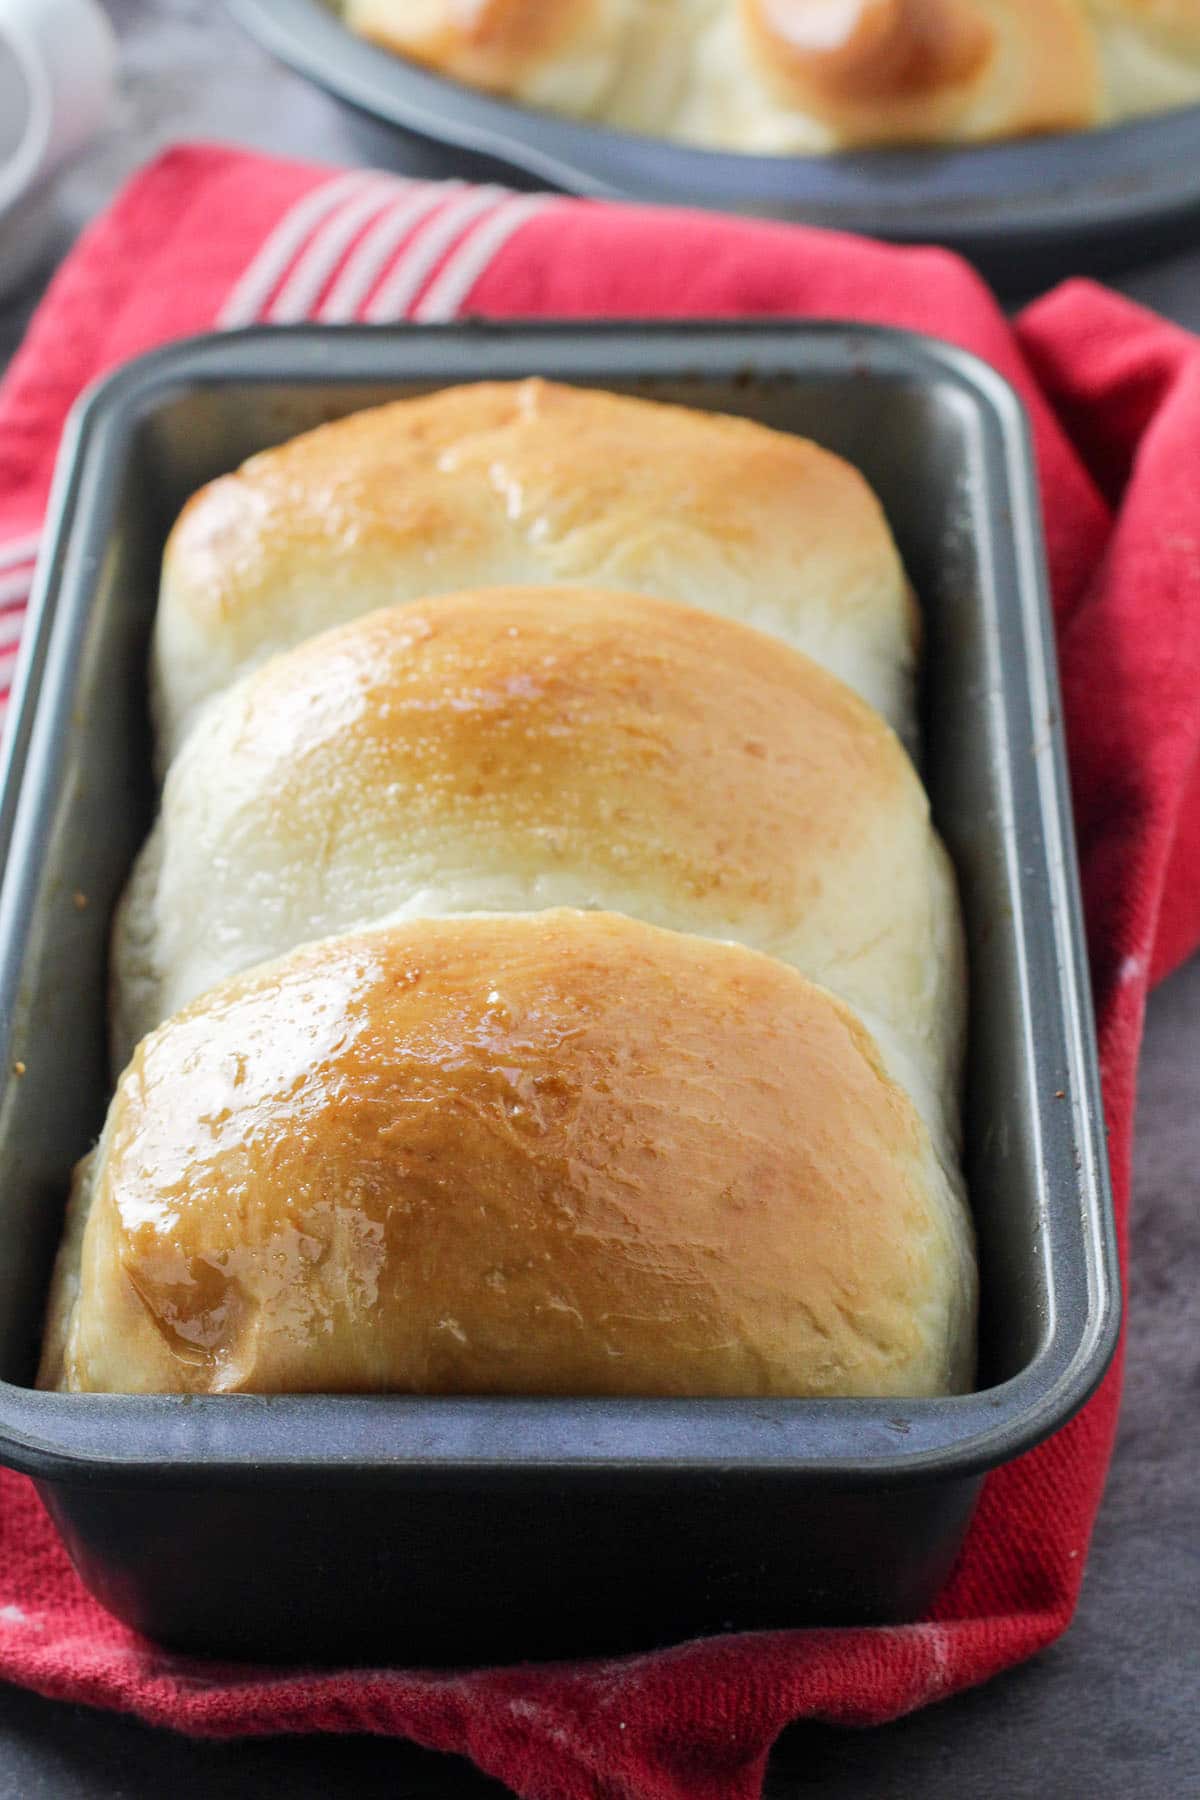
- 2 large milk loaves. Divide each portion into three portions for a total of 6. With your palms or a rolling pin, roll each portion into a rough rectangle that is about 1/4 inch thick. Roll each rectangle beginning on the short edge to form a cylinder. Repeat with the rest of the portions. Using two greased 9×5 inches loaf pan, arrange the cylinders next to each other, with three cylinders in each pan.
- Combination. Make buns with one half of the dough, then make a loaf with the other half. This is what I do!
The Second Rise
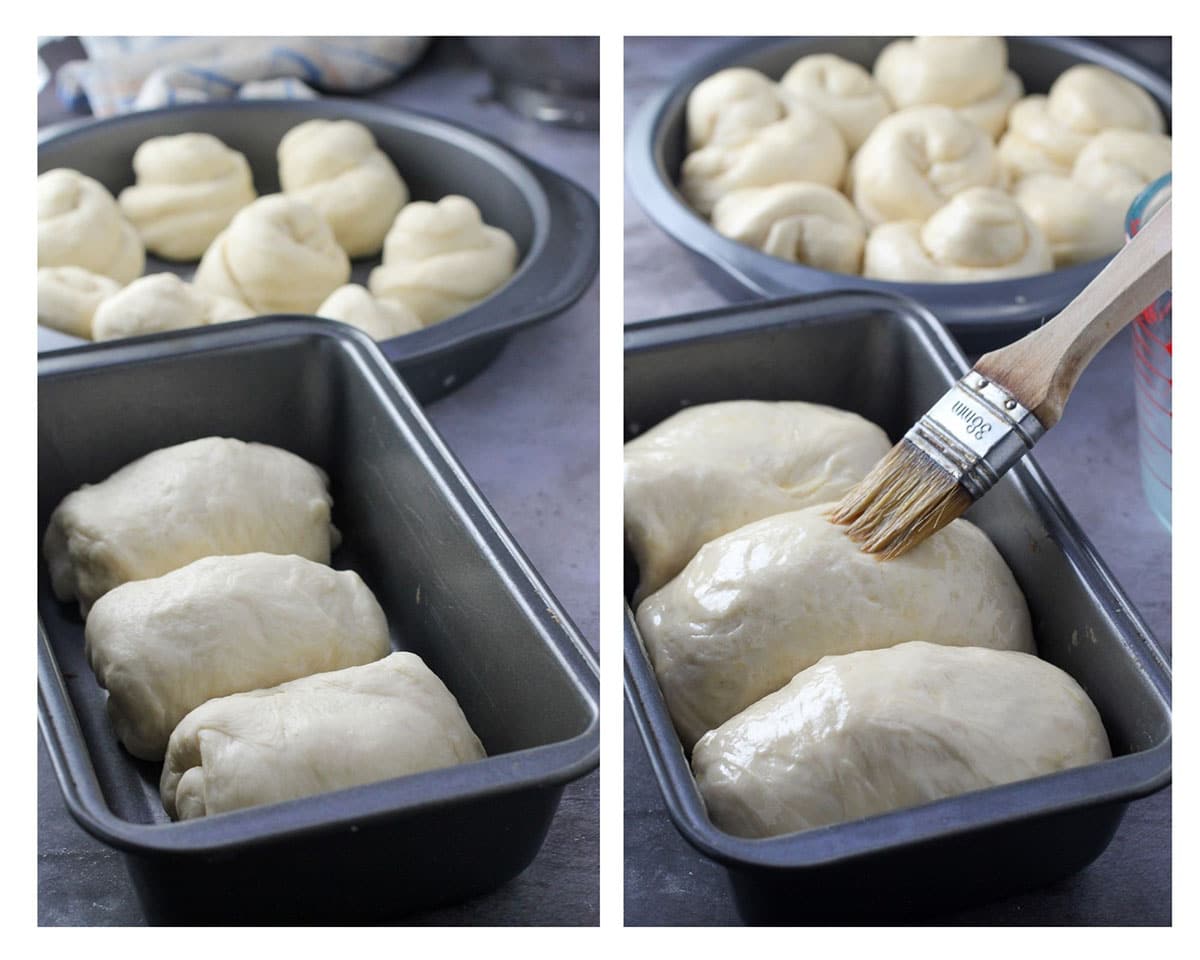
Let this assembled dough rise for an hour. Cover them loosely with plastic wrap and set them aside. Once the dough has risen, preheat the oven to 350 F.
Make the egg wash by beating one egg with 1 tablespoon of milk. Brush the surface of the rolls with the egg wash.
Baking the Rolls
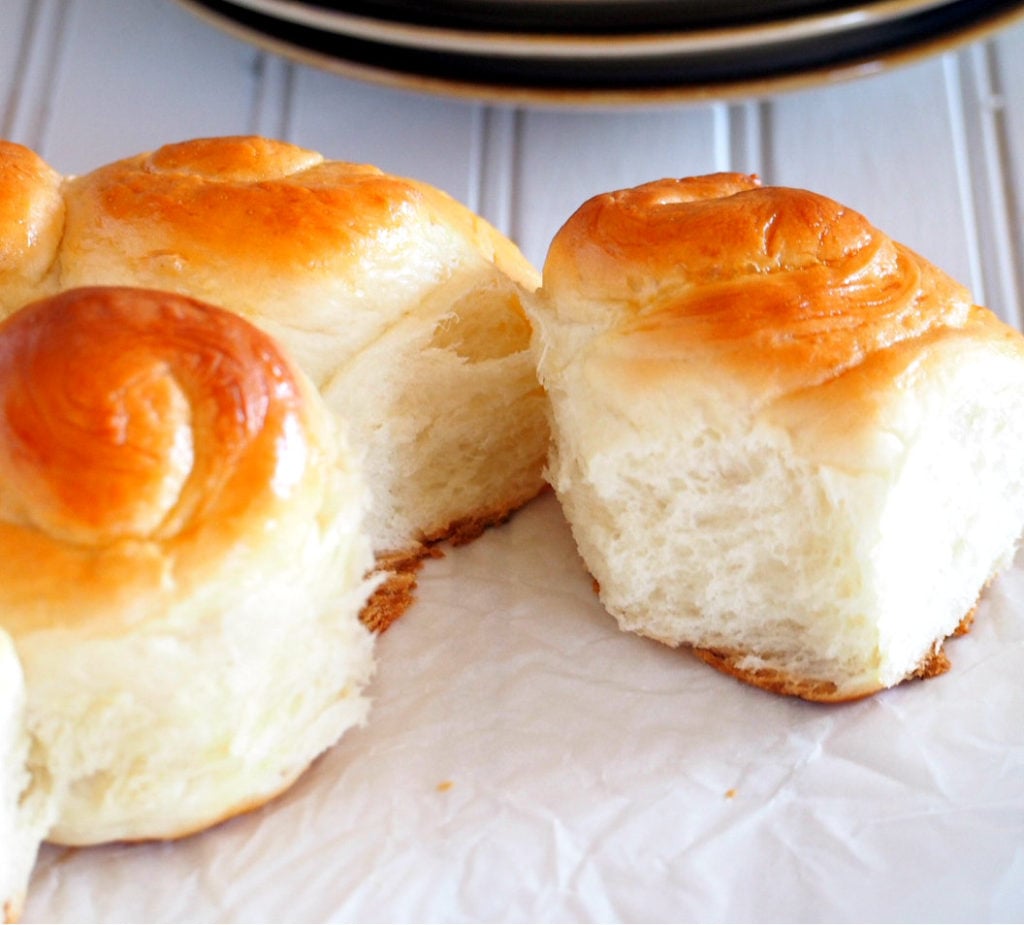
Bake the rolls for 23-25 minutes. The top should be deeply golden and a thermometer should read 200 F. Do not over bake them for they will dry out fast.
Then, enjoy the fruit of your not-so-hard labor. Your bread is now ready for glazing, for slathering with spread, or simply pick one out right there and feel the fluffiness of each bite.
Frequently Asked Questions
I would not recommend cutting the recipe in half. What you can do is to make the dough, then freeze half of it for future use.
After the first rise, gently deflate the dough and wrap it well in plastic film. Then, wrap it with foil. You can freeze the dough for up to 2 weeks.
To use frozen dough, thaw it in the fridge. Then shape the dough as instructed in the recipe. Allow it to do the second rise as usual, then bake.
I am essentially trying to yield the same type of bread with both recipes-soft, fluffy and slightly sweet. The difference between the two is that Japanese Milk Buns uses tangzhong in the dough, while Milk bread does not.
Simple glaze: Mix 3 teaspoons of sugar with 2 teaspoons hot water. Stir mixture until sugar is dissolved. Brush over the bread surface.
Enjoy!
If you are looking for more Asian Bakery favorites, try these:
Milk Bread
Ingredients
- 1 tbsp active dry yeast
- 1/4 cup warm water 105-115 F
- 2/3 cup warm milk
- 2/3 cup heavy cream
- 1 large egg
- 1/3 cup of sugar
- 1 ½ tsp salt
- 4 cups all-purpose flour plus up to 3 tbsp. extra
For the Egg Wash
- 1 large egg
- 1 tbsp milk
For the Sweet Glaze
- 2 tsp water
- 3 tsp sugar
Instructions
- In the bowl of a stand mixer, add the warm water. Sprinkle the yeast and about 1 tsp of the sugar. Let stand until foamy. Add the warm milk, warm heavy cream, the egg, the remaining sugar and salt. With the dough hook attached, run the mixer at low speed just to incorporate the ingredients.
- Add 3 cups of flour, one cup at a time, and beat on low speed after each addition. The dough will start to gather into a shaggy mass. Add the remaining cup of flour and continue to beat until incorporated. Then slowly build up the speed to medium and mix the dough for about 8-12 minutes, scraping the sides and bottom of the bowl when necessary.
- You will see the dough starting to gather into the center and attaching itself into the dough hook. Sprinkle a little amount of flour (about half a teaspoon at a time) into the bowl and continue mixing. This should help the dough to release from the bottom of the bowl. You can add up to two tablespoons of flour and you should soon see the dough starting to gather in the center of the bowl. As you approach the 12 minutes mark, you should hear the dough slapping the sides of the bowl as it clings to the dough hook. This is a good sign that your dough is ready for proofing.
- Gather the dough into a ball, sprinkle a little bit of flour into a bowl, and place the ball of dough inside it. Cover the bowl with a kitchen towel and set it on a warm place for one hour to one hour and a half, until the size of the dough is doubled. Meanwhile, Grease two 9 inch round cake pans.
- Divide the dough into 16 equal portions. I usually cut the dough in half, then cut each portion in half again, and so on until I yield 16 equal pieces. Roll each portion into a log of about 8-10 inches in size, then twist each log into a coil. Tuck the ends underneath. Place each assembled dough inside the round pans, giving about an inch of space between each roll. Each 9 inch round cake pan should have 8 rolls each. Cover the rolls loosely with plastic wrap and let rise again until double in size, about an hour or so.
- Alternatively, you can make two loaves by dividing the dough into 2 portions, then divide each portion into 3 portions for a total of six. Roll each portion into a rough rectangle, then roll it into a cylinder starting on the short edge. Arrange 3 cylinders of dough in each pan. (See photos in the post)
- Preheat oven to 350 F. Make the egg wash by lightly beating one egg with 1 tablespoon of milk. Brush the surface of the rolls with the egg wash without letting the fluid drip to the sides. Bake in a 350 F oven for 23-25 minutes or until rolls are deeply golden on top. A thermometer should read 200 F. Once it reaches that mark, the bread is done. For loaves, bake it for 3-5 minutes more. To make the glaze, mix three teaspoons of sugar with two teaspoons hot water, stir it until the sugar is dissolved, and brush over the bread.
Notes
- Bread can be stored at room temperature in a covered container for up to three days. You can heat it in the microwave for 12-15 seconds, if desired.
- The dough will literally make some slapping sounds during kneading, and this is your sign that the dough is ready.
- Do not add too much of extra flour to the dough, or you will end up with a dry dough. You want it nice, smooth and elastic. A little tackiness is perfect.
- You can either shape the dough into buns or into 2 loaves as instructed in the recipe.
Nutrition
Want more bread? Check these out:
- Buttery Sugar Buns
- Garlic Herb Bread
- Austrian Buchtel ( Sweet Mini Buns)
- Mini Cinnamon Rolls with Coffee Icing
- Ham and Cheese Rolls
- Chocolate Hazelnut Rolls
- Japanese Milk Buns
- Coconut Buns with Milky Sweet Filling
This recipe is originally published in February 2018. It is now updated with new photos and an improved recipe.
Post contains an affiliate link. Please see the Disclosure page to learn more.


Can you use half and half instead of heavy cream?
Hi, Marilyn! Although heavy cream is best, half and half will work too 🙂
This is the best milk bread recipe that I’ve ever tried. I had left comment and pic on your pinterest, but I’m afraid you’re not there anymore. I want to say a million thanks for your excellent recipe!
I multiply 1,5 of your recipe and made 3 loaves. One was plain and I experimented with the other 2 loaves by adding cinnamon-chocolate and cheddar cheese-parsley. In the beginning the dough was sticky, but maybe because I live in tropical weather country. I added more flour and did 3 times of ‘fold and stretch’ by hand every 10minutes and it became a perfect bread dough. All were so delish! My family loves it.
Can’t wait to try your other bread recipe 🙂
Hi Henny! I am so sorry that I was not able to meet you on Pinterest, I really appreciate you reaching out. I am so happy you loved this and thanks a lot for your feedback!
I do not know what I did wrong but mine turned out to be as hard as rocks. I am really sad that I messed these up.
Sorry, you had trouble Katelyn! Maybe the dough was under kneaded? I cannot say for sure what went wrong.
Just made today and yummy…I took half the batch and added garlic powder and Italian seasonings….yum. thanks for sharing this recipe.
Thanks, Carla! Sounds like a yummy version!
The recipe calls to return the dough to the mixer for a second mixing after the first proof. Is this instruction correct? The video doesn’t reflect this step.
Hi Vicky! Thank you for pointing that out. I have updated the recipe to omit that part as it does not make a major difference in the bread. I have to remove that part in the recipe.
Hi Sanna, I have 2 questions…can this dough be used to make cinnamon rolls & also could some herbs & garlic be added to make garlic herb bread? For the cinnamon bread I just wondered if rolling the dough would make any difference…then for the garlic herb I am wondering if adding that would hurt the dough. I’m not really new to baking, it’s just been many moons since I’ve really baked any. I appreciate your help & advice! Thanks so much!
Hello Vicky! Yes, you can use this dough to make both Cinnamon rolls and garlic herb bread!
So glad I found your website, I made the milk rolls couple nights ago and everyone loved them!! This was my first time making breads/rolls of any kind and the pictures really helped! Thank you
Hello Tanvi! I am so glad you liked them!
Hi Sanna,
I tried your roll, they’re awesome! Im a new baker and im curious why you did not add butter to the dough? Thanks for the recipe! 🙂
Hi Welch! I am so glad you liked this recipe. Some of my dough uses butter, some don’t. You can brush these rolls with melted butter after baking, if you like 🙂 There are also quite a few dough recipes on the site that has butter, you can try those too! Happy bread baking!
Hi, these buns look amazing! I was just wondering if you knew how I could make it with dry yeast.
Hi Riley! I use dry yeast (active dry yeast ) for this one.
This was THEE BEST BREAD I have ever made thus far. Thank you so much!!! Will add it to my upcoming blog!!!
Yay! I am so glad you enjoyed it!
Hi do you have to proof the yeast I’m just getting started on making rolls and From other recipes it calls for letting the yeast foam before adding to the other ingredients
Hello Cyndi! You can proof the yeast first in warm milk. I don’t do that for this recipe but it turns out fine Thank you! You can always proof your yeast to make sure it is still good and active.
Hey my husband is coming home from deployment and I wanted to make them ahead of time could I freeze the rolls after making them?
Hello Karen! I don’t really recommend freezing this one as I have not tried it yet. What you can do is once you shape them, put the pans in the fridge overnight, covered with plastic wrap. The following morning, take them out, let them rise and bake
Could you feeeze these?
Hi Kendra! I do not recommend freezing these after they are baked. they are best eaten within a span of 2-3 days 🙂
Can you freeze them after making the dough? My husband comes home from deployment it I wanted to make them the night ahead.
Hello Karen! I don’t really recommend freezing this one as I have not tried it yet. What you can do is once you shape them, put the pans in the fridge overnight, covered with plastic wrap. The following morning, take them out, let them rise and bake 🙂
Sanna, I half the recipe and put it in the bread maker, it comes out beautiful! Thank you for the recipe! I’ve made it several times!
Thank you so much Twila! I appreciate that! I am glad to know it worked out on a breadmaker.
I have tried dozens of recipes for dinner rolls, looking for the ultimate in soft, fluffy and tasty. These were the winner for sure!! I’ve made them several times now, they are consistently the best bread to ever come out of my kitchen. Thank you so much for sharing!
That is really great to hear! I appreciate you coming back for this feedback. Thank you very much!
Hi Sanna,
Have you ever tried this recipe in a bread machine?
My son just brought me one for my birthday, and I’m finding the recipes that are in the booklet that cane with it quite heavy.
I imagine it’s fine to adapt it to a machine but I thought I’d ask your advice.
Thank you, Naomi
Hello Naomi! I honestly have not tried bread machine yet 🙂 but I don’t see why you can’t adapt this recipe to be made in the bread machine. I do believe it is possible. Please let me know how it turns out:) Good luck and thank you so much!
Hi Sanna, can I freeze these as I won’t be able eat two pans in 3 days? Any other idea on how to preserve them for longer? Maybe keep half of the unrisen dough in the fridge for two days? Appreciate your feedback and thanks for the recipe.
Hi Jenny! You can freeze them after baking for up to 2-3 weeks. Or after the first rise, Divide the dough in half. Make the rolls for the other half as usual and keep the other half in the fridge for up two days. When ready to bake, allow the dough to rest at room temperature for about 5 minutes. Shape and let rise again. Bake as usual. I suggest this method rather than freezing them. Happy Baking!